Keep one for your ofrenda; give the others away.
A guest essay and pan de muerto recipe from Teresa Finney
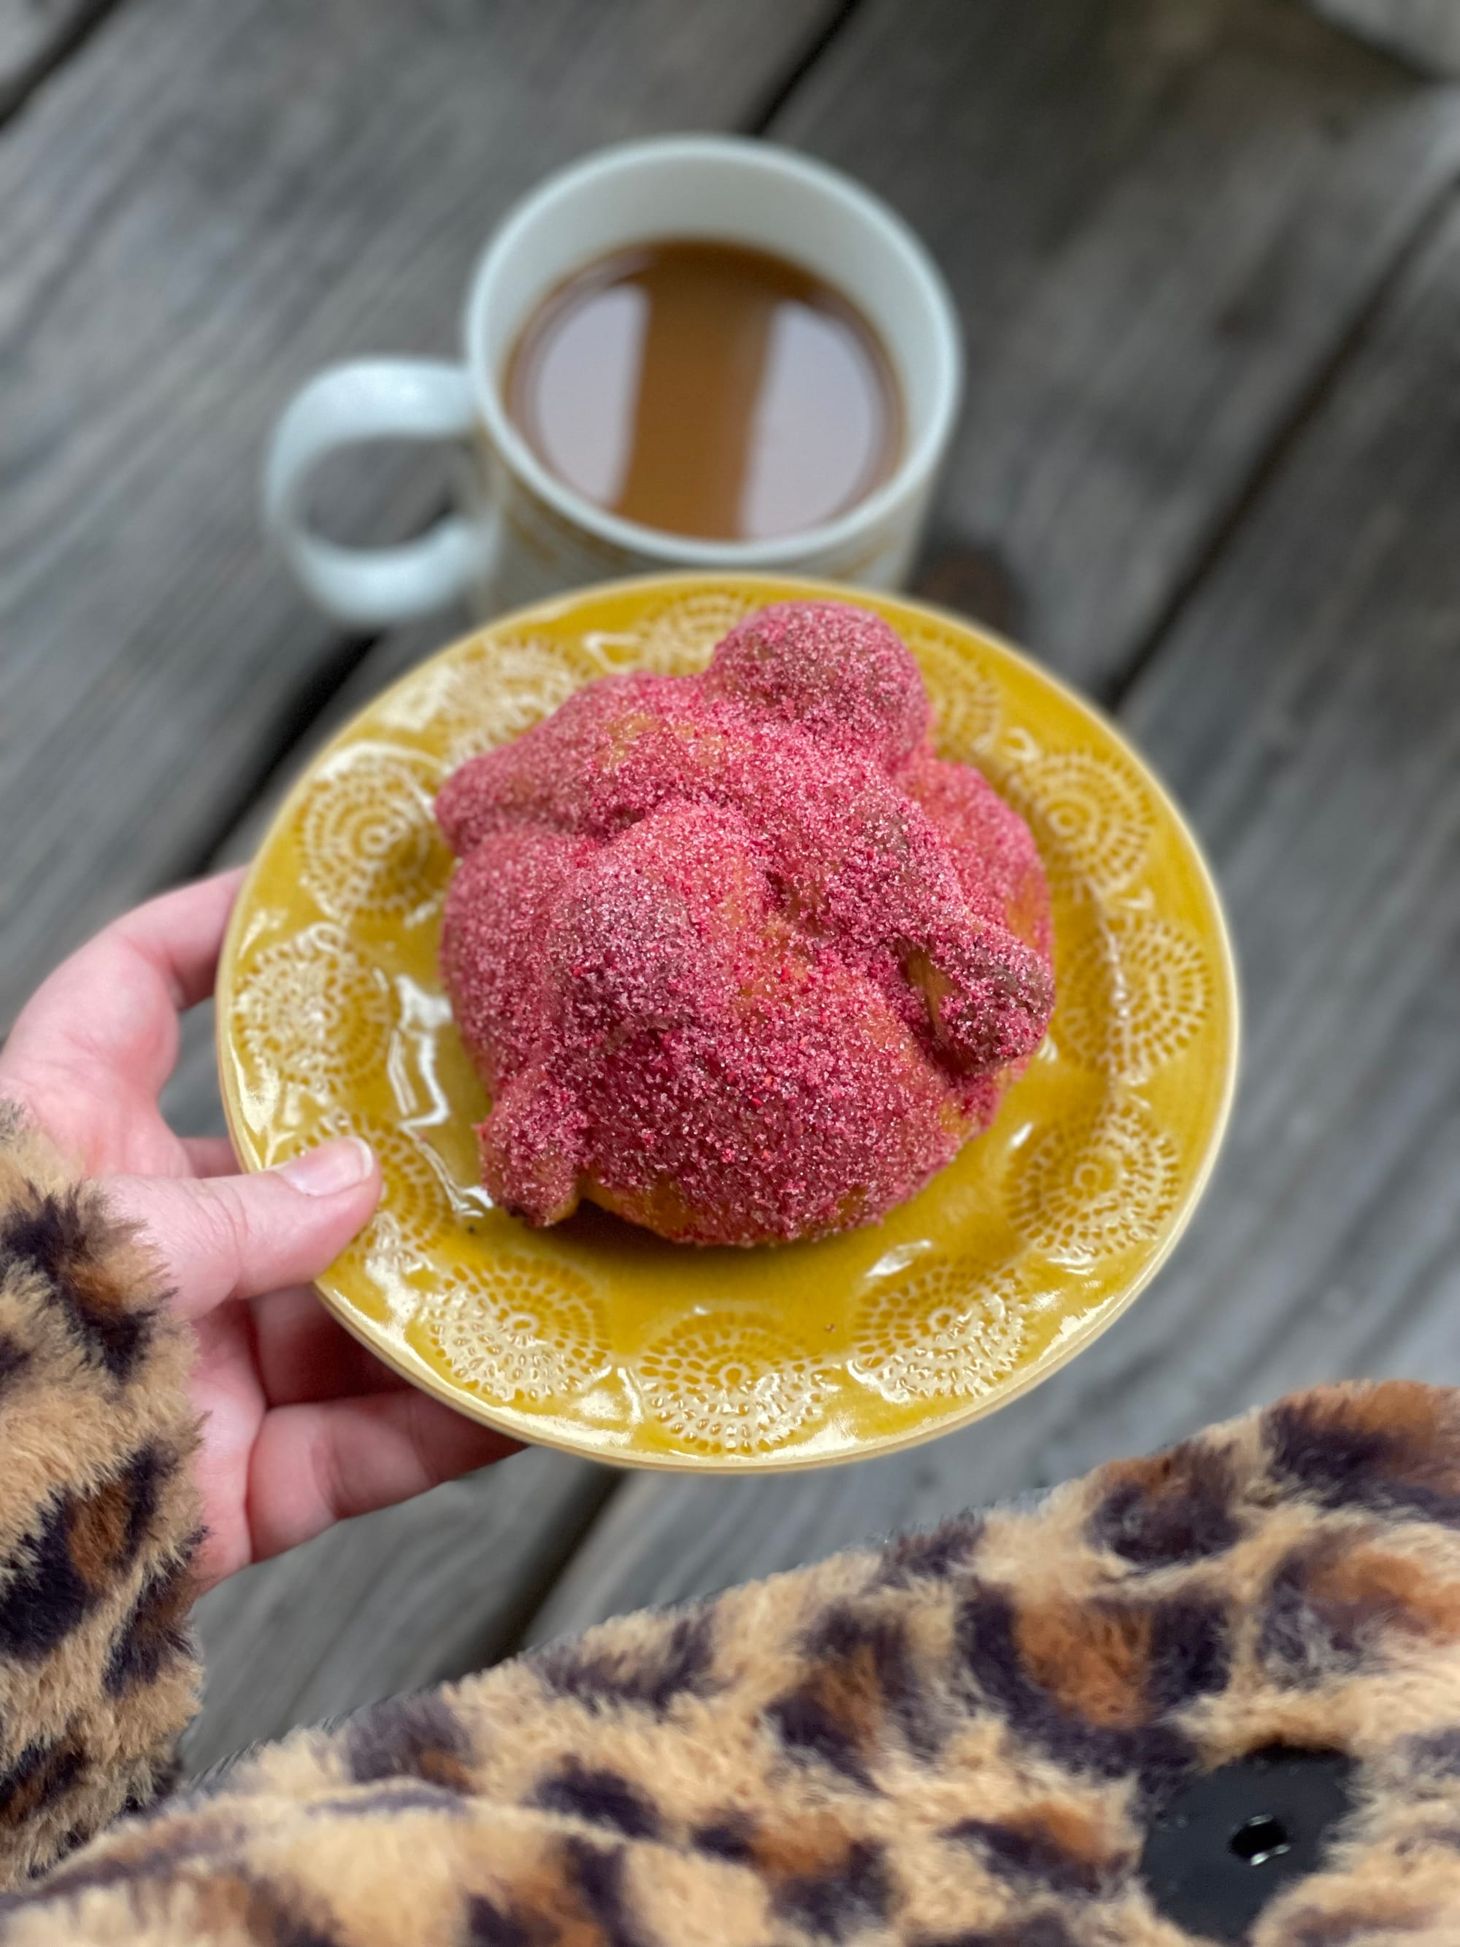
Table of Contents
Keep one for your ofrenda; give the others away.
by Teresa Finney
It’s an early October morning—2am—and just like every October since 2021, I’m in the kitchen making pan de muerto. My job this morning includes portioning enriched dough into 50 pieces that weigh 65 grams each, then shaping them into rounds—these rounds represent the circular nature of life. Once the 50 rounds are trayed up and hanging out in the proofer, I’ll move onto portioning more dough into 25 gram pieces. These dough pieces I’ll shape by rolling into strips and indenting them with four fingers–they represent human bones. Once the bread is proofed and ready to go, the bones get laid atop the rounds criss-cross, forming the classic pan de muerto shape.
After baking and cooling the bread, one of my last tasks of the morning will be to brush all 50 with a mixture of melted butter and orange blossom honey then shower each with strawberry or cinnamon citrus sugars. Before packing them up along with other pastries for my weekly market later that morning, I remind myself to set one pan de muerto aside for the ofrenda—my first—that I’ll be making for my grandfather.
Bread of the dead is omnipresent throughout October and leading up to the sacred Mexican holiday, Dia de los Muertos, on November 1st and 2nd, including here in the U.S., where it has followed the diaspora and become a part of public consciousness and public celebrations. Even as the “visibility carries a risk” and some cities are feeling forced to cancel their annual Day of the Dead events out of concern that ICE will further terrorize communities. Other cities are choosing to go on with their plans to honor the culture as a way of continuing to live their lives out in public, despite the palpable, state-mandated fear. In my own city, Atlanta, a public memorial and vigil on November 1 is happening at a local cemetery to raise awareness about and honor those who have died while in ICE custody here in Georgia.
Privately or publicly, the heart-center of Dia de los Muertos remains in the ofrendas—elaborate, colorful altars built for your dead and adorned with earthly materials: Marigolds—known by their indigenous name, cempasúchil—strung into orange flower garlands, framed pictures of the dead, a glass of tequila if they fancied it in life, and of course pan de muerto.
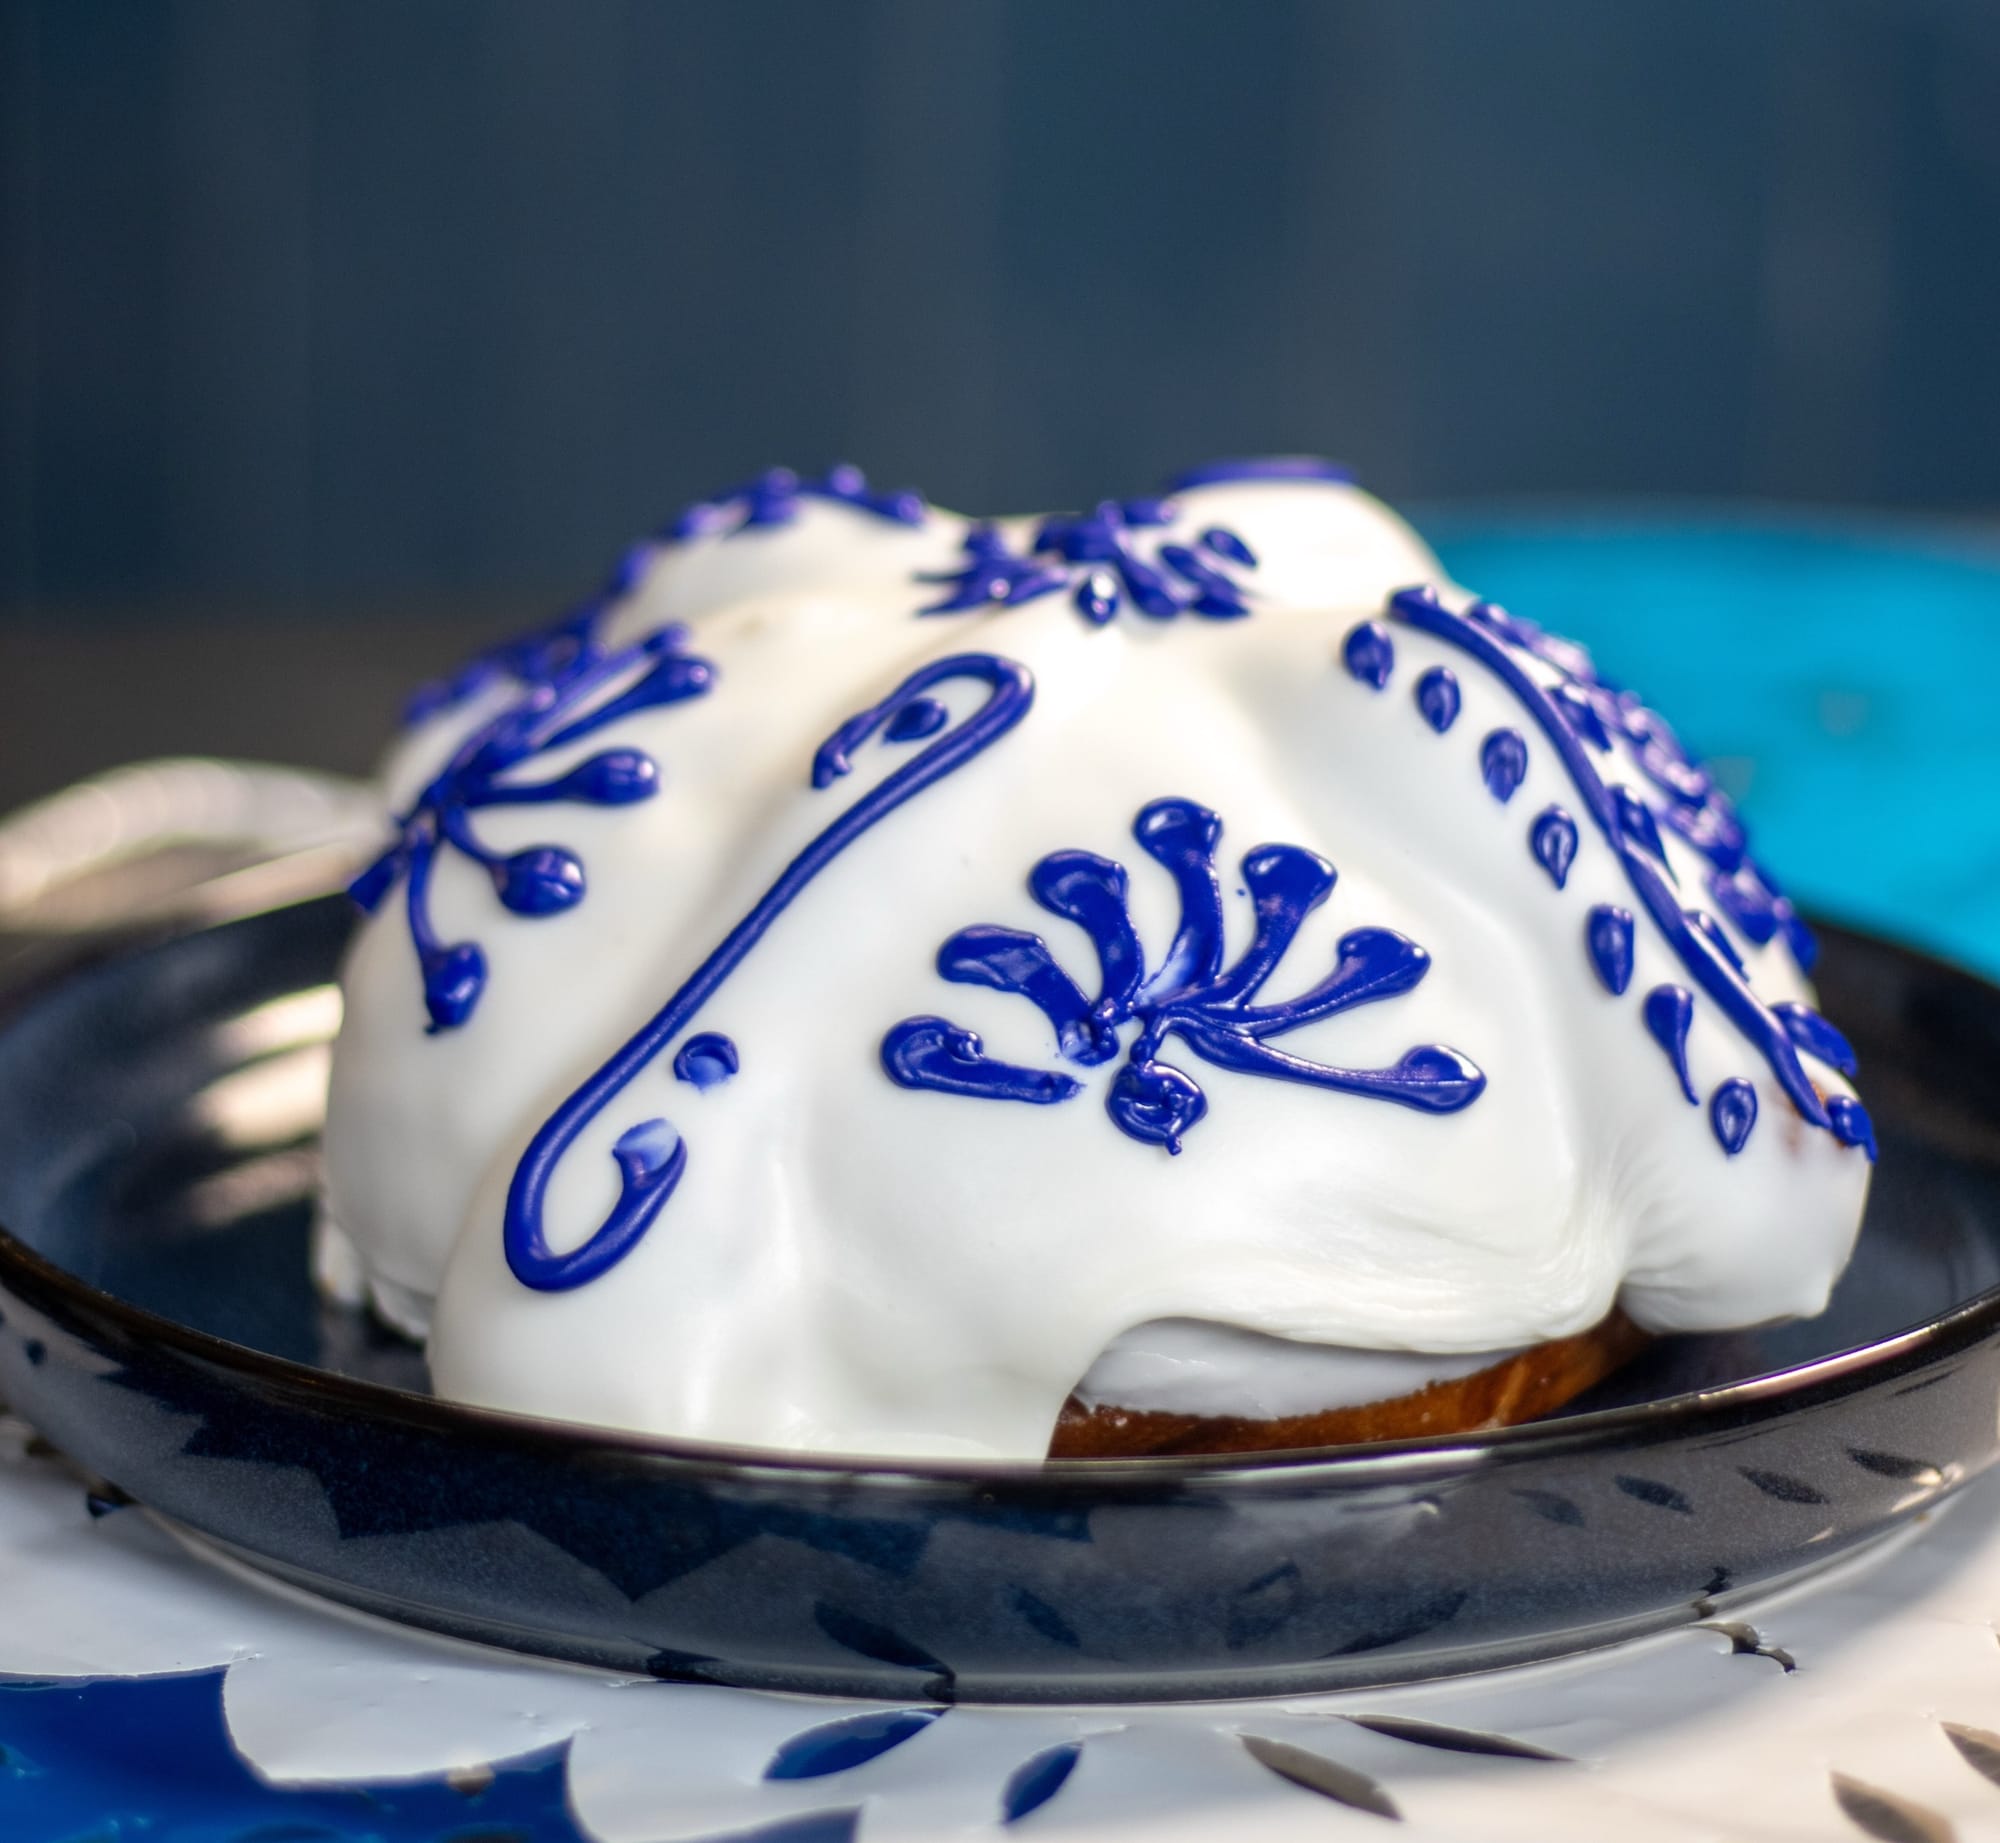
For this recipe I took inspiration from panaderias in Mexico that transform pan de muerto, already gussied up with all manner of colorful sugars, into a beautiful plated dessert. Some bakeries pipe fillings like chocolate or pistachio cream into the bread; others split the pan in half and pipe their creamy fillings, jams, curds onto the bread before setting the other half on top like a little hat. There’s the stunning Talavera pan de muerto that’s glazed and then piped in intricate designs in a deep sea blue color, effectively producing bread art at scale. I gasped at this neon purple pan de muerto that gets its color from a dramatic dragonfruit and prickly pear glaze.
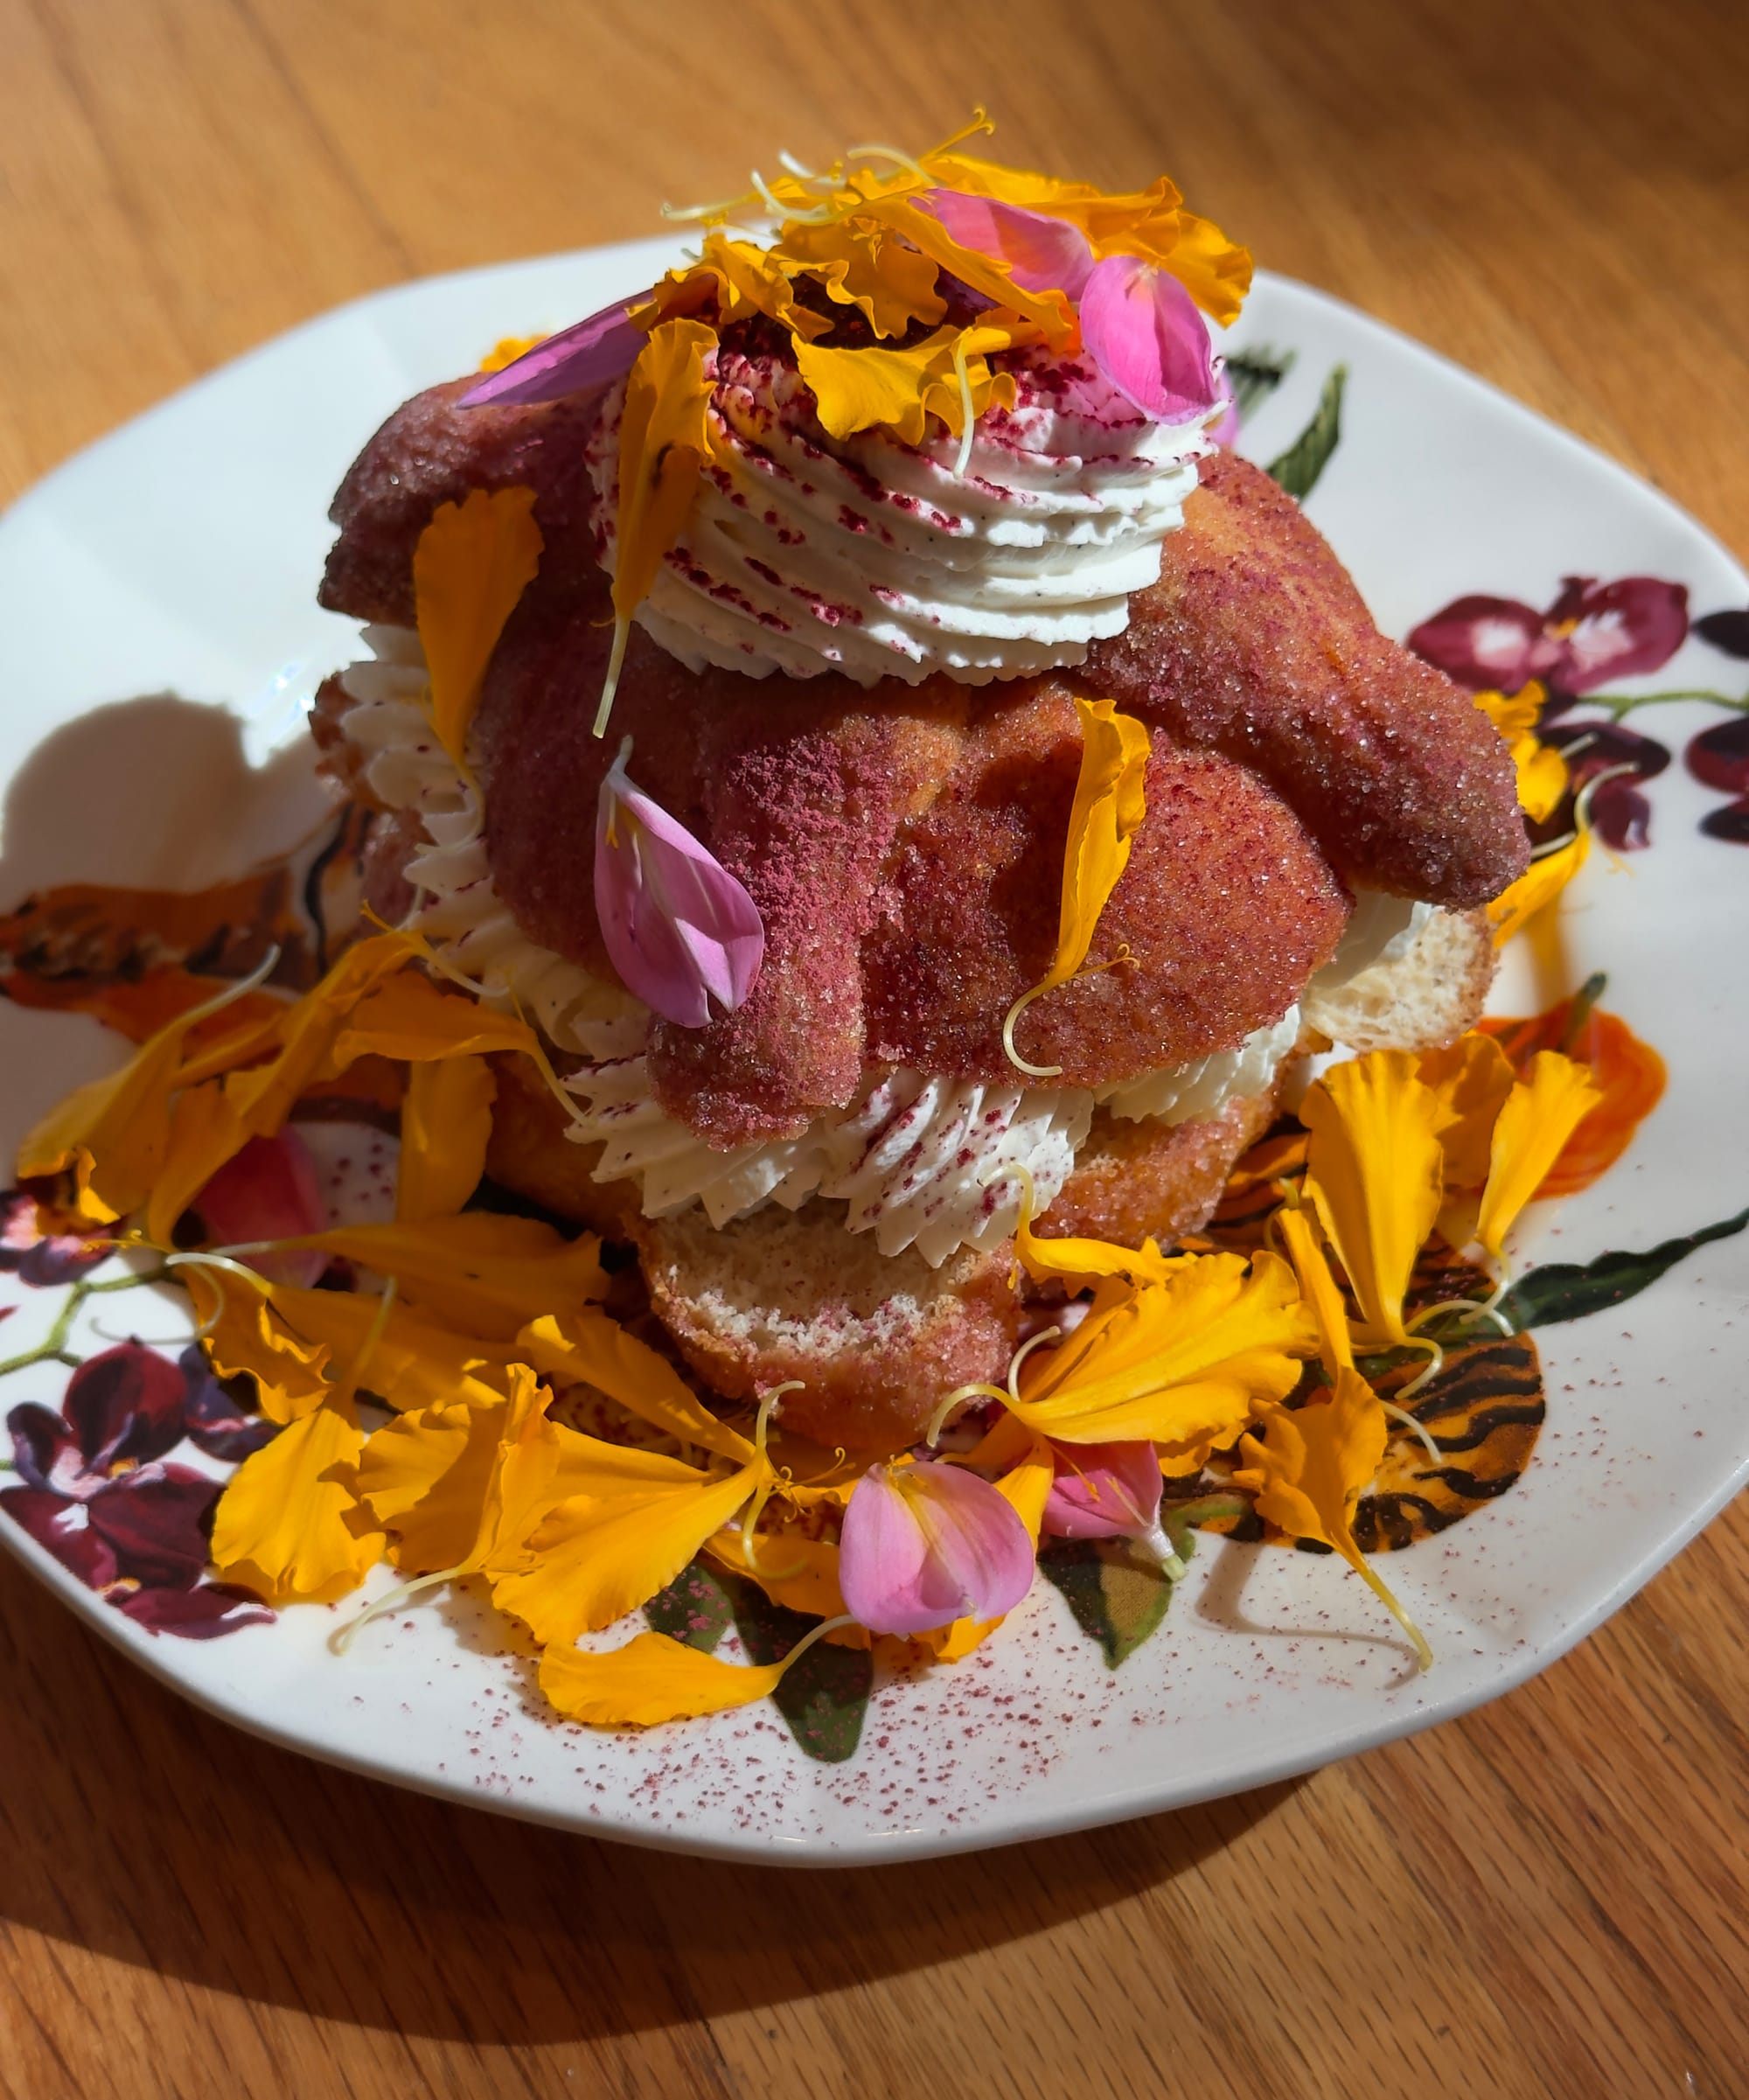
With my own plated pan de muerto, I choose a strawberry hibiscus pan, piped with stabilized whip, then a little hibiscus pear butter. I dusted the whole thing with hibiscus powder (are you getting a sense for what my favorite ingredient might be?), then piped more whip and scattered pink dahlia and orange marigold petals on top. Dia de los Muertos embraces the idea that mourning can also be a colorful, vibrant reflection on love and loss–it’s even evident in the bread of the dead.
It’s believed that the ofrendas, in addition to being literal and spiritual places of remembrance, also summon the dead back to our earthly realm, from the other room in which they just were. That morning at the kitchen, I was thinking about the ofrenda I wanted to make, how I hadn’t gotten around to it yet and that mine would probably not be as elaborate as the ones I’ve admired from afar. I had to wonder if this made me a bad Mexican-Catholic, a bad granddaughter. But, my grandfather dying taught me that in death the dead are actually everywhere we are, wherever we remember them.
This recipes makes 12 individual pan de muertos, or two larger loaves. When I was first teaching myself to make pan de muerto I’d have an excess of bread, which I’d give to a local community fridge/pantry and I encourage you to do the same. Keep one for your ofrenda; give the others away.
Recipe: Pan de Muerto
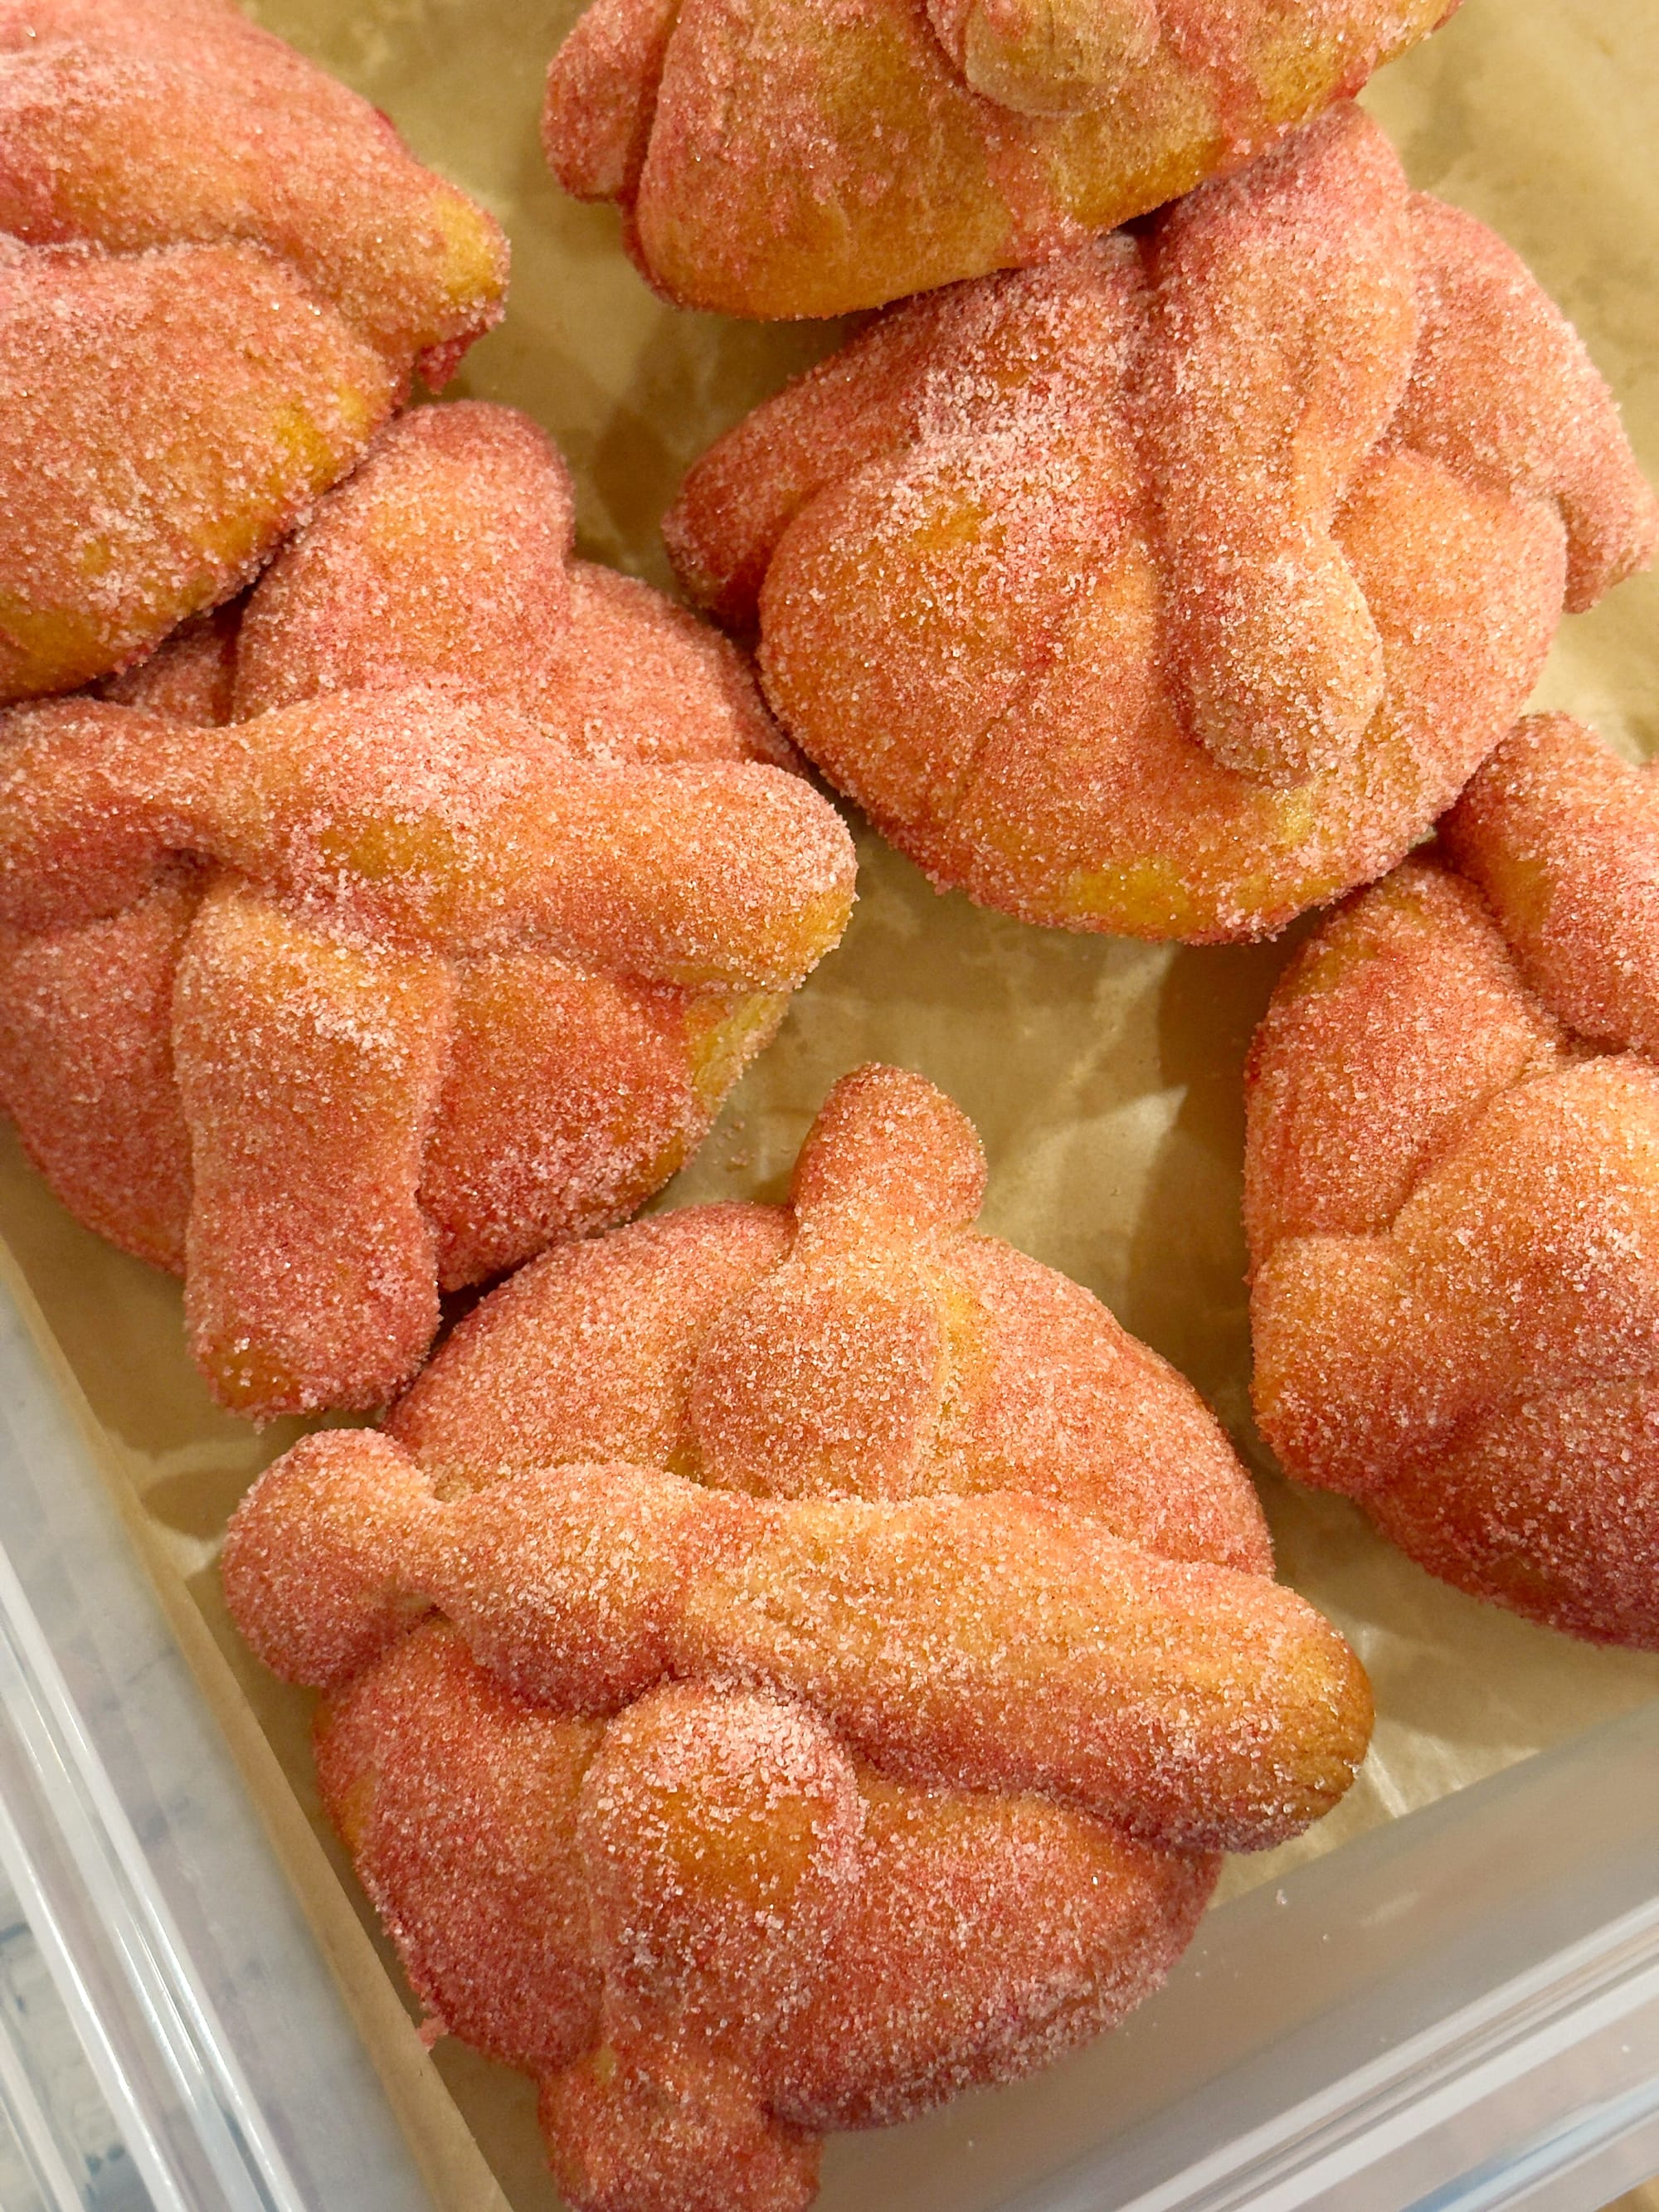
Yield: 12 individual breads or 2 (8-inch) loaves
- Freeze-dried strawberry and hibiscus powder can be purchased online or in specialty stores, or made by grinding small quantities of either ingredient in a spice mill.
- Other options for soft white wheat flour include Frederick, Shirley, and Mediterranean (or a generic whole-wheat pastry flour)
Strawberry-Hibiscus Sugar
40g freeze-dried strawberry powder
40g hibiscus powder
200g cane sugar
Bread
7g instant yeast
115g water, cold
250g bread flour
225g soft white whole-wheat flour, such as Sonora
20g cane sugar
220g (4 large) egg, cold
345g unsalted butter, cold, divided
20g orange blossom honey
- Make the Strawberry-Hibiscus Sugar: Add the strawberry and hibiscus powders and the cane sugar to the bowl of a food processor; blitz the mixture until both fruit and sugar are well combined. You will have leftover sugar after making the pan de muerto, which, because I operate a bakery, I’m able to use up rather quickly. Stored in an airtight container, the sugar will last up to 6 months and works well in sugar cookies, and for sprinkling on the tops of cakes right before going into the oven.
- Make the dough: To the bowl of a stand mixer bowl, add all of the ingredients, minus the butter. Make sure the salt goes in last and doesn’t come in direct contact with the yeast. Attach the bowl to the mixer and mix on medium speed until the dough pulls away from the sides of the bowl, about 5 minutes.
- Turn the mixer off and let the dough rest while you prepare the butter. Slice 227g (2 sticks) of the cold butter into thin, tablespoon-size pieces. Reserve the butter wrapper to grease the mixer bowl later. Start the mixer again on medium speed and begin adding the butter a few pieces at a time. Once all the butter has been added, let the dough mix on medium speed for a good 15 to 20 minutes.
- After mixing for about 15 to 20 minutes, the dough should be smooth and clearing the sides of the bowl. At this point the dough should pass the windowpane test.
- Remove the dough from the bowl and transfer to a lightly floured work surface. Knead the dough by hand, gathering it with a bench scraper if it’s sticking to your work surface, just for an additional minute or so. Using the reserved butter wrapper, grease the stand mixer bowl and transfer dough back into the bowl to proof. Cover with plastic wrap, then drape a clean kitchen towel over the bowl. If you have a Cambro container with a lid, transfer the dough there instead. Let your dough proof in a warm environment until doubled in size, about 2 hours.
- Once doubled in size, deflate the dough, cover again with plastic (or Cambro lid) then transfer to your fridge where it can begin a long, slow ferment for at least 12 and up to 24 hours.
- Shape the dough and bones: Once 12–24 hours have passed, line two large baking sheets (one if making just 2 loaves) with parchment paper. In a small bowl, make an egg wash of 1 large egg, a little water, plus a splash of heavy cream; set aside.
- Using a bench scraper, portion off pieces of dough that weigh 25g each (250g if making just two loaves). Divide each dough piece in half; set aside on a sheet tray and cover with a clean kitchen towel.
- Divide the remaining dough into 12 pieces that weigh 65g each (420g if making two loaves). Shape each dough piece into a round by gently cupping one hand on either side of the dough while rolling on your work surface to create tension. Place the dough rounds on the prepared baking sheets and gently press down on each to flatten. Cover with a clean kitchen towel while you make the bones.
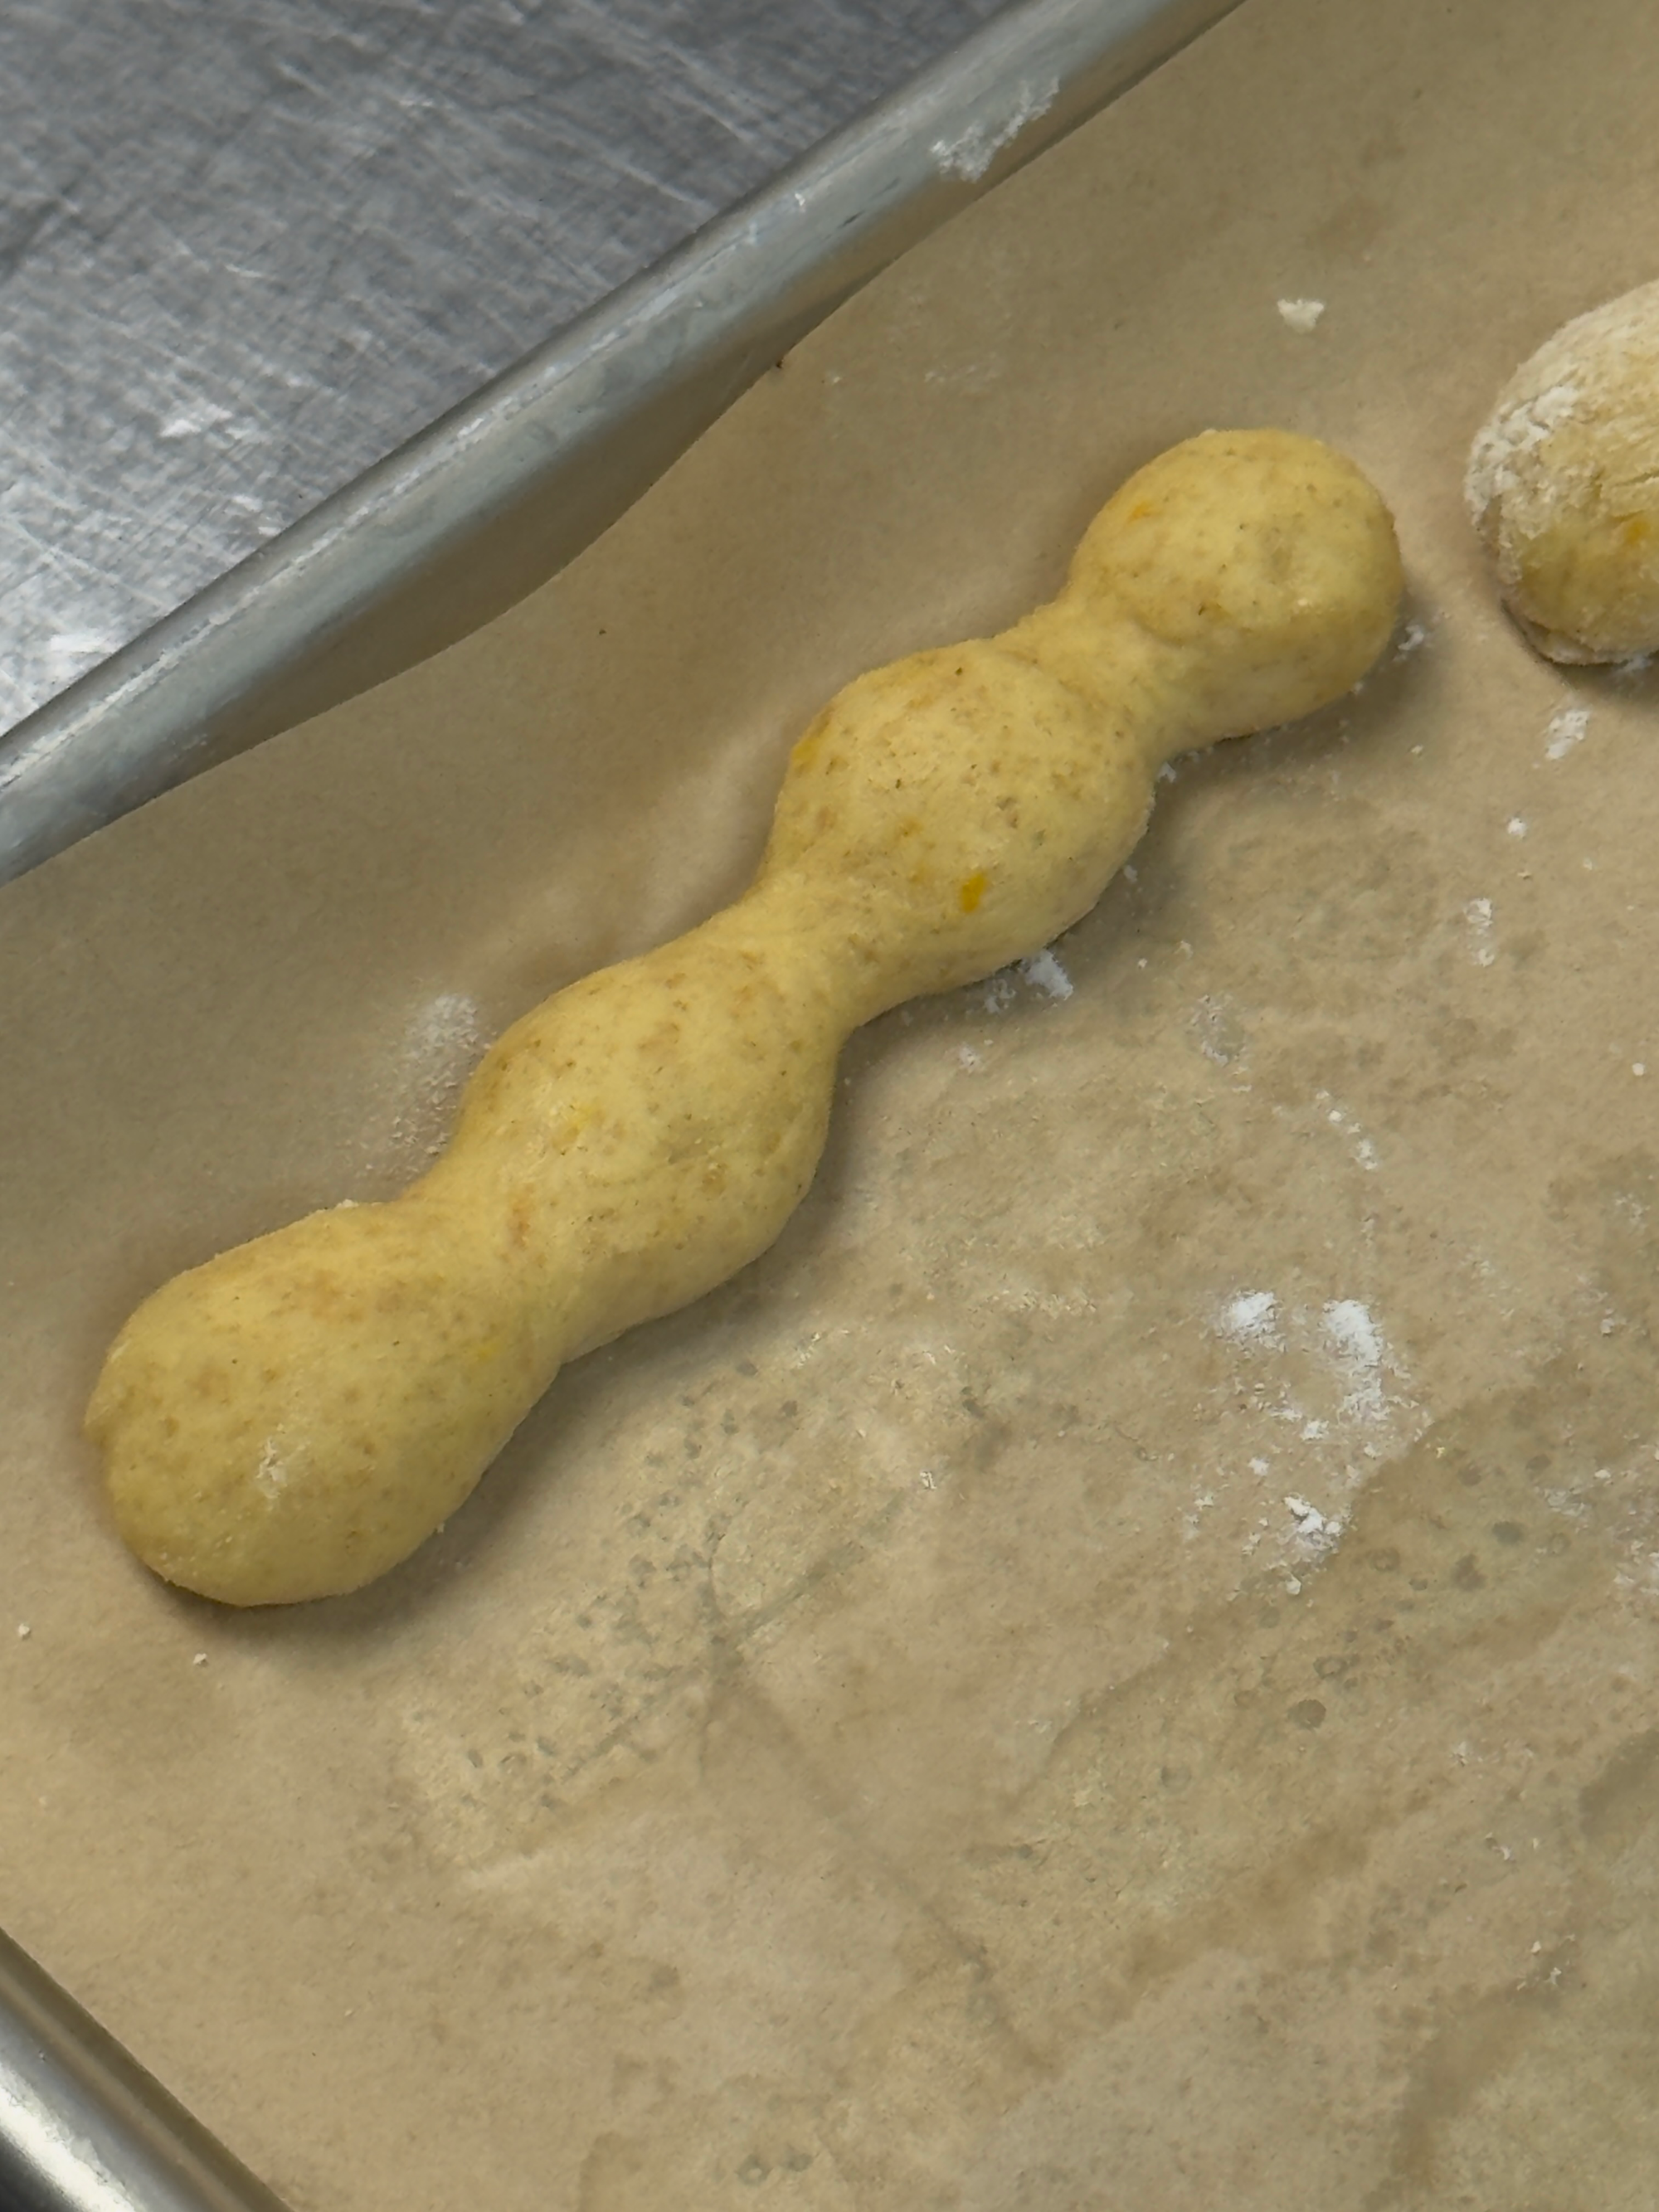
- Lightly flour your work surface. Roll two of the smaller dough pieces each into a roughly 4-inch rope; spread your pointer, middle, and ring fingers on the dough while pressing down to indent the rope. The idea is to make three deep indentations in the dough rope for the “bones” (see image below). Transfer the bone to a sheet tray lined with parchment and lightly dusted with flour. Repeat with the remaining pieces of dough.
- Brush the tops of the dough rounds with the egg wash now. Place one of the dough bones on the surface of one of the rounds, pressing down to secure. Make sure the portion of the bone with the middle indentation is in the center of the loaf. Place a second bone over the first bone on the same loaf now, making a cross. Again, make sure the indentations meet in the center of the loaf. Repeat with the remaining dough pieces until all dough rounds have their bones. Brush the bones with more egg wash now.
- Cover the rounds with a kitchen towel and let rise in a warm environment once again until puffy and doubled in size, 60 to 90 minutes.
- Bake the pan de muerto: When the loaves are nearly done proofing, preheat your oven to 350˚F (175˚C).
- Bake pan de muerto for 10 minutes to start. After 10 minutes, flip the baking sheets front to back and top to bottom, and continue baking for an additional 10 minutes or so, or until the pan de muertos are a beautiful warm brown color, all over. If you have an instant-read thermometer, insert it underneath one of the loaves; it should read 190˚F (88˚C) for a perfect bake.
- Let pan de muertos cool on the baking sheet for about 15 minutes, then transfer to a cooling rack.
- While the pan de muertos cool, melt the remaining butter with the honey in a small saucepan. Brush the melted butter all over the cooled pan de muerto, then shower each with the strawberry hibiscus sugar. Repeat with the remaining pan de muertos.
- Serve pan de muerto with your favorite warm beverage. If so inclined, split a pan de muerto in half using a serrated knife. Spoon or pipe whipped cream on the bottom half, then top with any sort of acidic filling (curd, jam) before topping with the top half. Store pan de muerto by covering in an air-tight container at room temperature; they will last for up to 3 days. Place a pan de muerto on your ofrenda in remembrance of and gratitude for your ancestors.
Teresa Finney is a baker-writer and the owner of At Heart Panadería, a contemporary Mexican bakery in Atlanta, Georgia. She's the author of the forthcoming cookbook, Panadería.
wordloaf Newsletter
Join the newsletter to receive the latest updates in your inbox.