Vacation, all I ever wanted

Some news: This will be the last public post from me until the beginning of September, since I’m taking the entire month of August off for some much needed R&R. I’ll be at the beach for a lot of that time (as pictured above), home for the rest of it, but in either case I’ll be using the time to game plan for the future and work on some personal projects. I’ve got lots in store for the Wordloaf newsletter, and I need this breather to plan out posts and recipes for the fall and beyond. So I hope you all have yourselves a lovely August, with baking if it is not too hot to do so, or with a break from baking if it is (as it is here in New England right now).
Speaking of which, I wanted to talk this week about baking bread on vacation (with a brief mention of taking vacation from baking bread and how best to keep your starter healthy while you are off adventuring).
As I mentioned above, I’ll be at the beach for much of my vacation, in a couple of different rental houses. As a regular renter of vacation homes and someone who likes to bake bread while away, I’ve thought a lot about what sorts of tools and ingredients it’s important to bring with versus those things that can be sourced or found locally. Over the years I have put together a lightweight, stripped-down toolkit of only the essential items I need to have with me to bake a loaf of bread that remain up to my exacting standards (while still being vacation-casual).
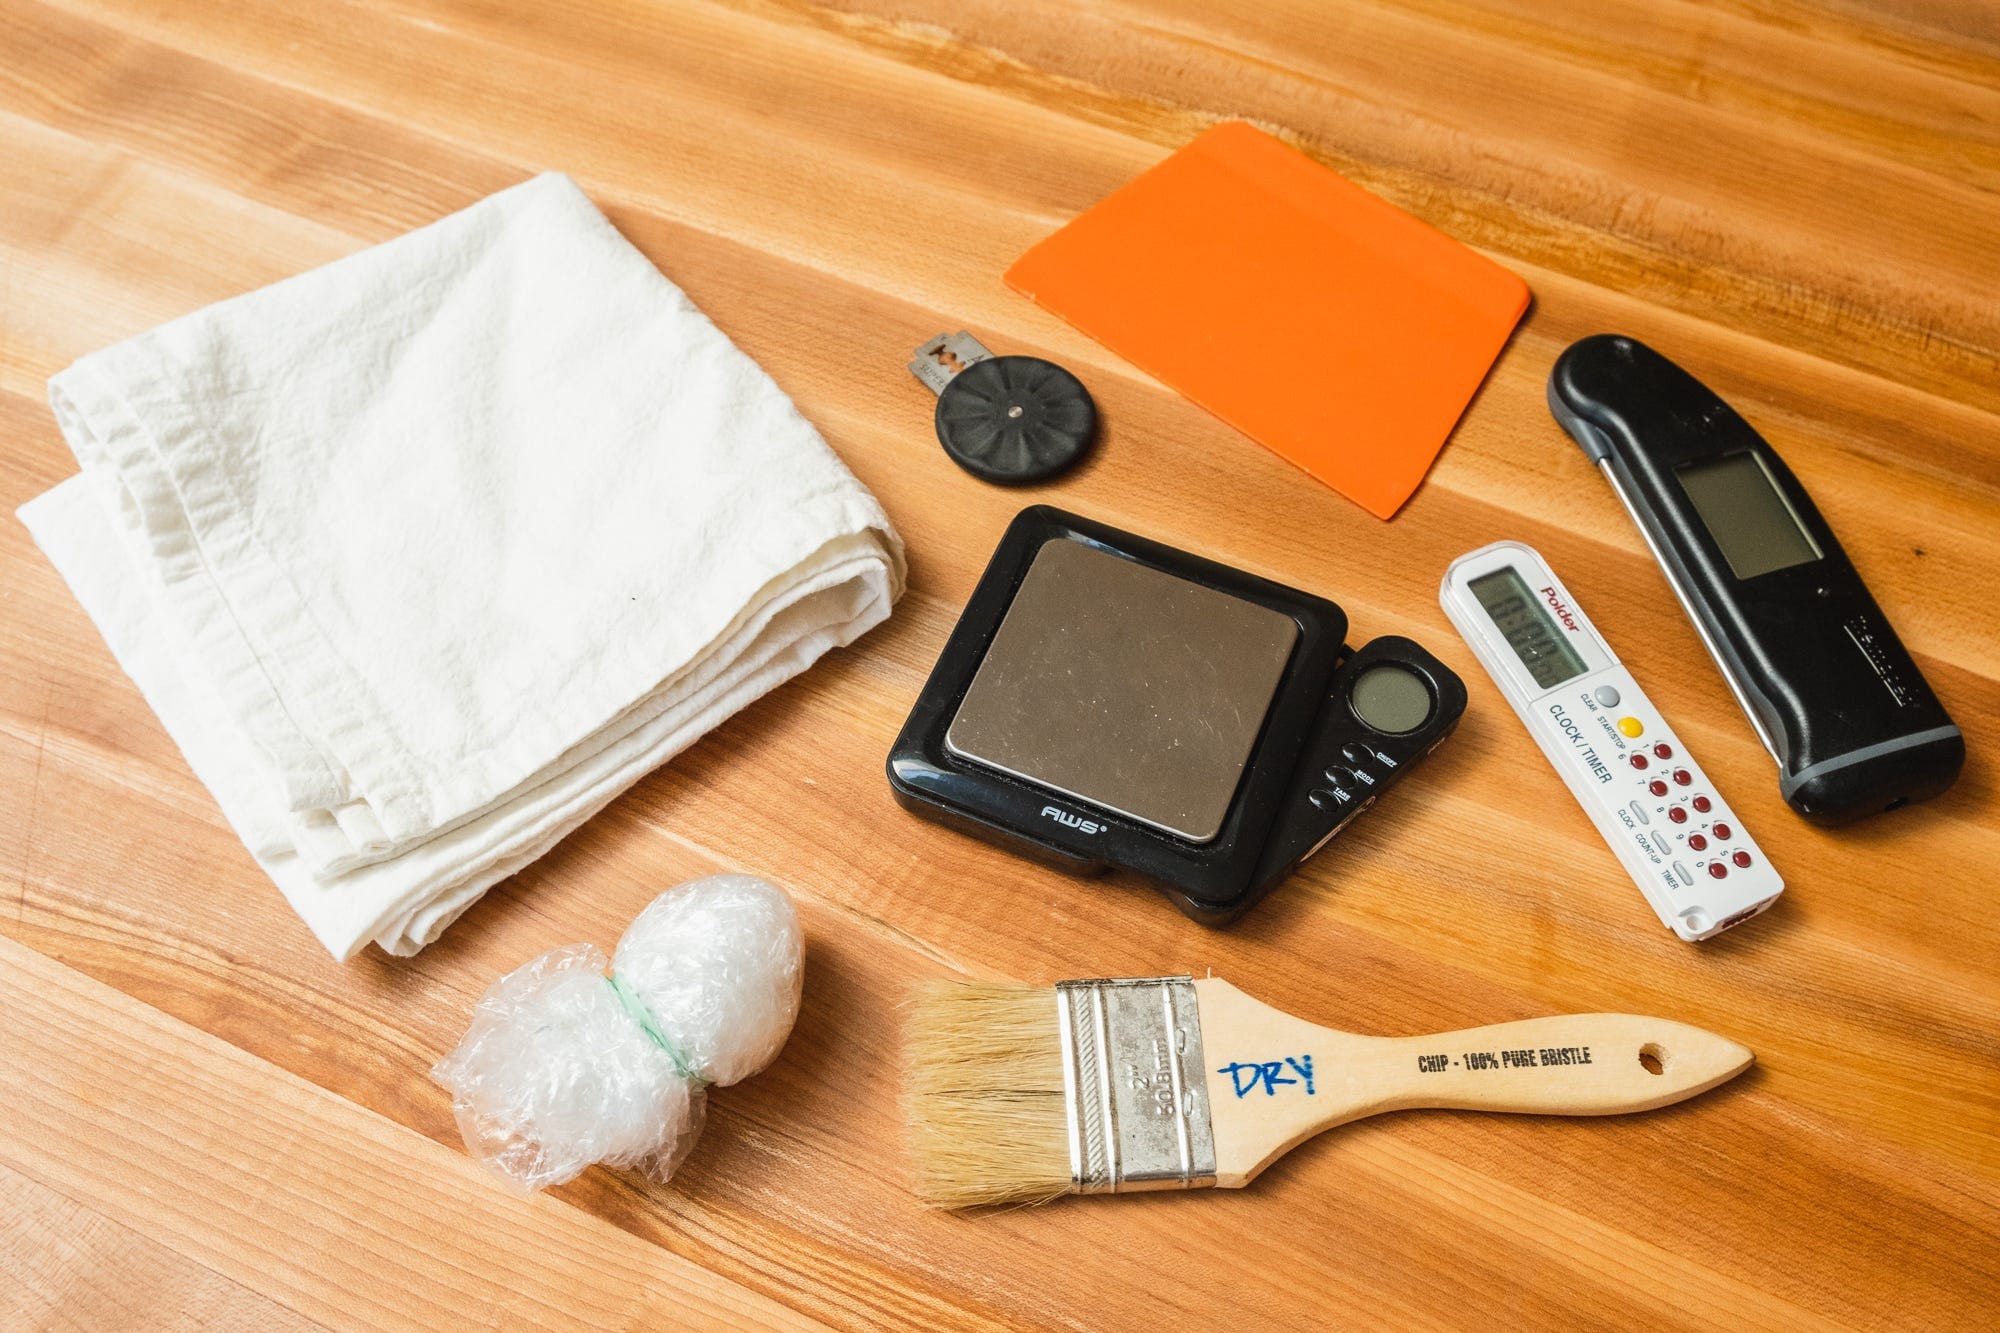
Here’s my 2021 toolkit:

a sackcloth towel, to use to line a makeshift banneton
a plastic shower cap, for covering the banneton
a Wiremonkey UFO lame1, with a couple of extra blades
a small bench scraper
a pastry brush
a timer
an instant-read thermometer
Obviously there are some missing tools here, but I know from experience that I can usually find the things I need at the rental house itself.
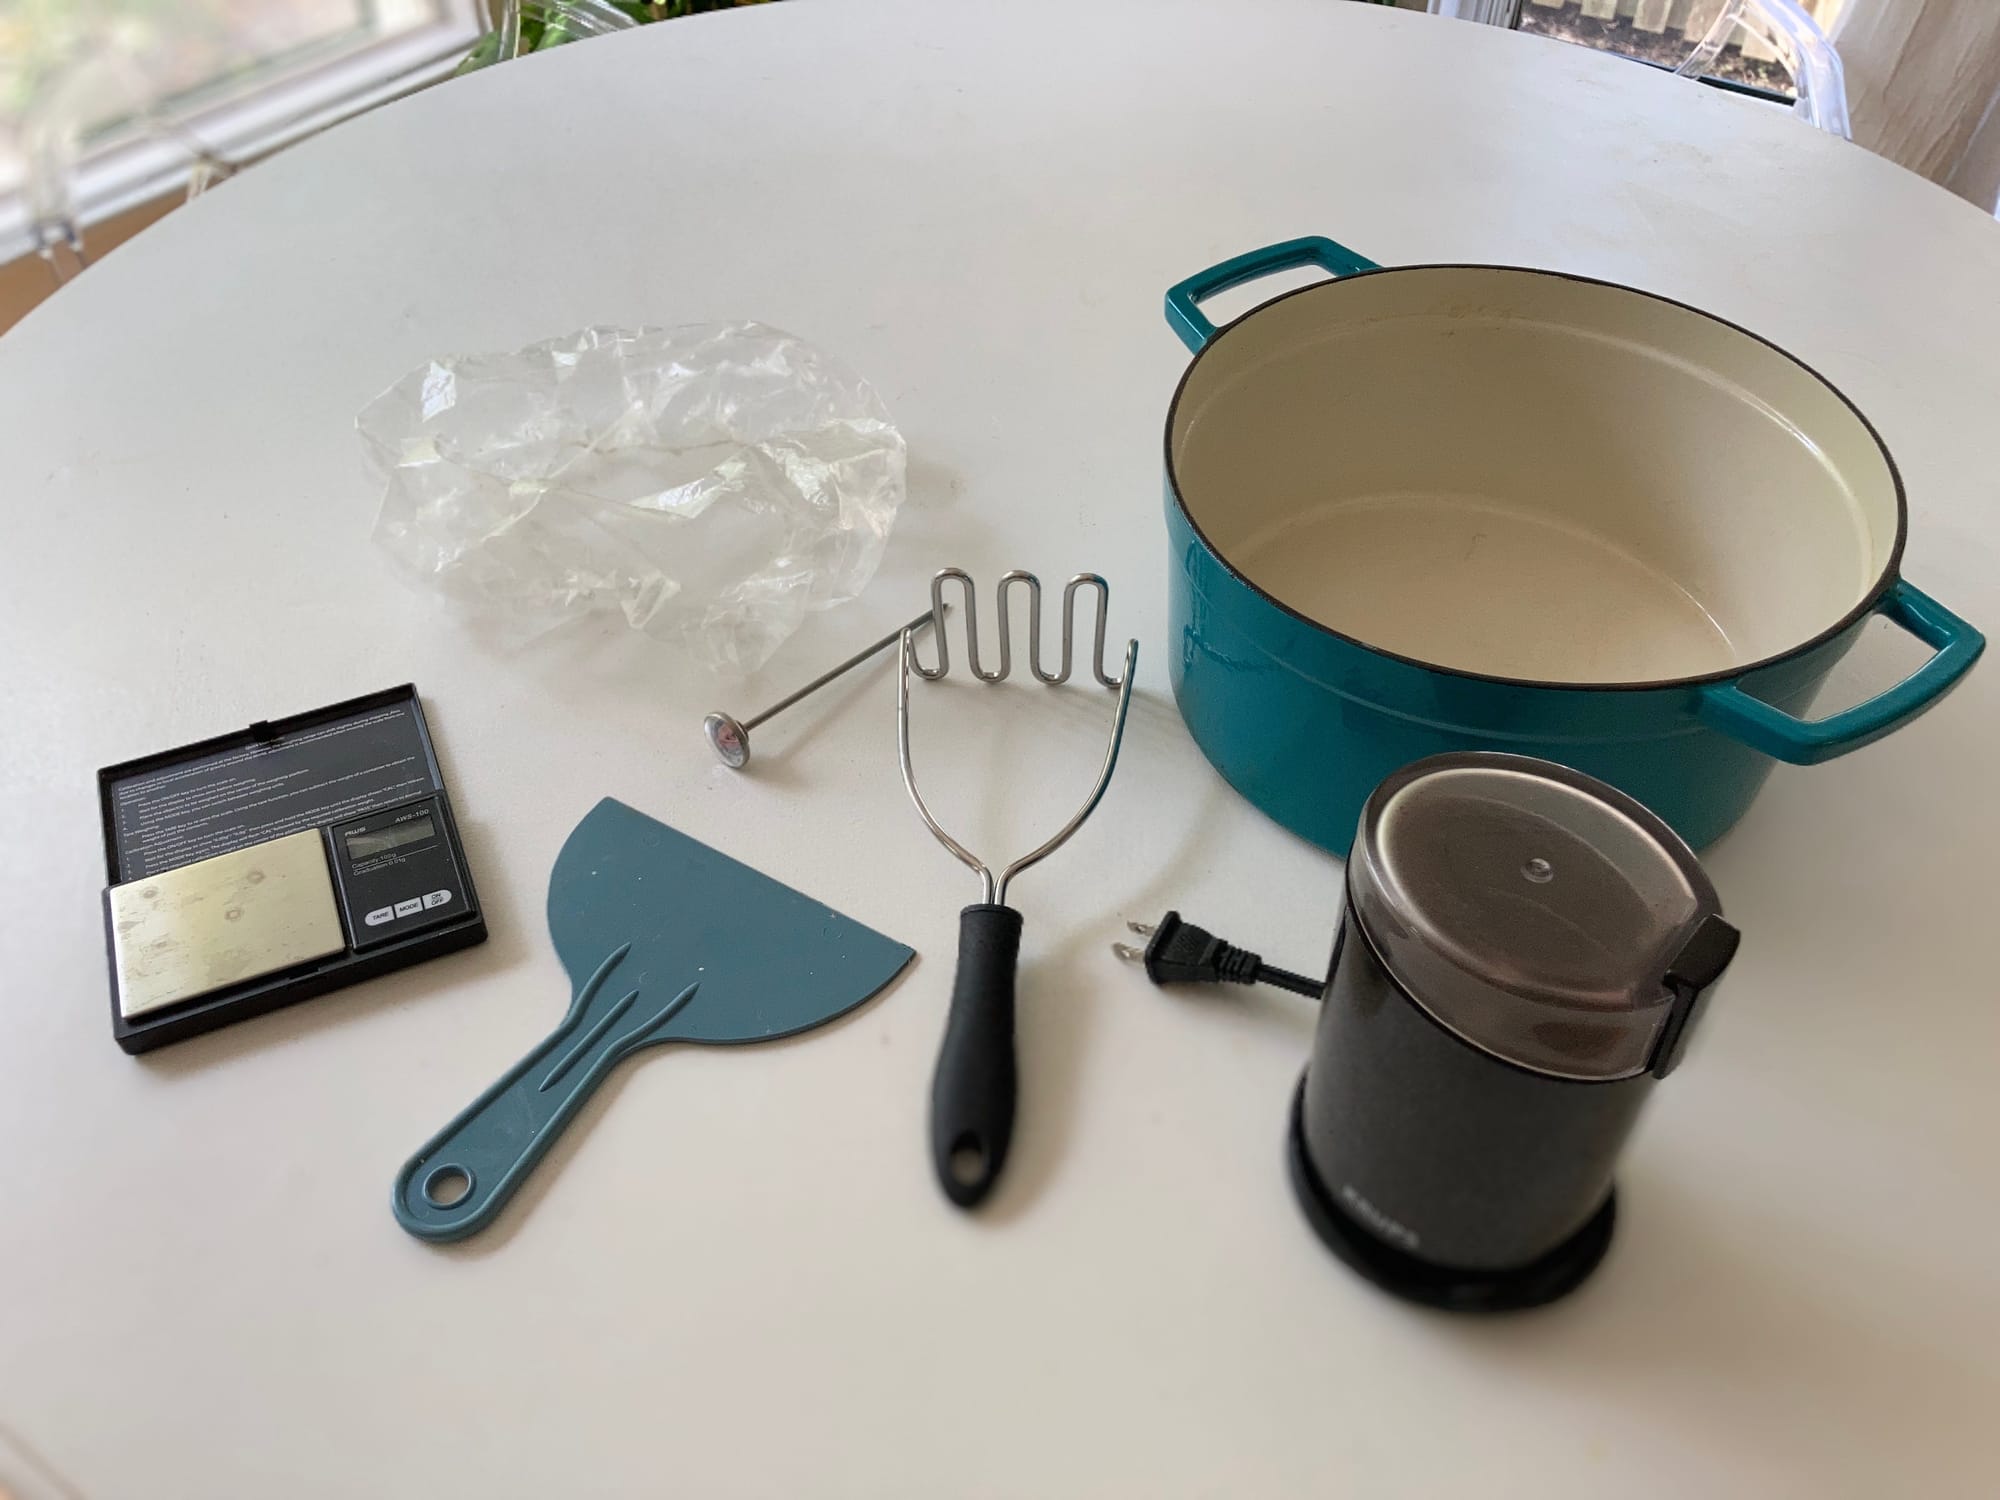
I took this photograph last year while on vacation, with this future post in mind:

The scale, shower cap, and thermometer I carried with me, but the rest of the items were things I scavenged around the rental house: A plastic paint scraper, which worked quite nicely as a bench scraper after running it through the dishwasher; a wire potato masher, which made a surprisingly great substitute for a dough whisk; an enameled cast iron Dutch oven; and a coffee grinder, for grinding small amounts of whole grains into flour.
Not pictured is that makeshift banneton I mentioned above, which in this case was a metal colander. Colanders make for decent bannetons because they are porous, to let the dough breathe, and they tend to be hemispherical, so they will cradle the loaf well no matter how large the vessel (or small the loaf). (I know of several bakers who use cheap plastic colanders—the kind you can find in Asian supermarkets—exclusively as bannetons.) Other possibilities include wicker bread baskets and small salad spinner inserts. A bowl will work in a pinch, but being solid it can tend to let moisture collect and risk the dough sticking to the liner.
As for a cooking vessel, the beach house we rent each year happens to have that fancy heavy cast iron Dutch oven in it, but really you can bake a loaf of bread using any wide metal pot with a lid, heavy or not. While the added mass of a Dutch oven can help with oven spring, any lidded pot that forms a tight seal will work, so there is bound to be something in the cabinets you can use. One thing to keep in mind when working with lighter pans is that, being thin, they can transfer the heat of the lower oven element to the bottom of the loaf a little too quickly; one way to avoid this is to line the bottom of the pot with a layer of foil or set it on an un-preheated baking sheet when you place the loaf into the oven, for a bit of insulation.
Also not pictured is a few pre-cut sheets of parchment paper (which of course I could buy at the local supermarket, except I hate the roll-y kind that never sits flat when you unroll it, so I tend to bring my own).
As for ingredients, I just purchase flour, salt, and inclusions from the local supermarket, which is decent where we are going. I might however bring some fancy flour with me if there is room in my luggage, especially since I have so many bags of nice-but-perishable flour that I need to use up, including some I recently got from my friends at Carolina Ground and Cairnspring Mills.
Traveling with your starter
And then there is my sourdough starter. I don’t have to travel more than a few hours with mine, so it’s as simple as placing a small amount of it in a container and adding it to our cooler bag. For longer trips, where it might sit un- or under-refrigerated for longer stretches, I do what I do when I ship live starter in the mail: mix up a fresh batch, using a small amount of water and a fractional amount of starter, both of which will slow down the fermentation significantly but keep it healthy enough to survive out of the fridge for hours (or even days, as in the case of my mailed live starter). So something like: 100g flour, 50g water, 5g starter.
I’ll keep this cold if possible and then when I get where I’m going, leave it at room temperature until it is about doubled, at which point it will be ready for refreshing using my normal ratios.
Giving your starter a vacation
If you instead are taking an extended break from baking, and won’t be able to refresh your starter every week or so just to keep it happy, there are some ways to put it into a deep sleep while you are away.
A starter will keep in the fridge without any special treatment for at least couple of months, but it will likely need extra feedings to get back to full health once you return to it. (Chances are it’ll have accumulated some amount of grey liquid—aka “hooch”—that you should pour off before using it to mix up a fresh batch.)
However, if you want to keep it a little happier while you are away, I have two recommendations to try:
Feed it as described above—e.g., 100g flour, 50g water, 5g starter—and put it immediately back into the fridge. The reduced hydration, reduced starter percentage, and cold temperatures will slow it way down, so that it can hold onto some activity for awhile.

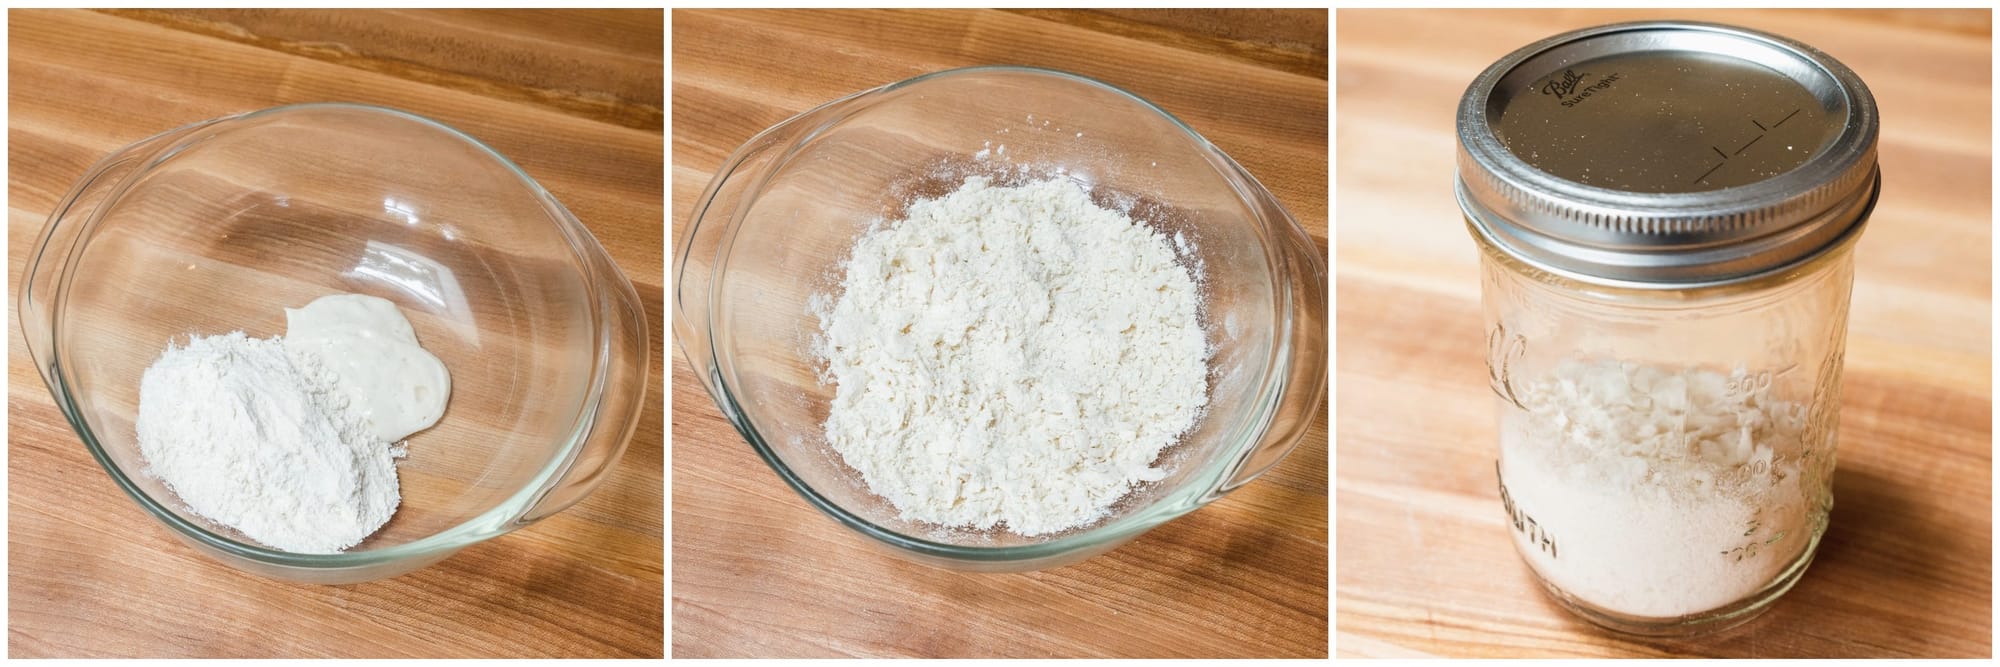
Or you can try flour-drying your starter. Here’s how: Weigh a blob of recently-refreshed starter into a bowl and add twice its weight of dry flour. Knead the mixture by hand until it forms powdery clumps. (If it seems at all wet, add more flour one tablespoon at a time.) Transfer the mixture to a jar, seal it, and transfer it to the fridge. When it comes time to revive it, just add enough water to bring it back to starter consistency (which should amount to about 30% of its weight) and let it sit at room temperature, covered, until it’s active again, and then refresh as normal. I haven’t tested this one out fully yet, but it should keep well for at least a couple of months without too much loss in vigor.
If you are like me and are extremely paranoid about keeping your starter happy and alive, you’d probably use both of these approaches, while also just leaving your standard starter in the back of the fridge as a backup as well.
That’s it for this last pre-vacation newsletter. I hope you are all having a peaceful summer (or winter, as the case may be), wherever you are. I’ll still be responding to comments and emails while on hiatus, so don’t hesitate to reach out if you have questions or requests. And if you are a paid subscriber, you can expect to see at least a few sneak preview/exclusive recipes in August, so not to worry about missing your Wordloaf fix. If you aren’t, but don’t want to miss out, you know what to do:
See you all in September!
—Andrew
I just got sent one of these, and while I haven’t really had a chance to put it through it’s paces yet, it’s nice and compact, perfect for vacation baking. I’ll have a full review soon. ↩
It’s a bit of a pain to weigh things on such a small scale, since my usual bowls obscure the readout screen, but quart deli or yogurt containers work well, since they are taller than they are wide. ↩


Member discussion