Sourdough shokupain de mie
A subscriber-exclusive recipe
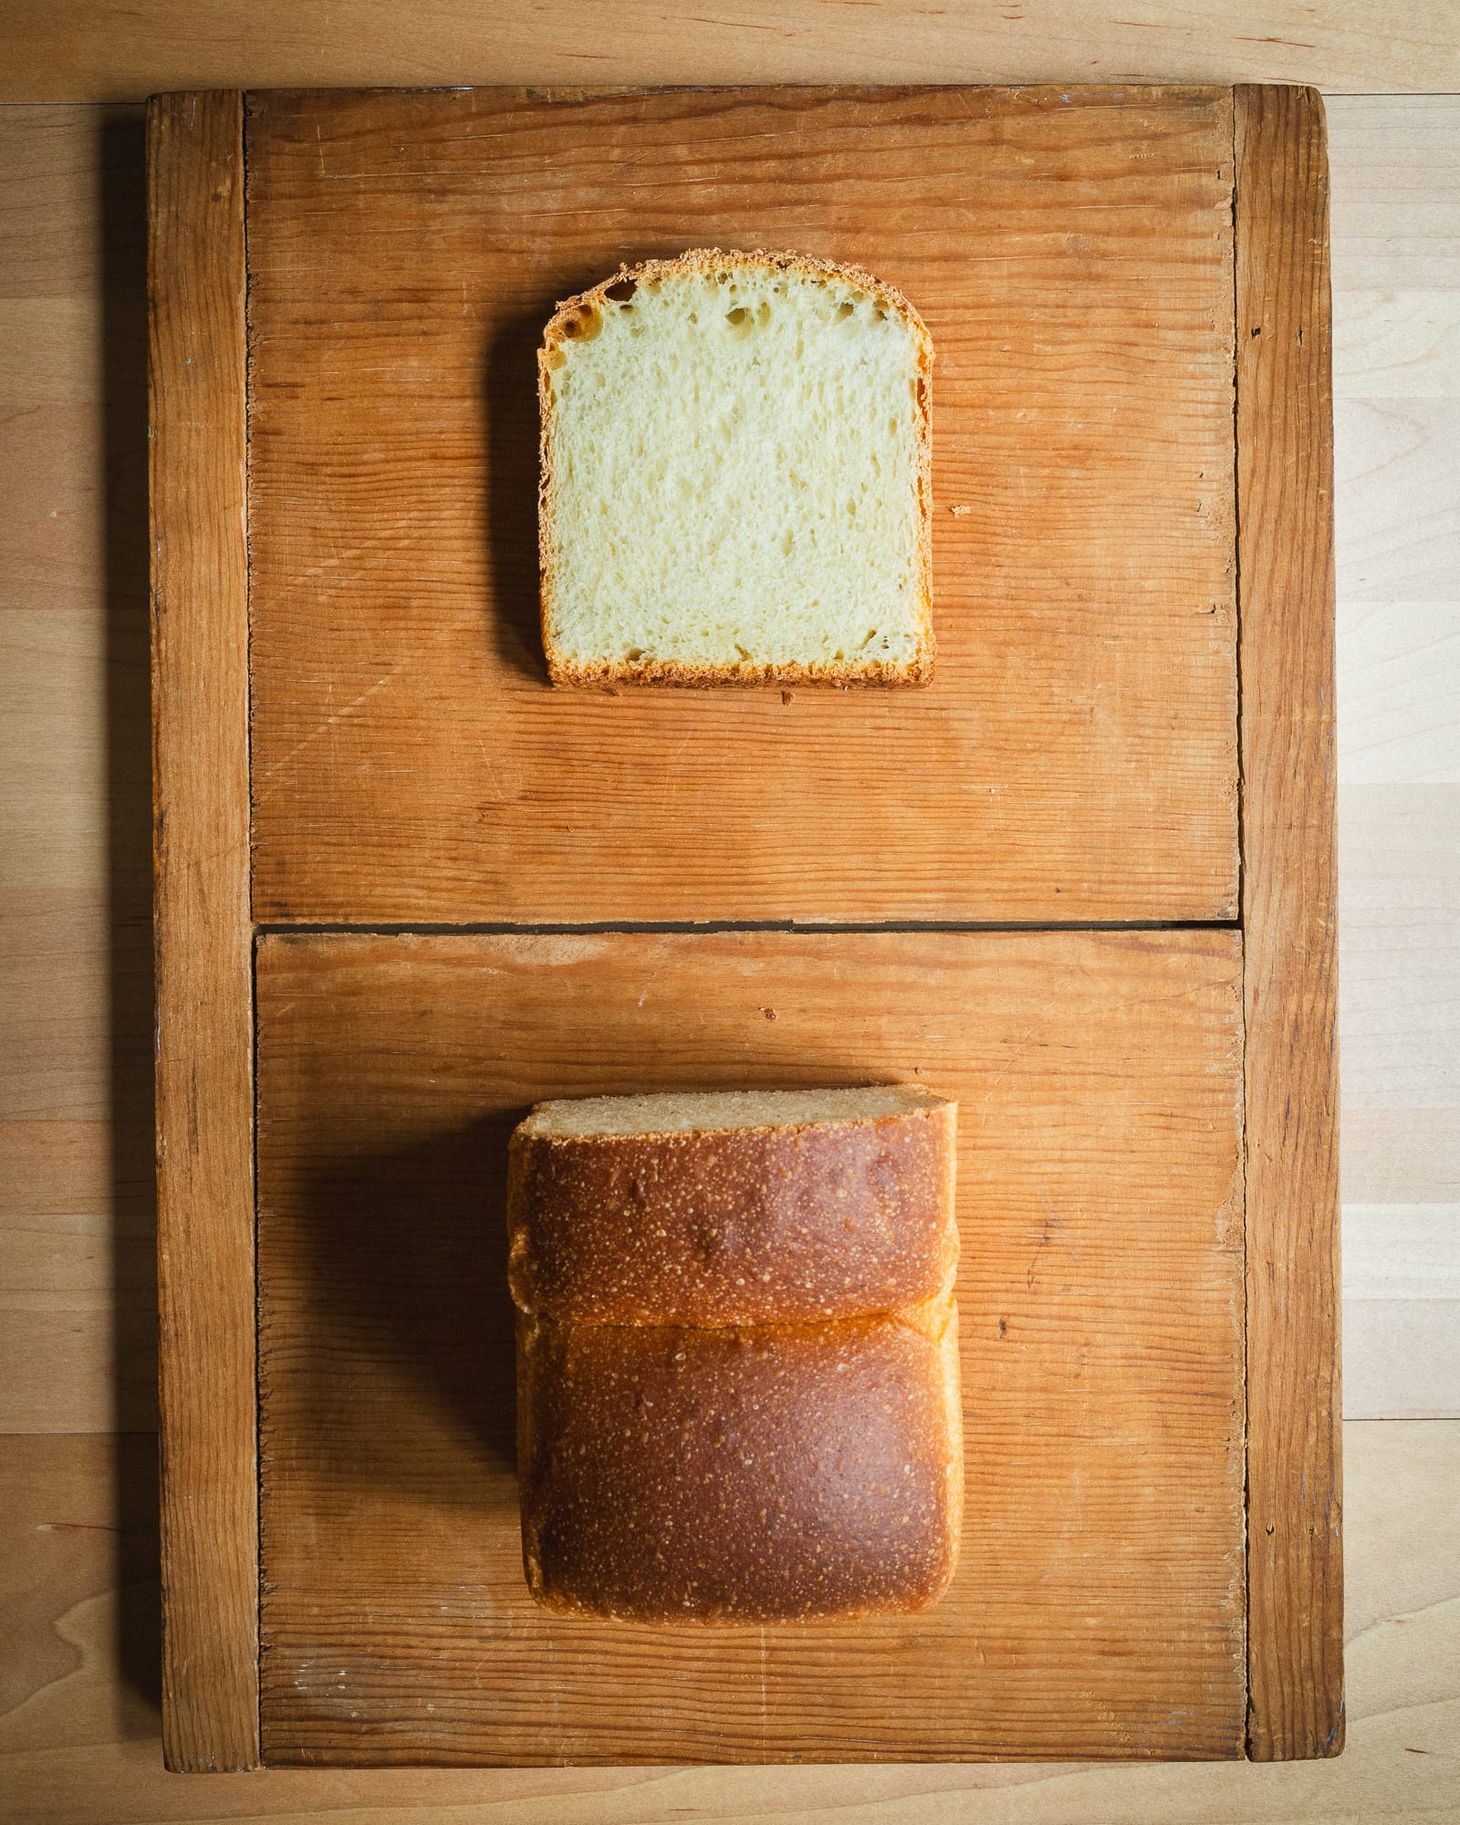
Table of Contents
Okay, so here it is, as promised, the sourdough shokupain de mie recipe from Breaducation, one of the first finalized recipes I've shared here or anywhere. If you haven't yet, please read last week's post about baking with liquid sweet starters:

If you have experience with yeasted enriched breads and lean sourdoughs, a very active starter, and loads of time on your hands, you should be fine. But if you have any questions, hit me up in the comments below (or the Discord server, linked below).
While the recipe below yields one pan loaf (or a slightly-smaller pan loaf and a single bun, instructions for which can be found at the end of the recipe), you can also use this dough for making smaller things like burger buns, kolaches, or bullar.
—Andrew
Sourdough shokupain de mie
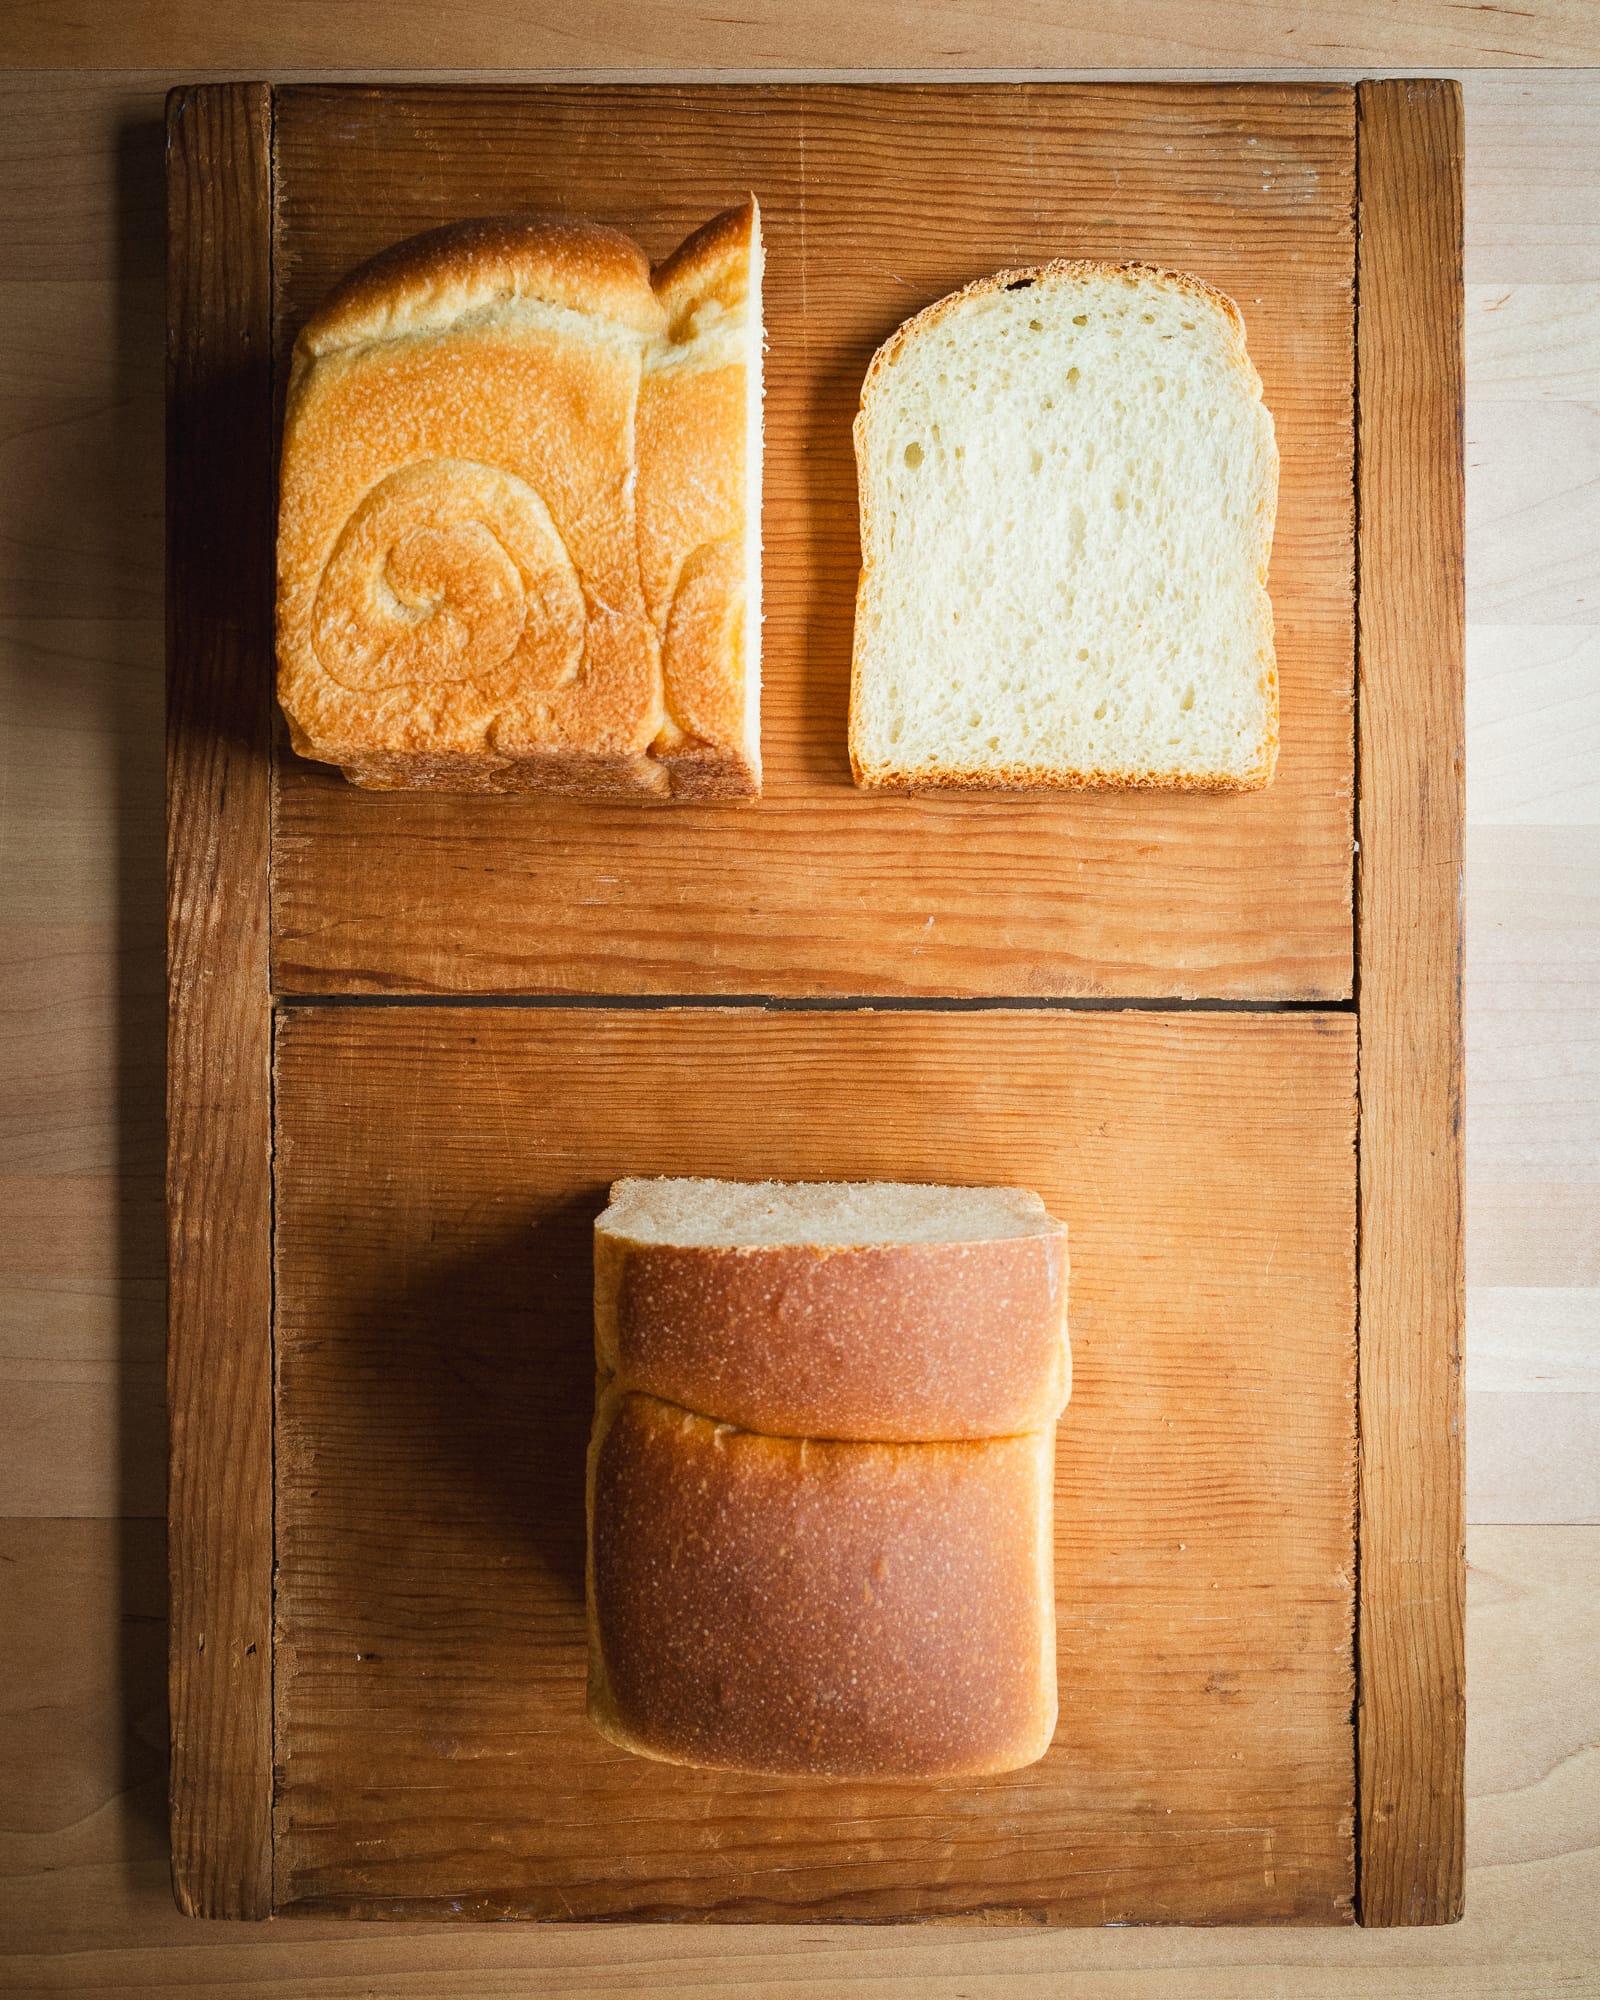
makes: 700g dough for one Yama- ("Mountain") style 9x4x4-inch pan loaf (or a 600g kaku-style square loaf and one 100g bun)
bread class: enriched
loaf type(s): pan bread, buns
fermentation type(s): sweet starter sourdough
mixing type: machine
specialty equipment needed: stand mixer, a 9- by 4- by 4-inch (22.5- by 10- by 10-cm) rectangular Pullman pan
minimum time frame: 46 hours
desired dough temperature: 82˚F (28˚C)
final proof temperature: 85˚F (29˚C)
General Schedule
Day one:
- ~7pm: Build levain, proof 12h at 70˚F (21˚C).
Day two:
- ~8am: Build sweet starter, proof 3–5h at 82˚F (28˚C).
- ~11am: Mix dough.
- ~11:15am: Bulk ferment dough, 8–10h.
- ~7:15pm: Transfer dough to fridge, hold for up to 24 hours.
Day three:
- ~9am: Shape loaf.
- ~9:15am: Proof loaf at 85˚F (29˚C) for 5–8h.
- ~3:15pm: Bake, 40–50m.
Notes
- Use soft bread flour with a protein content of 11–12%, like King Arthur all-purpose, Central Milling ABC+, or Kirkland Organic all-purpose.
- Sweet (aka glutinous) rice flour can be found in Asian markets or online; Bob's Red Mill and Mochiko are both excellent options.
- To make caster sugar, grind it to a fine consistency in a blender or food processor. Don't use powdered sugar here.
- Make sure your starter is really active. It’s probably best to use one maintained on white flour exclusively awhile, so convert yours if it is currently whole-grain.
OVERALL FORMULA
soft bread flour 90%
sweet rice flour 10%
water 59%
nonfat milk powder 13%
caster sugar 10%
butter 13%
egg yolk 4.9%
salt 1.8%
LEVAIN (100%-hydration)
10g soft bread flour
10g water, 70˚F
2g active starter, any hydration
SWEET STARTER (100%-hydration)
46g soft bread flour
46g water, 85˚F (29˚C)
13g caster (or finely-ground) sugar
13g active 100%-hydration starter (from above)
SCALD
35g sweet rice flour
70g boiling water
45g unsalted butter, cold, cut into 4 pieces
DOUGH
83g water, 85˚F (29˚C)
21g sugar
16g (1 large) egg yolk
sweet starter (from above)
260g soft bread flour
45g nonfat milk powder
6g salt
BAKE
1 tablespoon unsalted butter
- LEVAIN: Place the flour, water, and starter in a small, tall container and stir until uniform. Proof at 70˚F (21˚C) until fully expanded, about 12 hours.
- SWEET STARTER: Place the flour, water, sugar, and starter in a small, tall container and stir until uniform. Proof at 82˚F (28˚C) until about doubled in volume and very airy, 3 to 5 hours.
- SCALD: While the starter proofs, place the sweet rice flour in a medium bowl. Pour the boiling water over it and stir until uniform. Set the butter over the scald, cover the bowl, and let sit at room temperature while the starter ferments.
- DOUGH: Place the water, sugar, egg yolk, sweet starter, and scald in the bowl of a stand mixer and mix on low speed with the hook until until mostly uniform. Add the flour, milk powder, and salt, and mix on low speed until the dough just comes together and no dry flour remains, about 2 minutes.
- Increase the mixer to medium speed and mix until the dough just starts to clear the sides of the bowl and starts to form a cohesive ball (it may remain webby, sticky, and attached to the bottom of the bowl), 6 to 10 minutes.
- Transfer the dough to the center of an oiled, flat pan and shape gently into a smooth ball. Cover and proof at 82˚F (28˚C) for 8 to 10 hours, folding it once an hour or so until it feels cohesive, 2 to 4 folds total. The dough will not expand much during this time, so just follow the clock here and give it the time it needs. If it does start to expand, move it to the fridge once 8 hours has passed.
- Transfer the container to the fridge for up to 24 hours.
- SHAPING AND BAKING: Grease a 9- x 4- x 4-inch loaf pan. Flour the top of the dough and transfer to a lightly-floured counter. Divide the dough into 3 equal pieces of about 230g each, cutting them into pieces as square as possible.
- Working with one piece of dough at a time, lightly flour the exterior of the dough on both sides. Using your hands, press and stretch it into a 4- by 6-inch rectangle. Letter-fold the long ends into the center to form a 3-inch wide rectangle. Using a rolling pin, roll the rectangle into a 9- by 4-inch strip, flouring the dough on both sides as needed to prevent sticking. Anchor the far end of the strip by smearing it into the counter with your fingertips, and then, starting at the opposite end, roll the dough into a 4-inch-wide log, stretching it gently as you go and keeping the spiraled edges even. Detach the dough from the counter and then pinch the seam closed. Repeat with the remaining dough pieces.
- Set two cylinders of dough into the pan seam-side down with the spiraled ends facing the long sides of the pan, tucked firmly into the ends of the pan. Set the remaining cylinder between the other two.
- Cover the pan and let sit at 85˚F (29˚C) until the top of the loaf is about 1 inch below the rim of the pan, 6 to 10 hours. Twenty minutes before the loaf is fully-proofed, set an oven rack to the lower-middle position and heat the oven to 375˚F (190˚C).
- Transfer the pan to the oven, reduce the oven temperature to 325˚F (160˚C) and bake until the loaf is well-browned (particularly in the paler seams between the dough balls on the top surface) and at least 207˚F (97˚C) at its core, 40 to 50 minutes.
- Transfer the pan to a cooling rack, brush the exposed surfaces of the loaf with the melted butter, and allow to cool to room temperature, at least 1 hour.
To make a kaki (square) version
- Divide the dough into three 200g and one 100g portions.
- Shape the loaf as usual using the 200g pieces, then shape the remaining piece into a round bun, as a baker’s treat.
- Be sure to grease the lid before baking the loaf. Bake covered for 40 minutes, then remove the lid and continue baking until well-browned and the internal temperature is 207˚F (97˚C).
- Proof the bun on a small, lightly-greased sheet pan that will fit next to the loaf pan on your oven rack. To bake the bun, transfer to oven and bake until golden brown, 17 to 20 minutes.
wordloaf Newsletter
Join the newsletter to receive the latest updates in your inbox.