A Sweet Starter User Guide
May 2025 edition
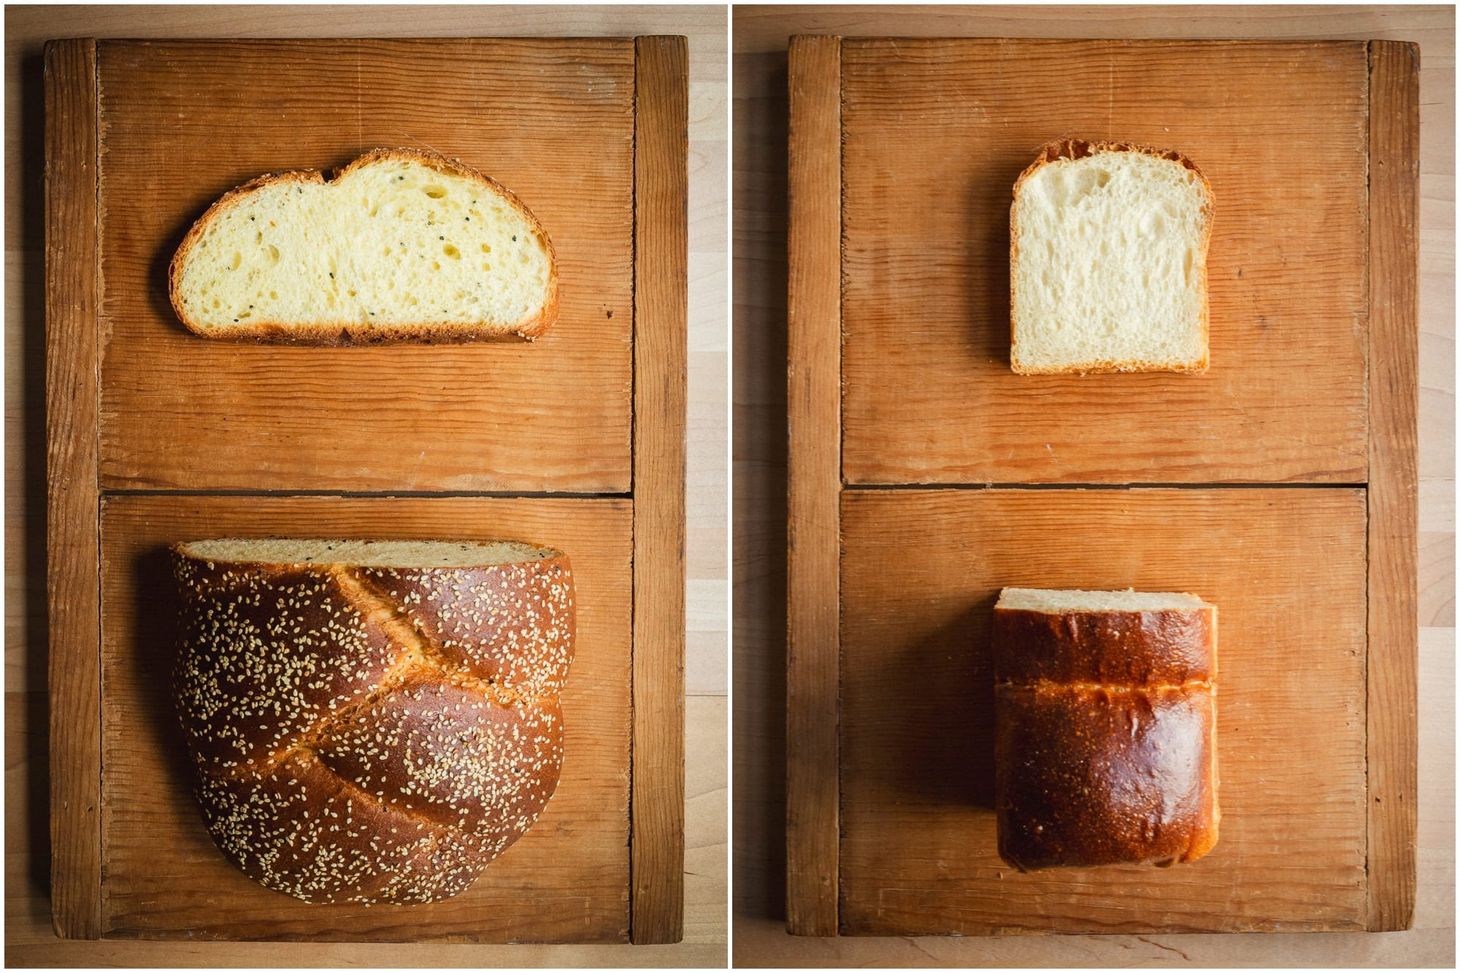
Table of Contents
Awhile back I spoke to Ian Lowe about his invention and the use of the stiff sweet starter process for sourdough enriched breads:

With it, I shared a practical guide to using his process, based upon my understanding of at the time. In the interim I have learned a lot more about how to make it work best, so I thought it would be a good idea to update that guide.
And last week I shared my interviews with Maaryasha Werdiger and Emily Hart, two bakers who use a liquid sweet starter, a variation of Ian's stiff sweet starter:
Since each approach works best with different styles of enriched breads, I thought it would be best to summarize all I know about each in a single post. I encourage you to read the source posts closely if you plan to experiment with sweet starters, since there are many details I did not include here for space reasons.
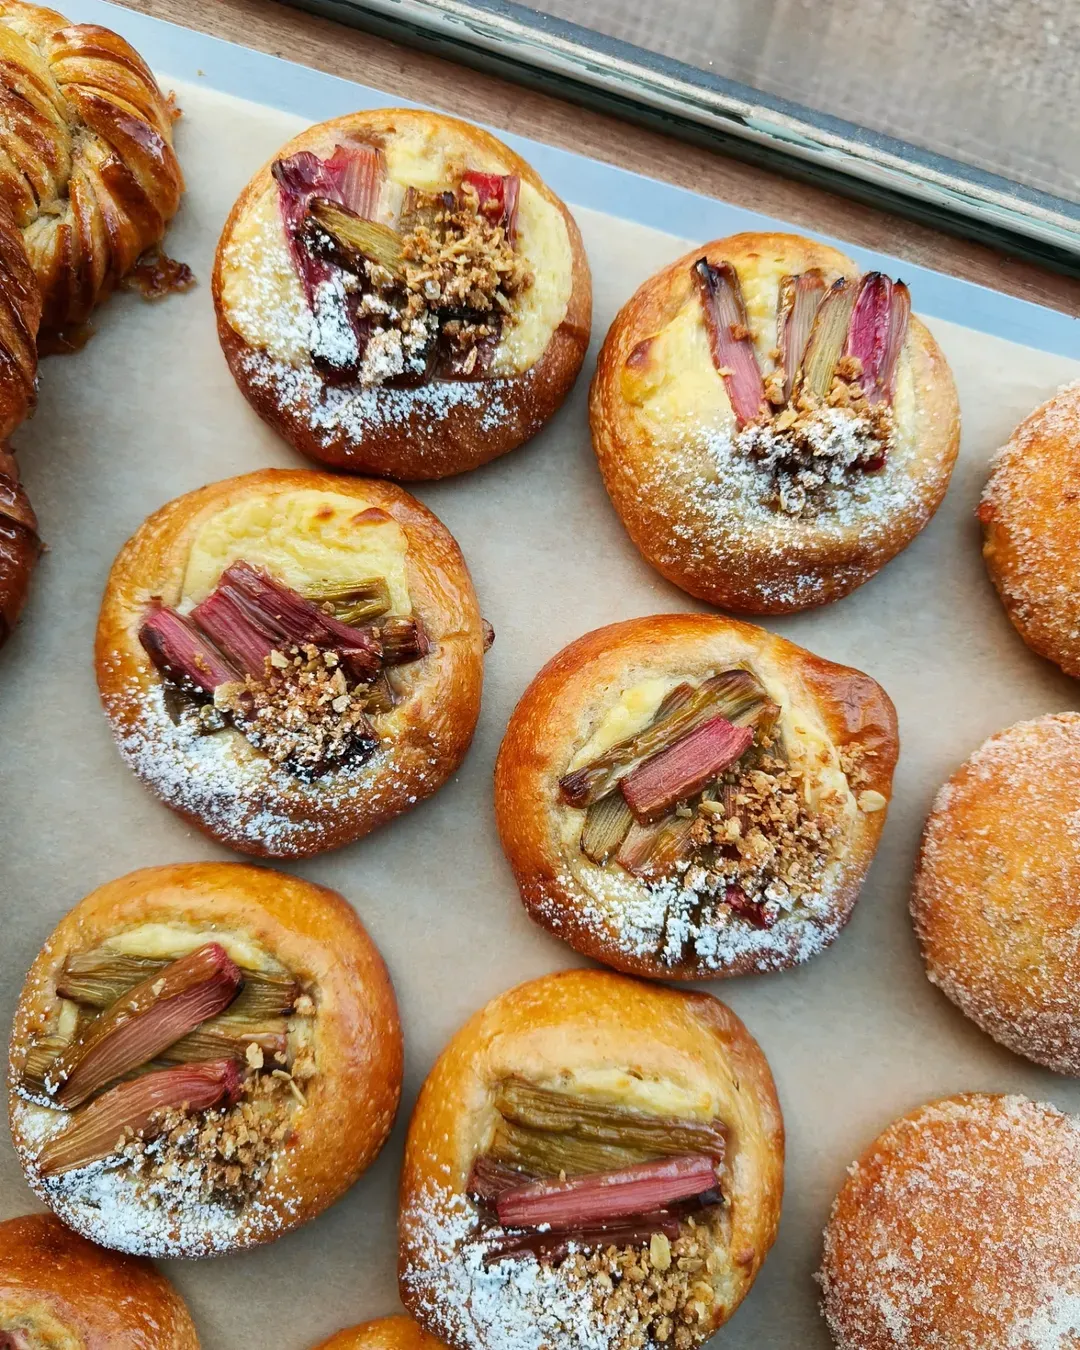
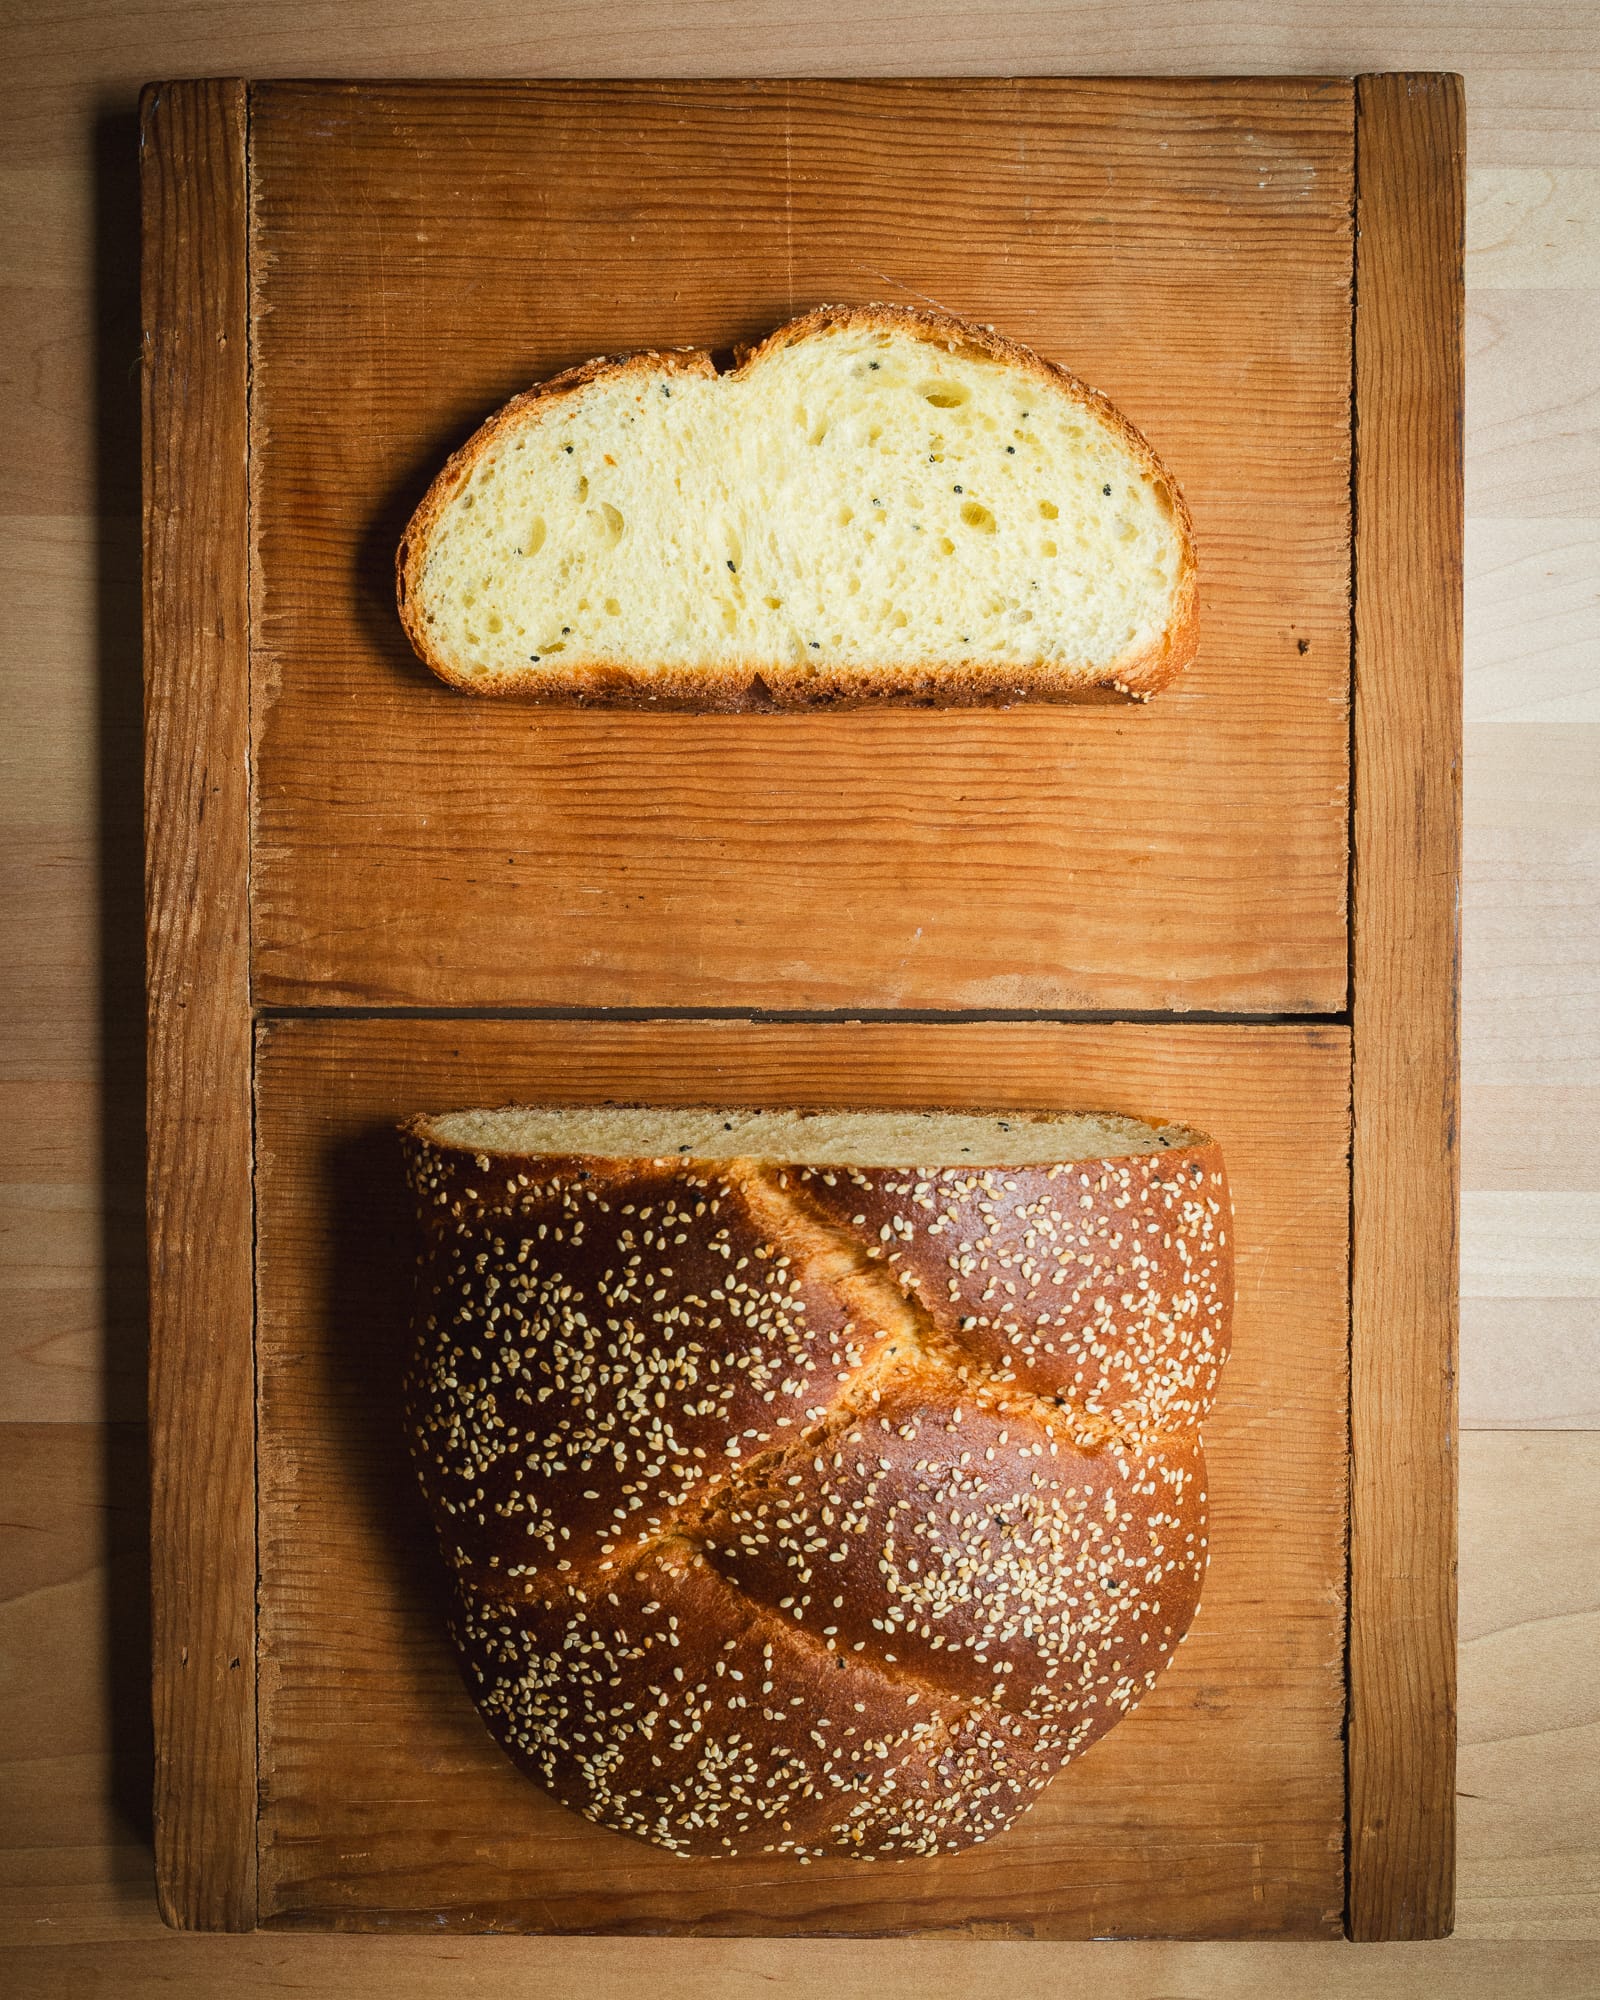
Unlike enriched breads made with a typical sourdough culture, sweet starter enriched breads have little perceptible sourness to them; it's there for sure (some LAB inevitably survive the process), but only enough to enhance the other flavors of the bread. Sweet starter enriched breads taste wonderful, but even better, they keep for ages. Enriched breads are notoriously quick to stale, lasting only a few days at best. Sweet starter ones, miraculously, keep for weeks; they remain soft as day one for up to a week, and toast up nicely well beyond that.
Ian's original method uses a stiff sweet starter, a low-hydration starter that is ideal for making enriched breads that have high amounts of sugar and other enrichments—eggs, dairy, and fats—like brioche. It is not ideal for breads with a modest amount of either, such as shokupan; in those cases, I use a liquid sweet starter, based upon the methods used by Maaryasha and Emily.
Before I get into the differences between the two, these are some of the elements and requirements common to both:
- Sweet starter breads are not for novices, there are too many pitfalls along the road to success. Anyone who attempts sweet starter breads will first want loads of experience with both yeasted enriched breads and lean sourdoughs.
- You'll need a very active sourdough starter, preferably one that is maintained continuously at room temperature, and preferably on white flour. If not, you are bound to have problems with some or all of the stages of fermentation, yielding starters and doughs that will take forever to proof, and breads that—if they proof—will be sour. Before you embark on sweet starter breads, be sure your starter is in tip-top shape.
- The entire process takes many days. It's not that much more work than yeasted ones, but it's not unlike making enriched breads in slow-motion. Instead of a few hours of bulk and a few hours of final fermentation, each stage takes the better part of a day.
- They tend to work best with refined white flours (T55/high-protein all-purpose), in all stages. The bran in whole-grain and high-extraction flours will yield a sour bread, especially when used in any preferment stage of the process. High-extraction flours can be used in limited amounts in the final dough—Emily Hart uses 20–30% in hers—though some additional sourness is inevitable if you do.
- This goes for starters too: You’ll get best results by maintaining the starter you use for sweet-starter breads on white flour. My usual starter is refreshed on whole-wheat and rye flours. When I am baking sweet starter breads, I spin it off into a separate white-flour one and give it a week or so of daily feedings before use.
- You need to use granulated sugar (sucrose) in the starter; other sugars like honey will (again) produce sourness.
- White sugar is also the best choice for the final dough; other sugars can be used here, though they might yield more sour breads.
- So that the sugar is quick to dissolve (particularly in the stiff sweet starter), I use fine caster sugar. Since this is hard to find in the U.S., I make my own by grinding granulated sugar in a blender.
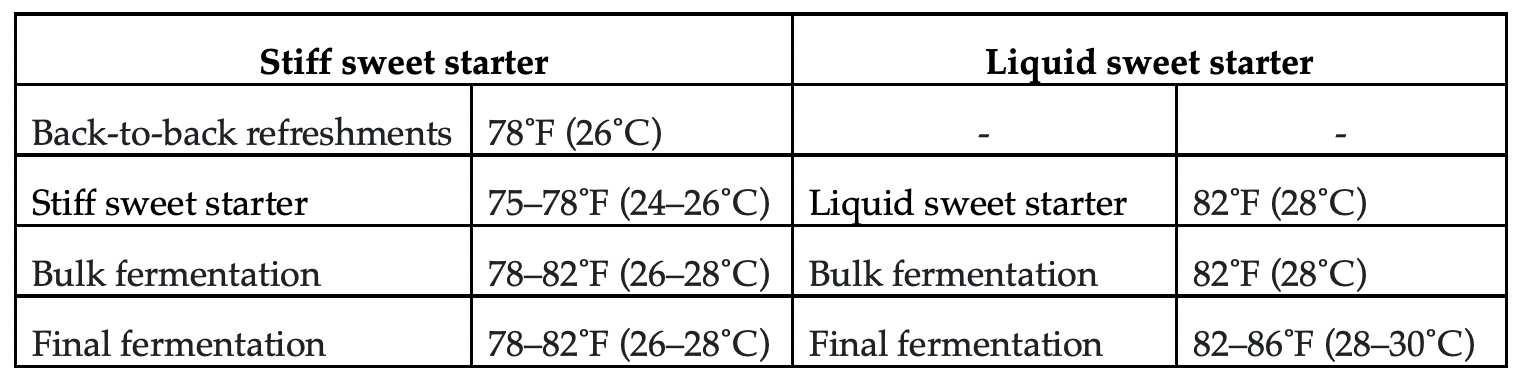
- Temperature control is really important here. Most stages need to be quite warm to proof properly. Here's a table of all the different stages and their ideal temperatures, based upon what Ian, Maaryasha, and Emily told me:
- The bulk fermentation of the final dough is the trickiest part for beginners to grasp, since it doesn’t really look like other enriched breads when complete. A dough that is ready to shape will feel softer and more extensible, slightly smoother, more cohesive, and less sticky than it was when first mixed. The dough might be a little expanded and airy, but it might not.
- You kind of have to go on faith here, and you won't know if all went well until the final fermentation. Here's how Ian describes how to evaluate the bulk fermentation: "You don’t judge readiness by rise, you judge it by final dough performance. Bulk is a setup phase. The dough may not move—but it must still rest." If you are in any doubt, let it proof as long as possible here, because an underproofed one will likely not rise well once shaped.
The stiff sweet starter
Ian's stiff sweet starter is best for doughs that contain 20% or more sugar and high amounts of eggs and fat; I use it for brioche and choreg. The stiff sweet starter requires more work and more time than the liquid one—about 5 days—since before you can build the sweet starter itself, you need to do 2 or 3 back-to-back young-levain builds over the course of a day, setting up the LAB in it for plasmolysis. Here's how Ian describes what happens in this stage:
Using a back-to-back refreshment schema...causes a “thinning” of the bacterial membrane, a trade-off from increased growth rate and cell volume. Their weakened membrane leaves them more susceptible to death or injury due to playsmolysis. Yeast, on the other hand, have the opposite experience. The short refreshments leaves a higher percentage of mother cells with thickened membrane structures in the yeast population, improving their survival during sudden, drastic shifts in osmolarity.
Here's how the entire process usually goes:
- Day one: I'll refresh my starter in the evening and let it proof overnight.
- Day two: First thing in the morning, I will build a levain with a 1:1:1 ratio (equal weights flour/water/starter); for a single-loaf scale, I will use 10g flour, 10g water, and 10g starter.
- I will let this proof at 78˚F until it is airy and about doubled in volume, which takes 3 to 6 hours; mine usually take 4 hours. (I don’t typically use a pH meter here, but if I did, I’d look for the pH to be between 4.2 and 4.0.)
- I'll repeat this twice over the course of the day, for a total of three builds. If your starter is slower to proof than mine, you might only be able to get two builds in. (Which is less good, but still okay.)
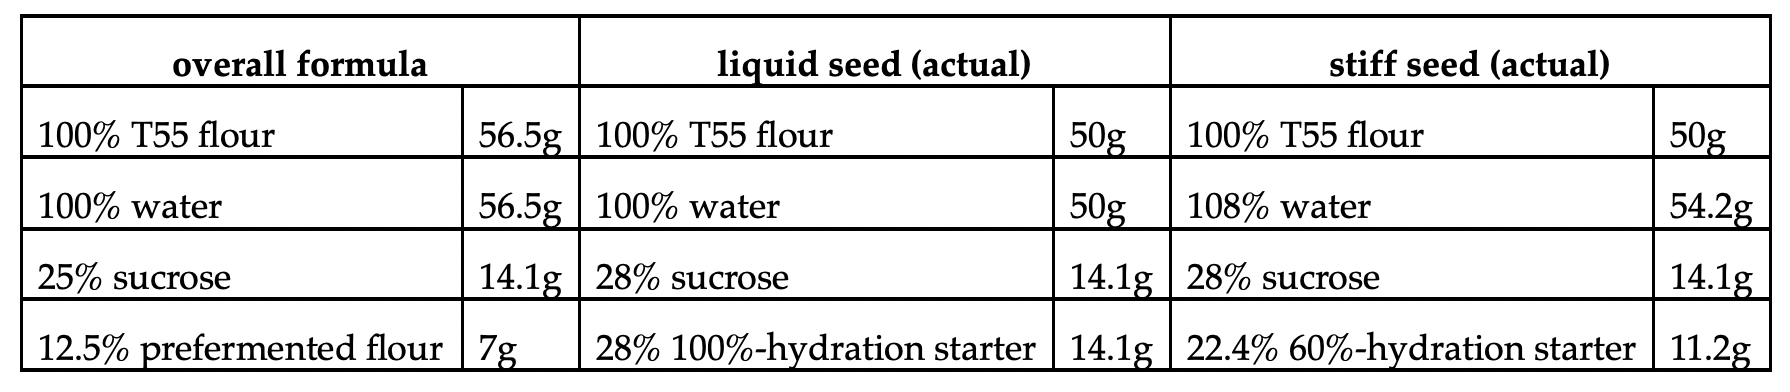
- At the end of the day, I will use the final stage to build the sweet starter using Ian's ratio. The table below shows the overall formula along with the formula and weights for building the sweet starter using 50g of flour, which yields 102g, more than enough for a single loaf. (I use precise amounts in mine, the numbers below are just examples.)
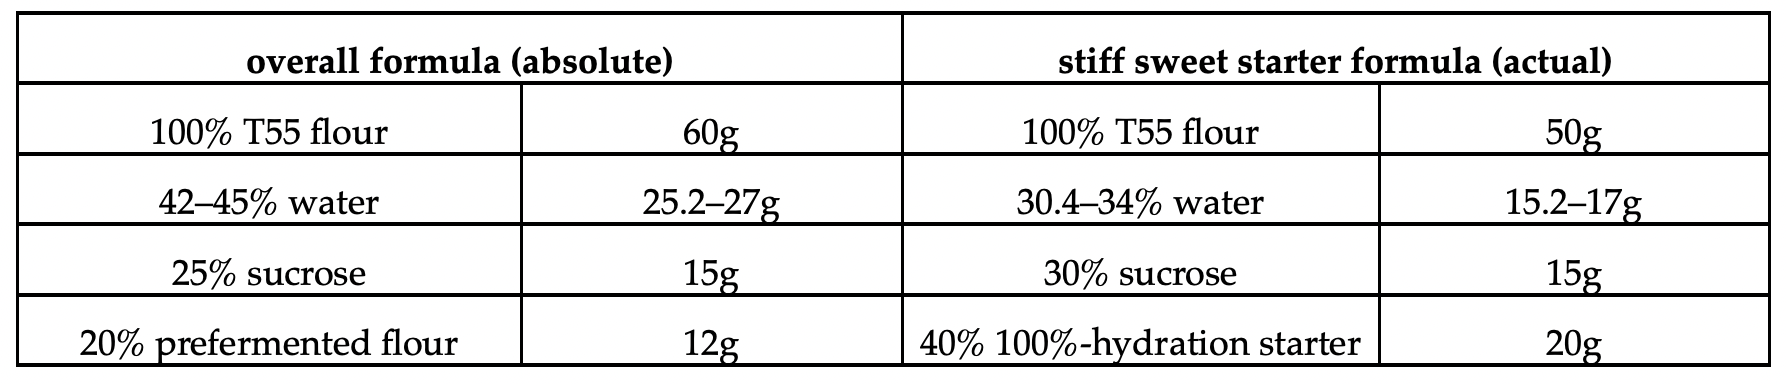
- Though Ian gives a range of hydration for the stiff sweet starter, I use 45% (absolute)/34% (actual) hydration in mine, to make the starter as easy to work as possible.
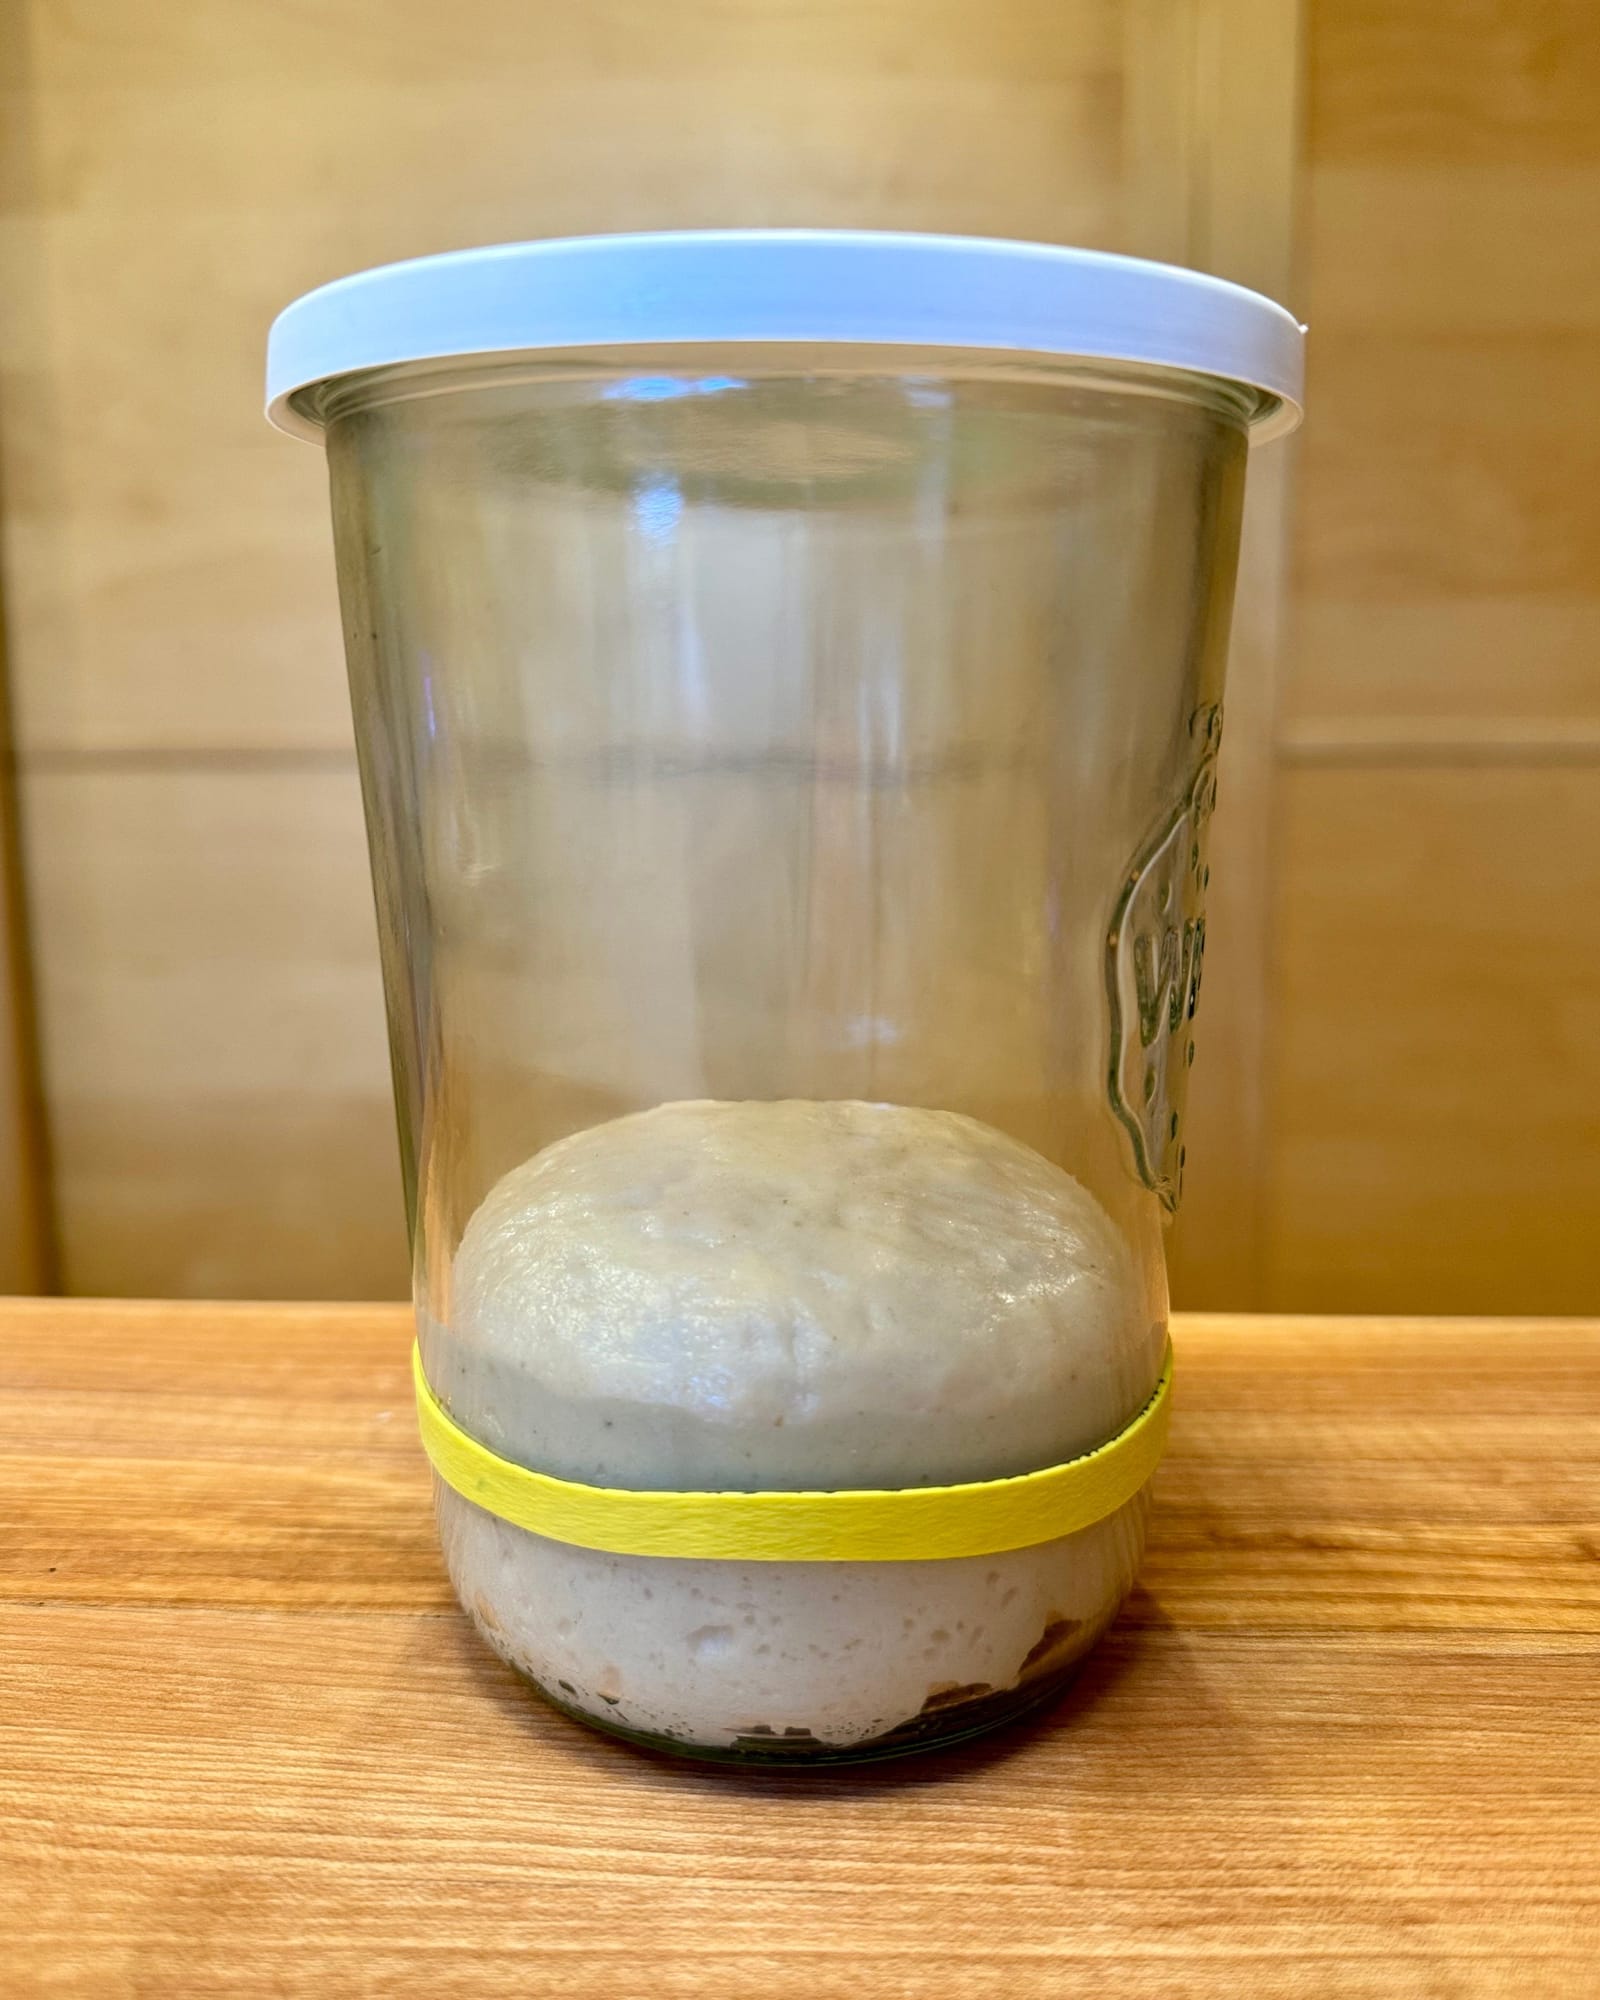
- The stiff sweet starter is very stiff; unlike the liquid sweet starter, it needs to be kneaded by hand on the countertop to get uniform. (Larger quantities can be mixed in a spiral mixer.)
- The stiff sweet starter will proof overnight (10–11 hours) at 75–78˚F (24–26˚C), after which it should be domed and slightly puffy.
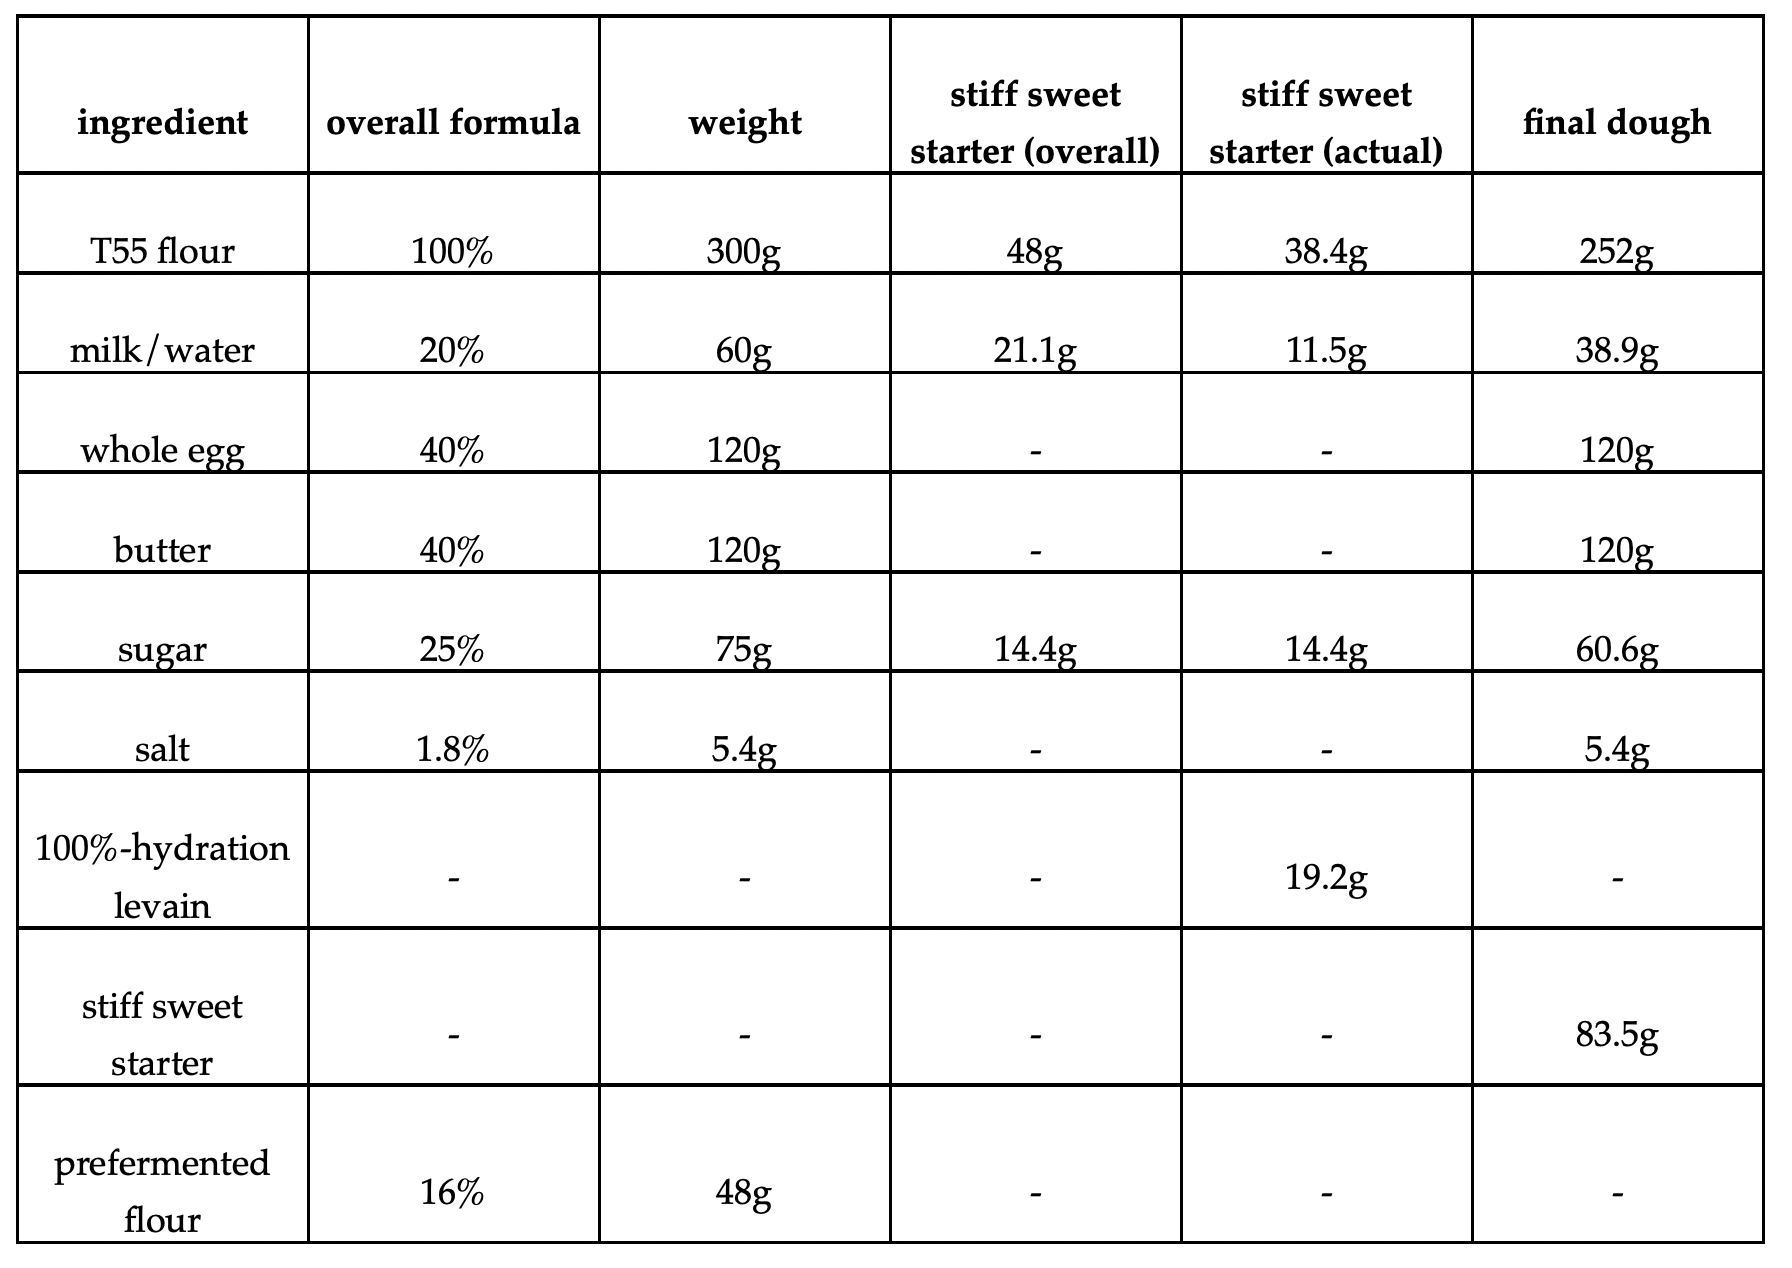
- Day three: First thing in the morning, I will build the final dough using between 12.5–17.5% prefermented flour from the sweet starter; I tend to use 16% prefermented flour, on the higher end of the range.
- This will proof for most of the day at 78–82˚F (26–28°C), getting folded occasionally. Stiff sweet starter doughs need a minimum of 6–12 hours for the bulk proof, and longer is generally better here. (Remember, if in doubt, let it go longer.)
- In the evening, I'll transfer the dough to the fridge to firm up for shaping. It can be held under refrigeration—in bulk or shaped—for up to 4 days total, but I usually leave it in the fridge for about 24 hours.
- Day four: The evening before baking, I will shape the loaves and leave them to proof for 12–16 hours at 78–82˚F (26–28°C). Because of the long final proof, overnight tends to work best.
- Day five: Sometime early the following day, the loaves will be fully-proofed and ready to bake.
Like I said, it takes a lot of time and effort, but the results are 100% worth it.
The liquid sweet starter
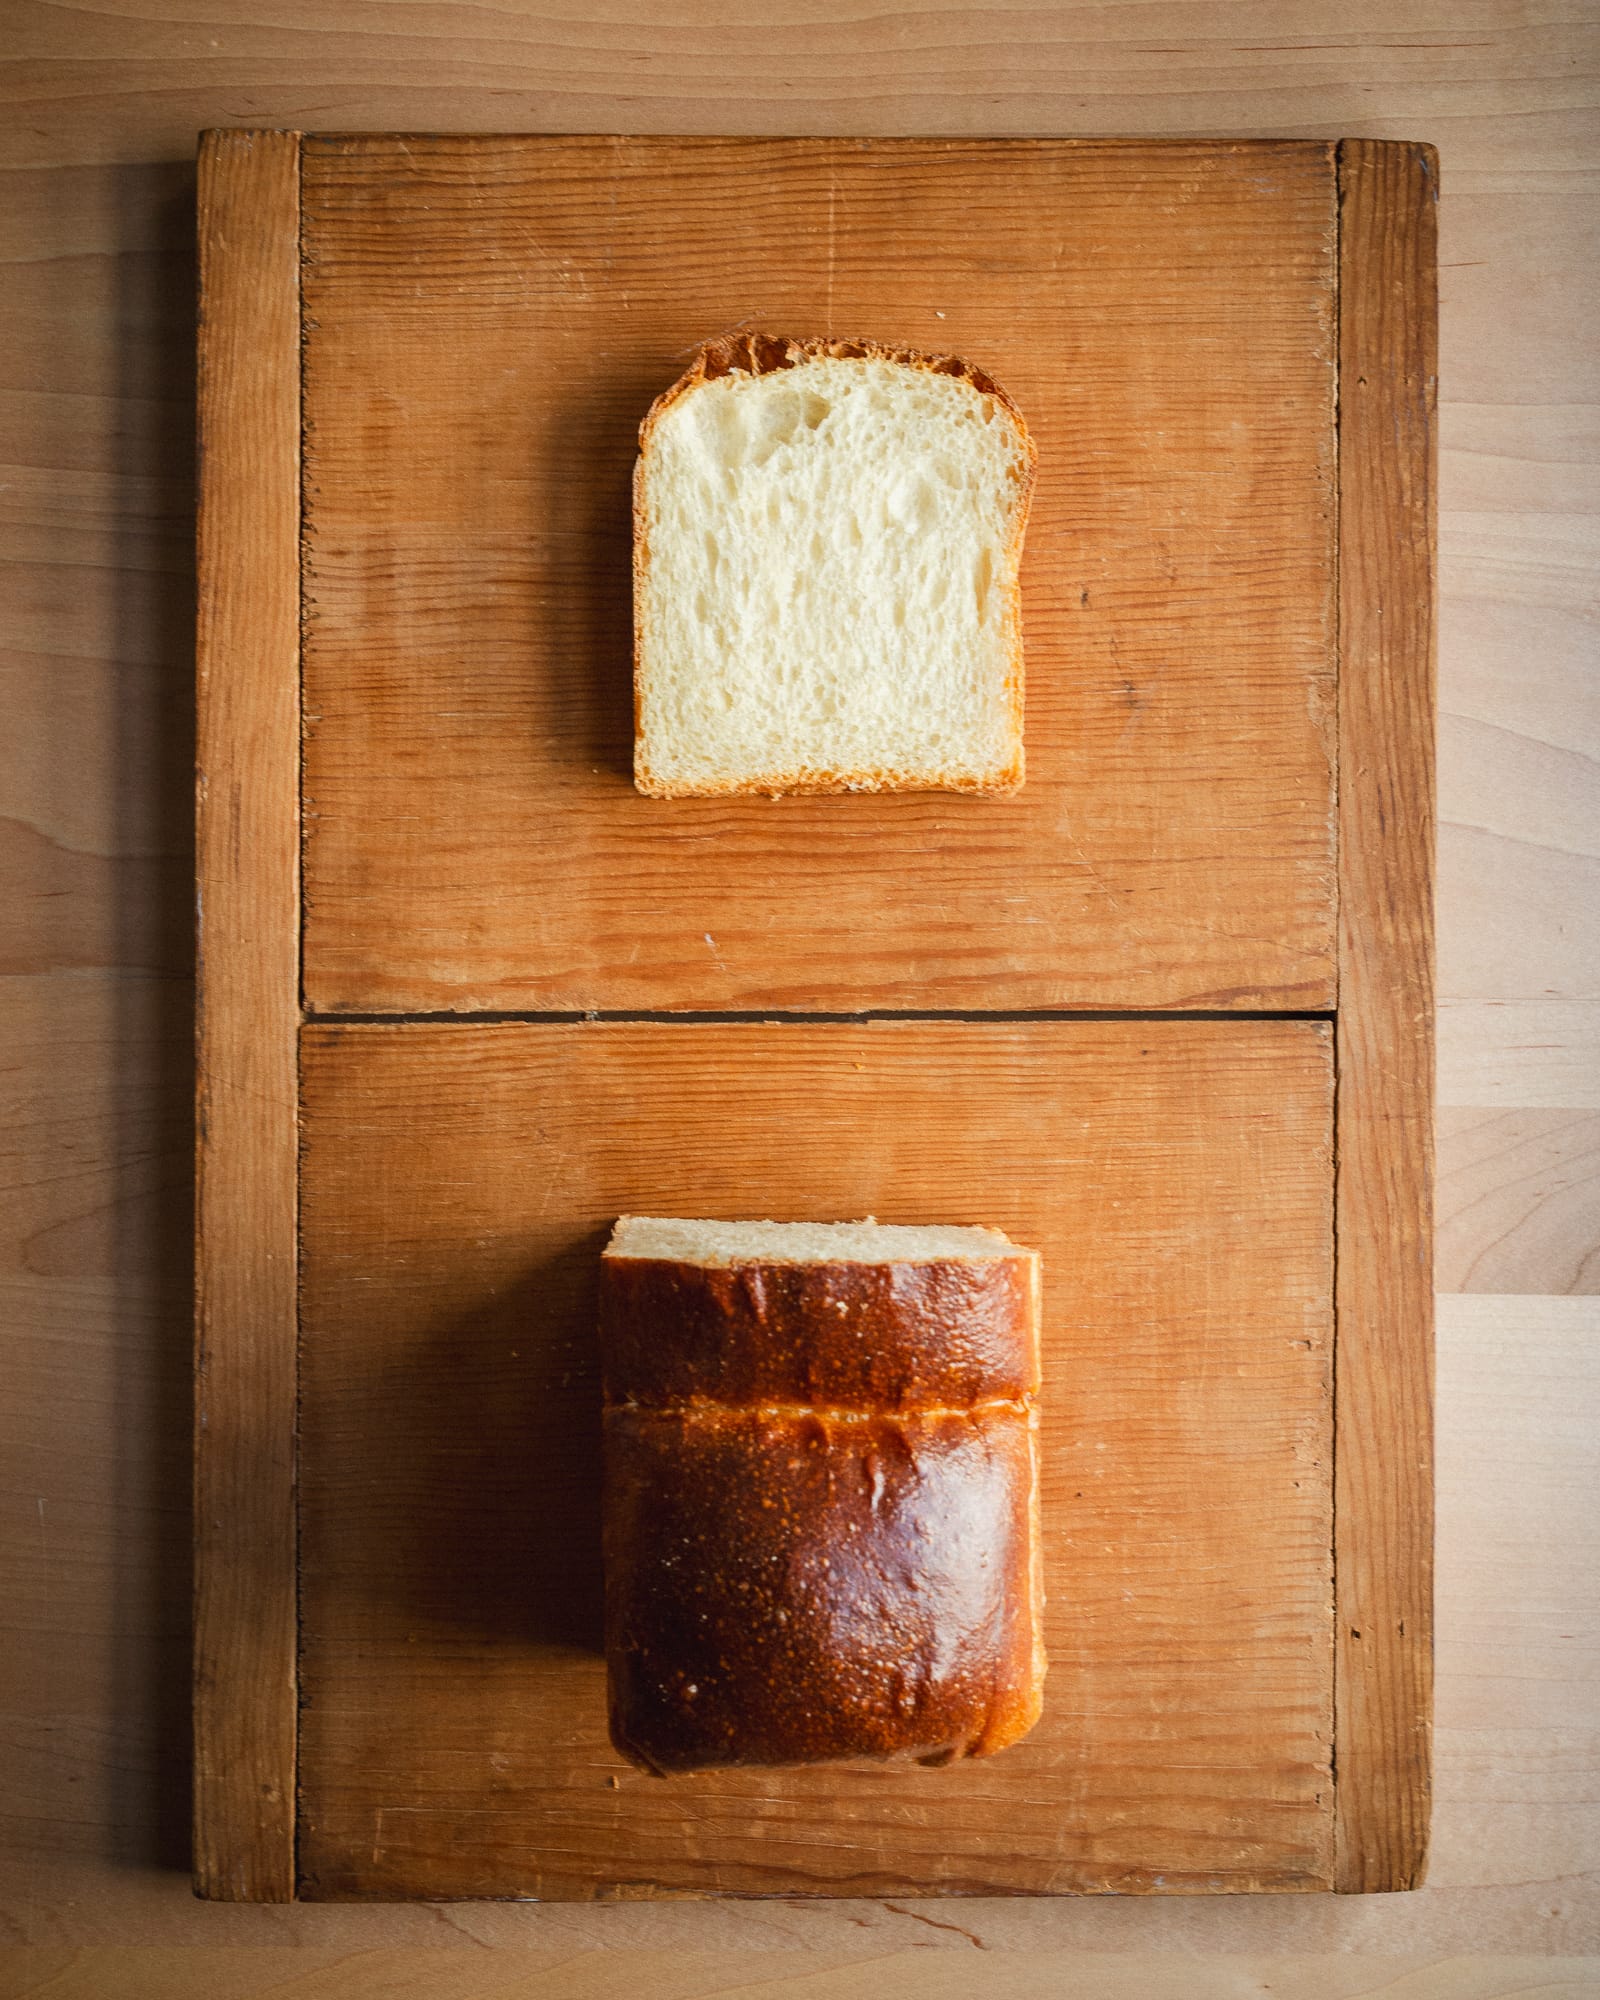
The liquid sweet starter is best for doughs that contain 20% or less sugar and modest amounts of eggs and fat; I use it for shokupan and other leaner enriched breads. The process is a little simpler and a few days faster than that of the stiff one, for a couple of reasons. To begin with, it does not include the multiple young levain builds of the stiff sweet starter; while it would probably be more effective with them, most liquid sweet starter bakers—like Maaryasha Werdiger and Emily Hart—seem to make it work fine without it. And both the bulk and final fermentations take about half as long as that for doughs containing a stiff sweet starter.
Here's how the liquid sweet starter process usually looks:
- Day one: I'll refresh my starter in the evening and let it proof overnight, using my typical stiff hydration (60%). (You can use either a stiff or liquid hydration here, as long as you adjust the formula for the sweet starter appropriately; see below for examples of both.)
- Day two: First thing the next morning I will build the liquid sweet starter using the ratios below, with around 50g of flour, making enough for a single loaf. (I give tenths of a gram here for accuracy, though in practice I round to 1-gram amounts.)
- This will proof for 3–5 hours at 82˚F (28˚C), after which it will be about doubled in volume and airy. (Mine is usually ready after 3 hours.) I don’t usually take a pH reading here, but if I did, I’d look for it to be between 4.2 and 4.0, the ideal pH for a young levain.
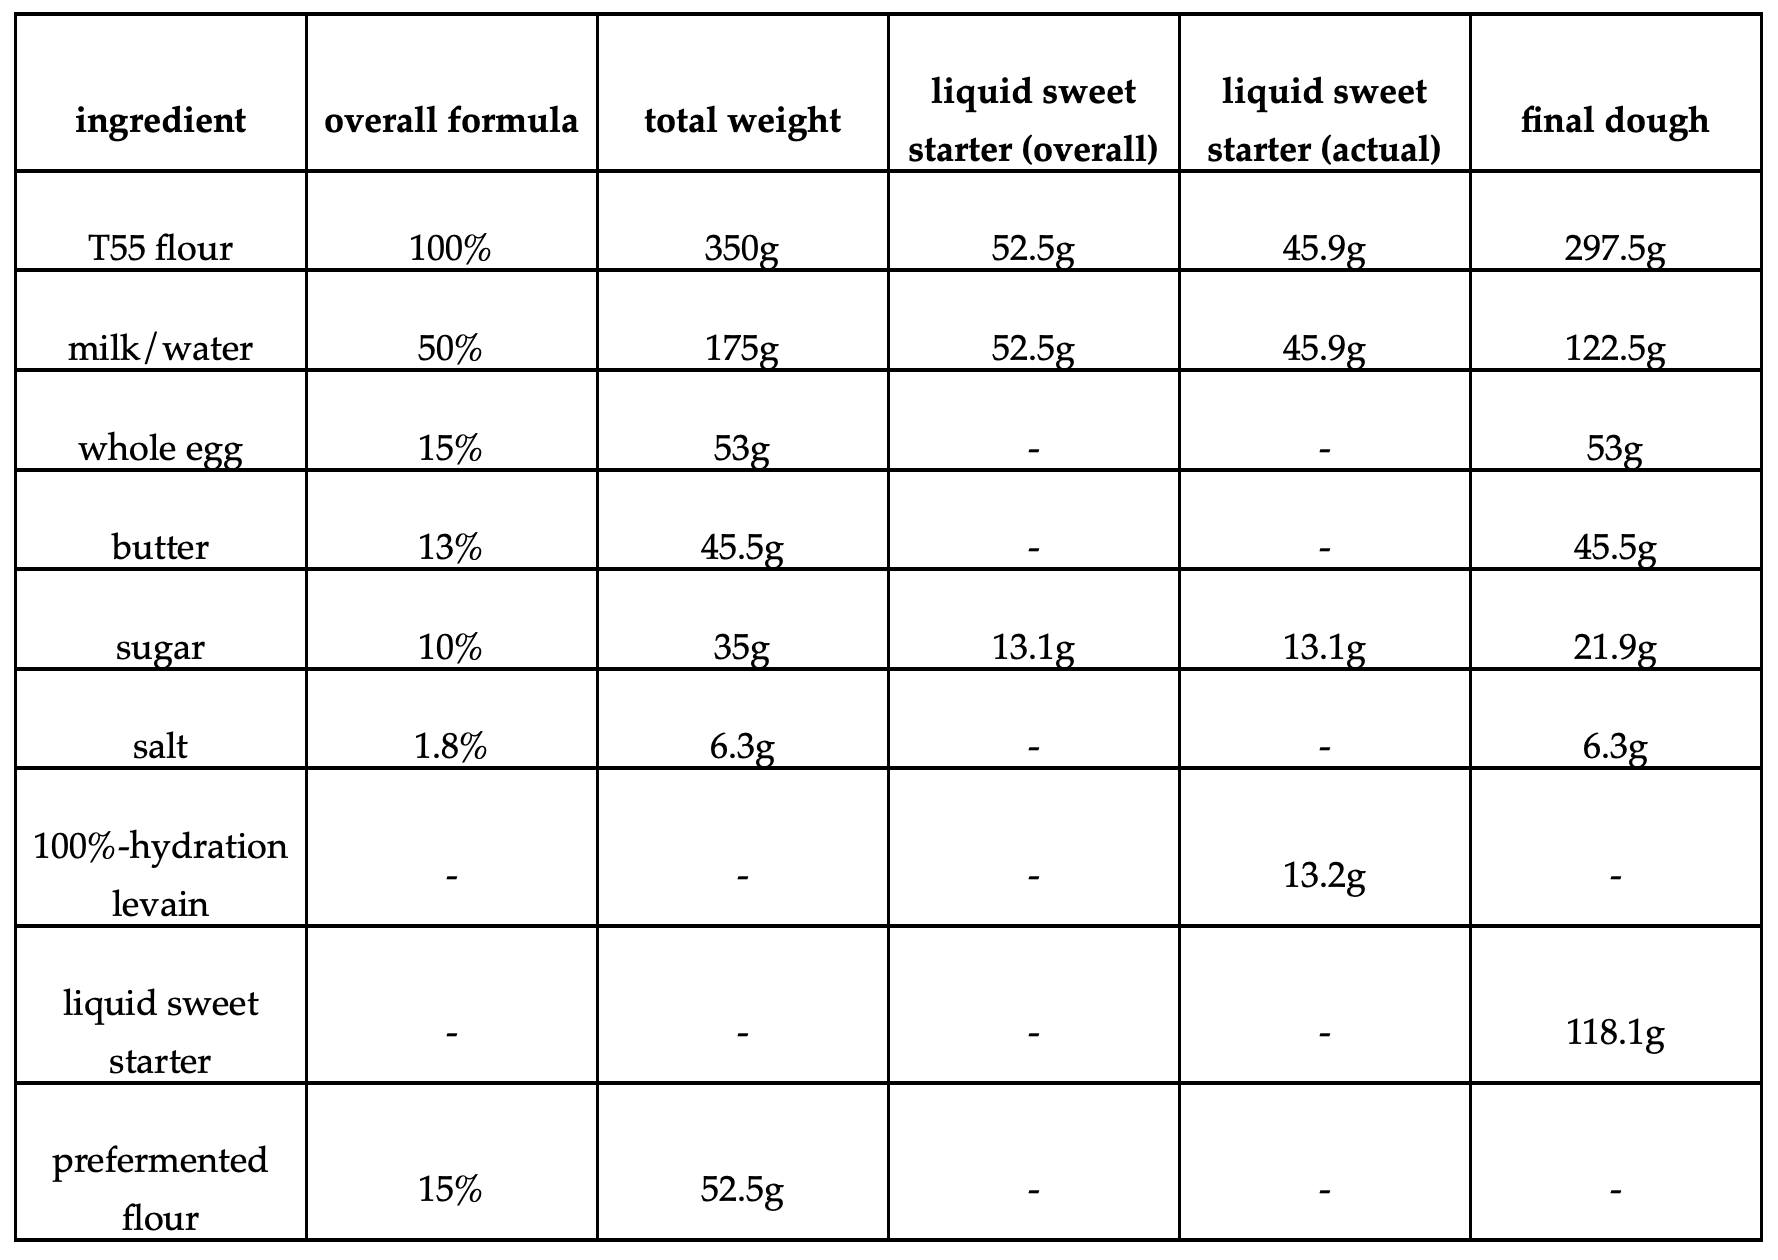
- Midday I will build the final dough using the liquid sweet starter, with between 12.5–17.5% prefermented flour. (I typically use 15% prefermented flour, which amounts to about 120g liquid sweet starter for an average loaf.)
- This will proof for at least 6 hours at 82˚F (28˚C), with occasional folds along the way. Again, it might expand by the end of the bulk, but probably not by much. As before, if in doubt, let it go longer.
- In the evening, I'll transfer the dough to the fridge to firm up for shaping. Liquid sweet starter doughs can be held under refrigeration (in bulk or shaped) for up to 24 hours, but I usually leave mine in the fridge overnight.
- Day three: First thing in the morning, I'll shape the bread and then let it proof at 82–86˚F (28–30˚C) until fully expanded and ready to bake, which should take 5–6 hours.
Creating sweet starter formulas of your own
While it’s possible build a sweet starter formula from scratch, the simplest approach is to convert a reliable yeasted formula, so that the basic contours of the recipe are already worked out. With an overall formula in hand (minus the yeast, obviously), it’s pretty straightforward:
- First I’ll determine whether it will use a stiff or a liquid sweet starter. For leaner and less-sweet breads I’ll use a liquid sweet starter; for highly-enriched breads, a stiff one.
- Then I’ll decide how much prefermented flour to use; I tend to use 15% for liquid sweet starter doughs, and 16% for stiff ones.
- Finally, I’ll determine the weight of the ingredients in the sweet starter, then subtract them from the total weights to sort out the amounts in the final dough.
This is all probably easier to understand by example, so here are two sample conversions, starting with entirely made-up formulas. I’ve given the amounts here to tenths of a gram for accuracy, but in practice I would round to the nearest gram. The tables show both the overall formula for the sweet starters and the actual amounts used, for clarity.
“Lean” enriched bread (liquid sweet starter, 15% prefermented flour)
Highly enriched bread (stiff sweet starter/16% prefermented flour)
Anyone interested in creating a sweet starter formula of their own should be able to use these examples to sort out how, but if anything here could use more explanation, let me know. And if you have any other questions about any of this, please ask away. I've been working with sweet starters for a few years now, but I'm still figuring it all out myself.
Next week I plan to share an actual recipe for a liquid sweet starter shokupan for paid subscribers to play around with. (Eventually I will also share my stiff sweet starter choreg, though I am still working on it.)
—Andrew
wordloaf Newsletter
Join the newsletter to receive the latest updates in your inbox.