You and your new (sourdough) baby
Or: test baking without tears
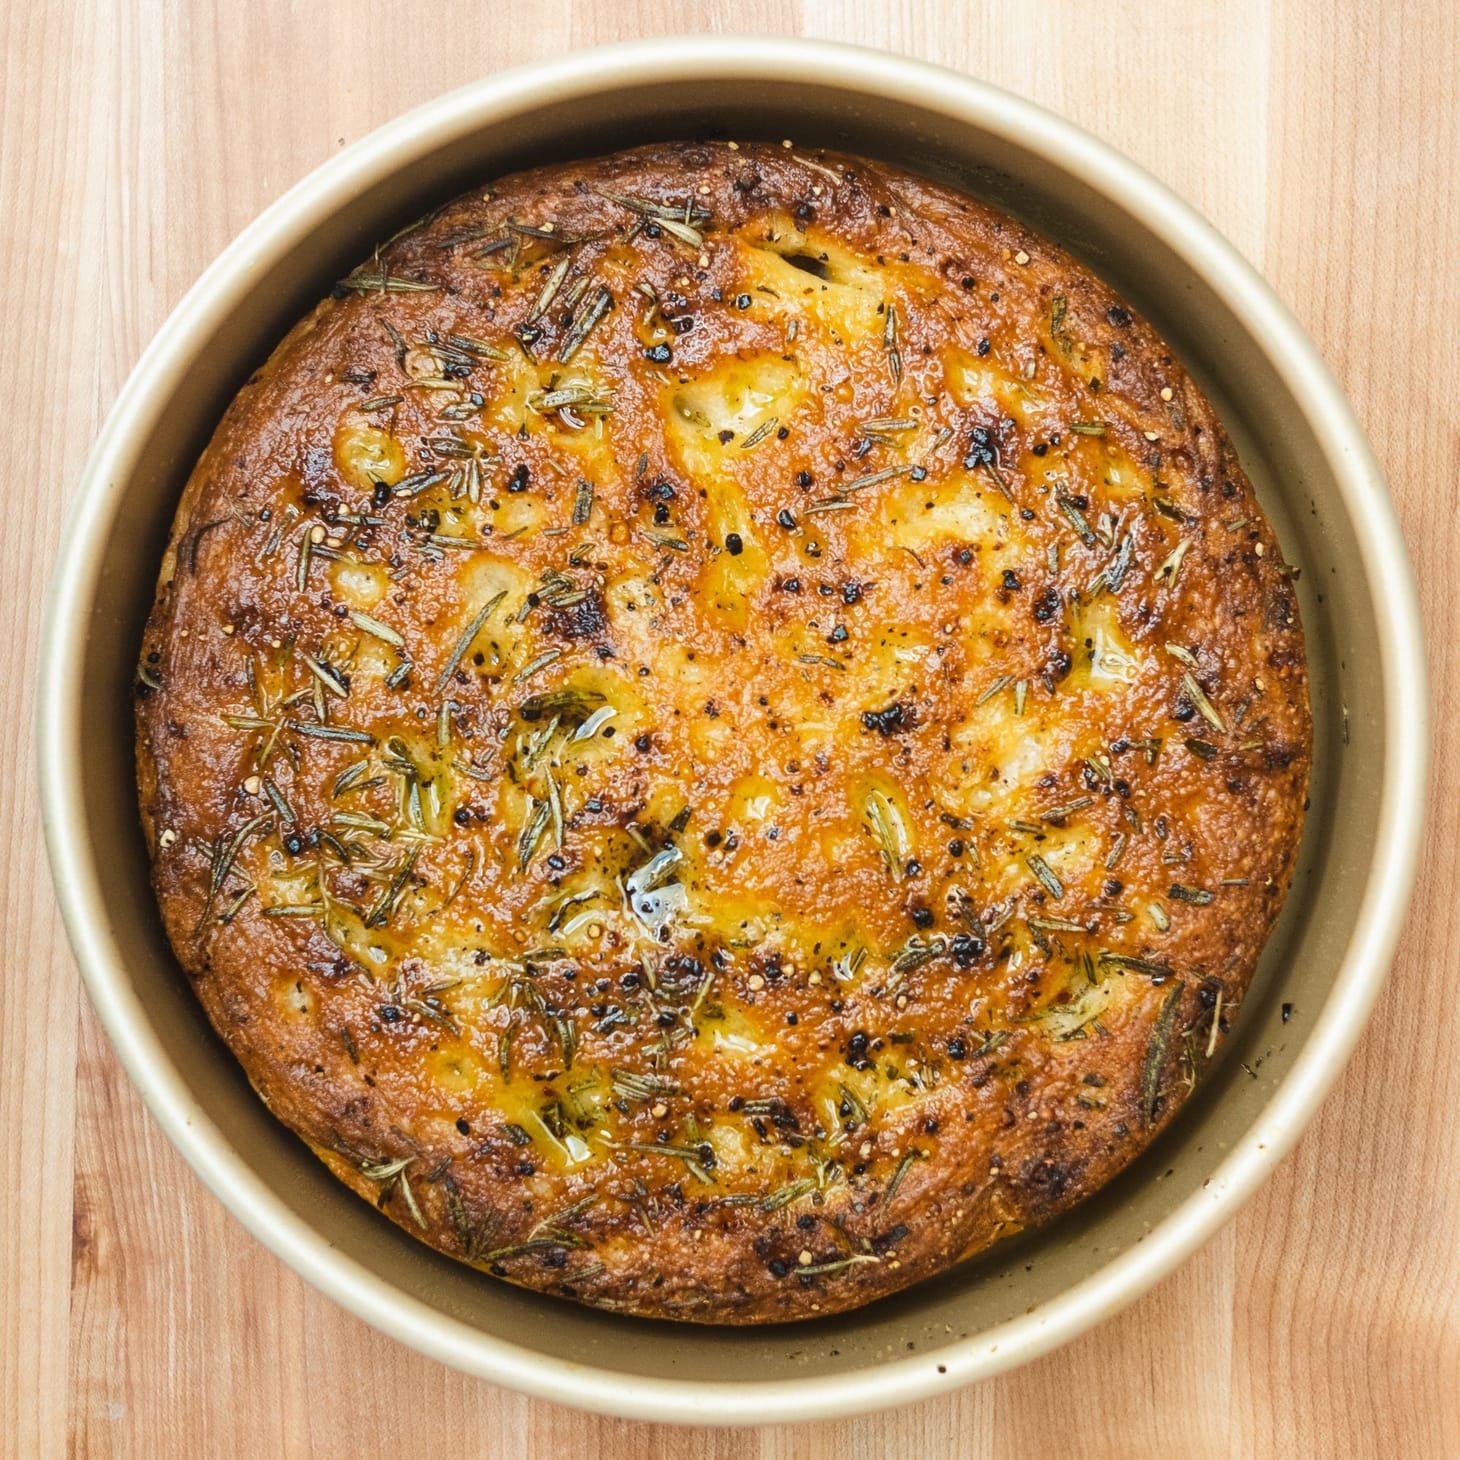
Table of Contents
I’ve shared my sourdough starter—in both dried and live form—with hundreds of people at this point, and have fielded a lot of questions on how to get it into tip top shape for baking. People often experience a slow climb to optimum starter health, particularly when they start from the dried culture.
I’m not entirely sure why this is, but clearly only a subset of the mix of bacteria and yeast survive the dry-down process, and those that do not must be replaced before the starter fully revives. For this reason, I think it’s always best to try to get your hands on a live culture rather than a dried one if you can. I don’t just mean by ordering one of mine—though that is an option too—rather I think you should first ask around locally, surely someone in your network has a sourdough starter they can share with you. (Either that, or ask at your local bakery, where they will usually be glad to give or sell you some of theirs.)
Even when the revived starter appears to be behaving “well”—i.e., doubling in volume within 6 hours after refreshing—I’ve noticed that it can still require additional refreshments before you see reliably robust fermentation and oven spring. And there’s nothing more discouraging than going through all of the effort necessary to produce a loaf of bread, only to have it come out dense and compact. It can feel like a waste of both flour and time.
Which is why I’ve long thought it would be useful to have a simple, quick, and scaled-down recipe to use when you are in the “testing” phases of sourdough starter development—a low-commitment recipe that will allow you to gauge the health of your starter. And one that is enjoyable even if the internal crumb is less than ideal.
At first I thought to just create a small-scale version of one of my pain au levain recipes, but then it occurred to me that many people who are working with sourdough for the first time are also likely new to bread baking generally. Which means it’s possible that less-than-perfect results from test bakes might be the result of inexperience rather than starter weakness.
To avoid this ambiguity, what I needed instead was a recipe that lacked much in the way of complicated shaping, or equipment, or the need to properly judge the quality of development or fermentation. And despite its simplicity, it also needed to be tasty.

Once I realized all this, the answer was obvious: focaccia. Specifically, a dump-and-stir, no-knead focaccia that anyone can pull off without skills, unusual equipment, or practice. Something like this new recipe.
Those of you who have been here awhile will find this one quite familiar, as it is very similar to the no-knead focaccia that I published last September. It differs from that one in a only few minor ways: It’s on a smaller scale (600g instead of 1000g), it doesn't include rye flour, and it’s even simpler to do (no autolyse and no folds, aside from a quick, in-bowl pre-shaping into a rough ball at the end of the bulk proof). Despite the simplifications to the technique, it’s actually just as nice, which suggests I made that earlier one unnecessarily complicated. (It wouldn’t be the first time. You can always sub 5% rye flour here, or just use the method here using that formula.)
Another thing that is different here is that I’m “topping” my focaccia on the underside, tarte tatin-style. (In the image above, the finished focaccia has been inverted and returned to the pan.) For that reason, I’m baking it on a bare oven rack rather than a stone, to prevent the toppings from burning. You can top yours however you like, just keep this in mind: if you put wet ingredients in the pan first, you’ll definitely want to use nonstick spray, or the loaf can stick. With spices and herbs, it’s not a concern.
Using this recipe to evaluate your starter
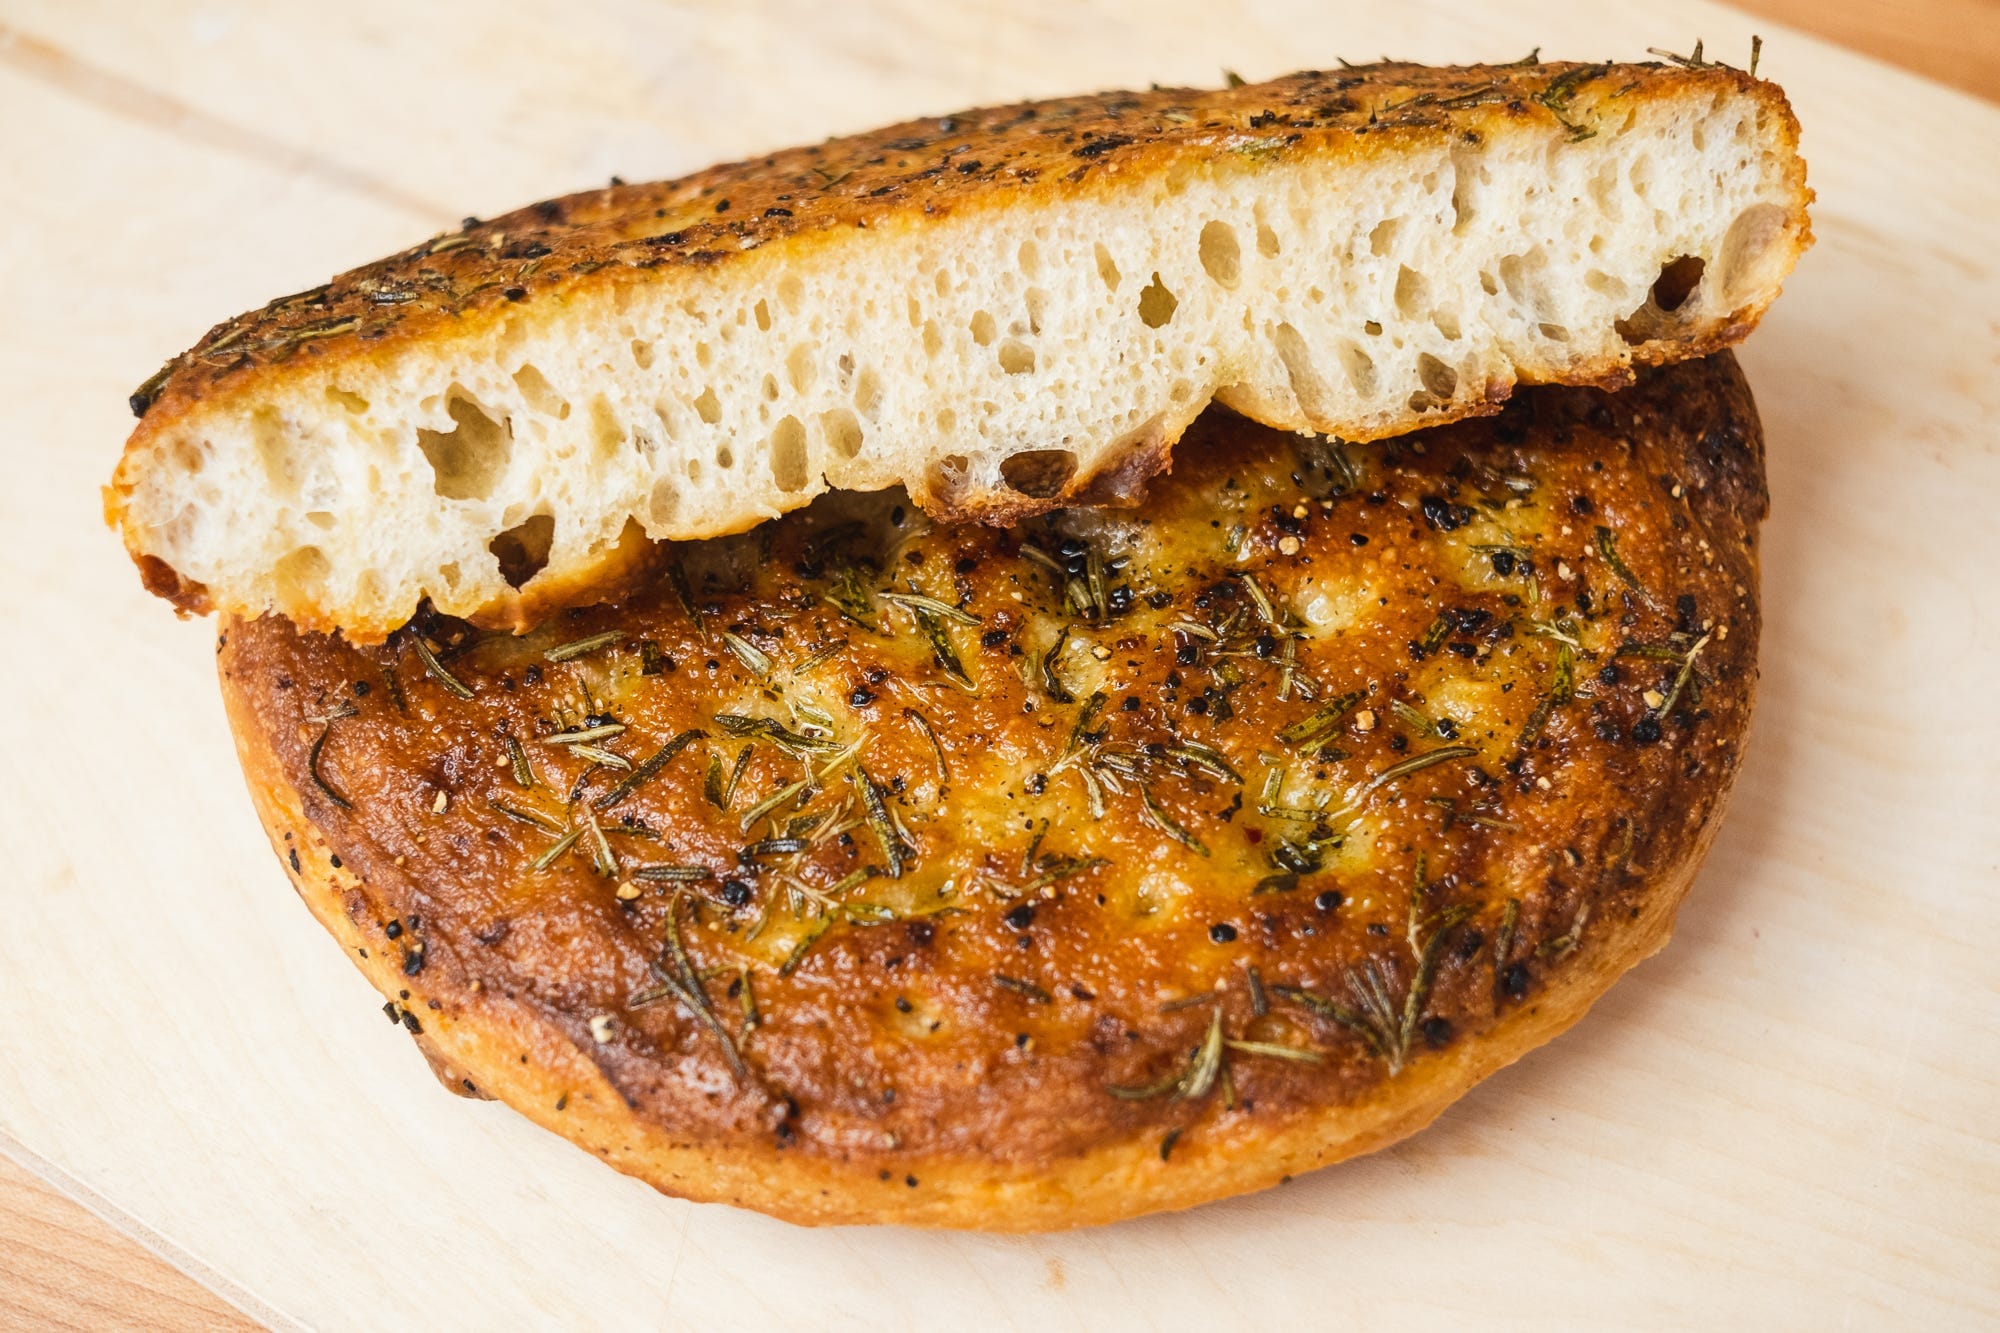
Here’s what the crumb looks like on the inside of my focaccia. You’ll note that it shows a decent mix of large, medium, and small alveoli. If your starter is still immature, you’ll likely see the larger and medium-sized holes, but the smaller ones will be much smaller. That’s what to look for, and what to look for going away as your starter approaches maturity. Once your focaccia looks like mine (and your starter doubles in volume reliably in less than 6 hours when refreshed at 2:2:1 ratio as described here) then you should be good to go.
-> Recipe: No-Knead, Upside-Down “Test” Focaccia
—Andrew
wordloaf Newsletter
Join the newsletter to receive the latest updates in your inbox.
