What Makes a Challah a Challah?
A guest post & recipe by Rachel Mennies
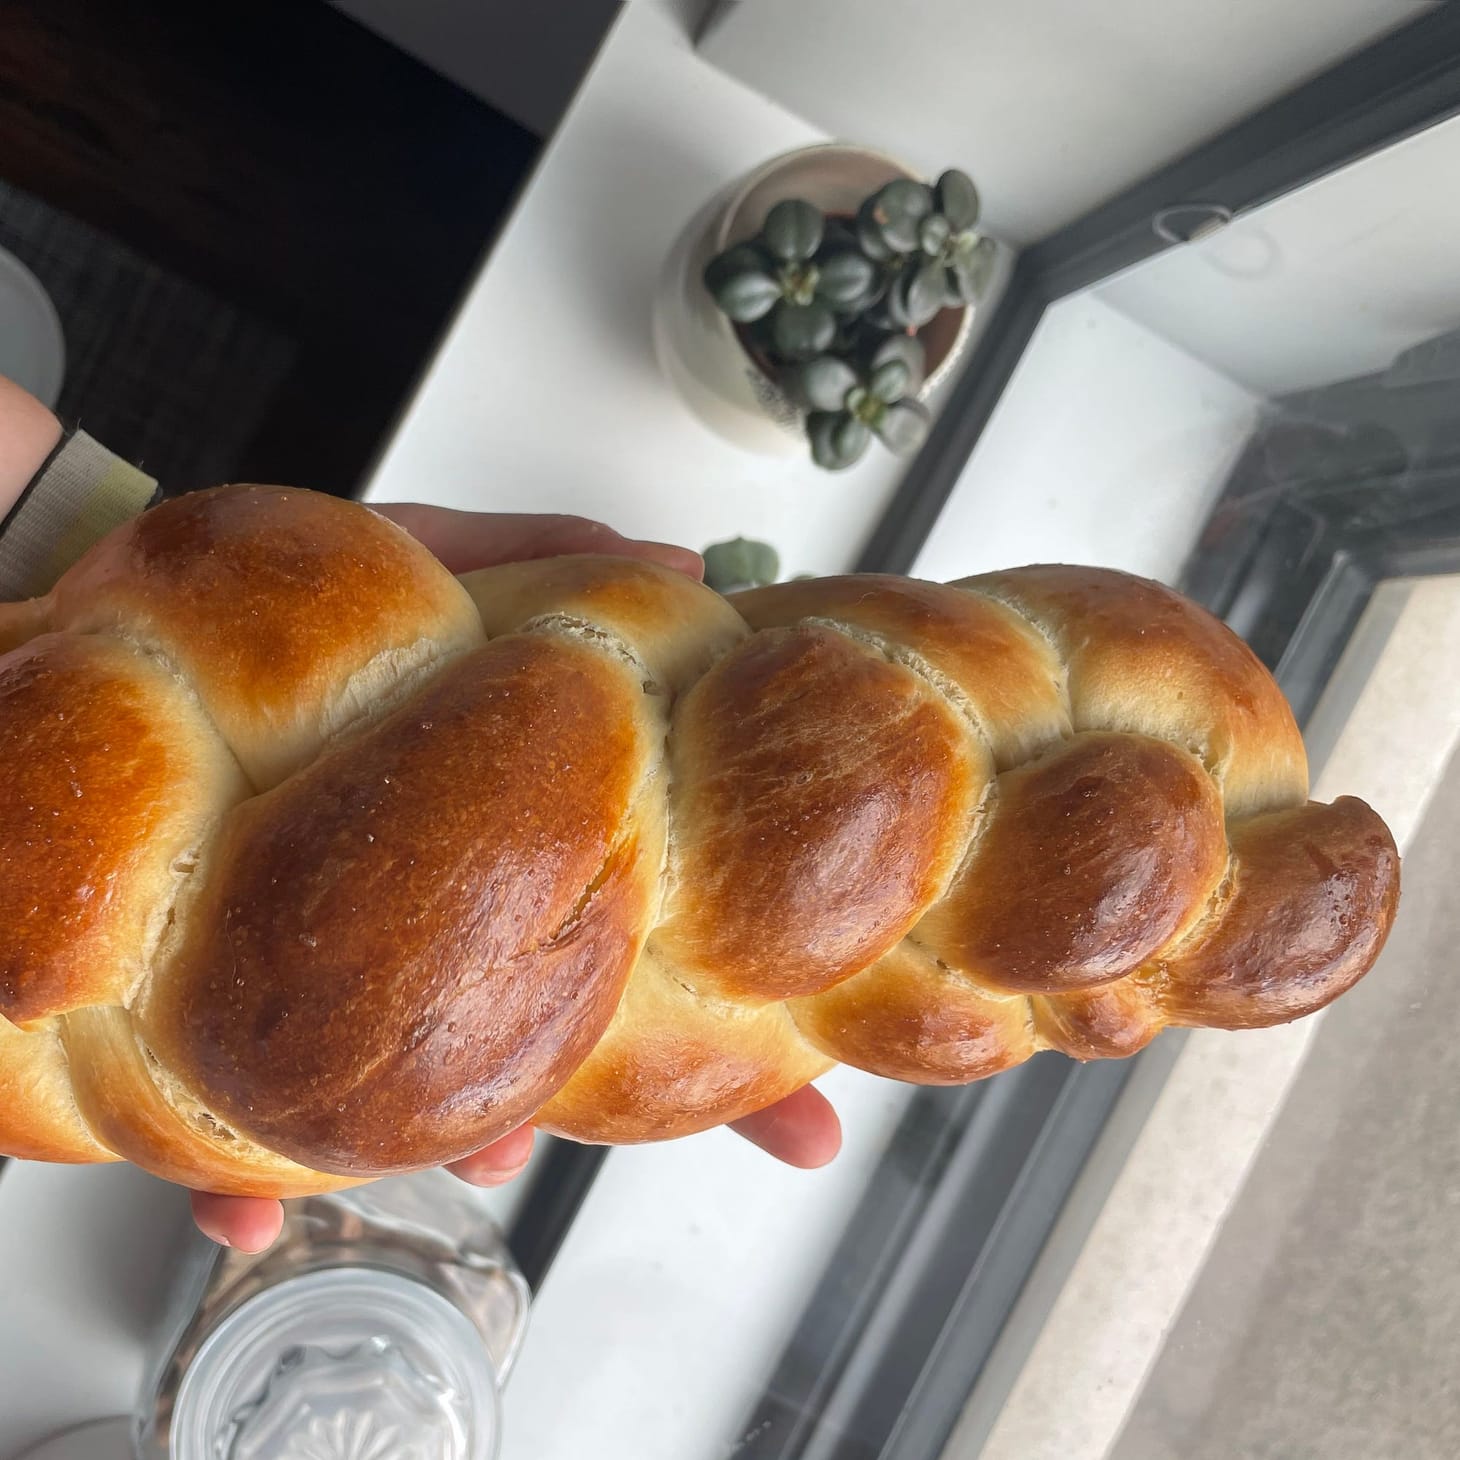
Table of Contents
Today’s guest post is from Rachel Mennies, a baker and poet from Chicago (and sister to Leah Mennies, proprietor of Above the Fold, my favorite newsletter on the subject of dumplings.) Rachel tells the story of—after a lifetime of challah baking using recipes of others, her mom’s especially—she found her way to a challah of her own, one that she calls “Houseguest Challah”, since it’s what you will get if you are fortunate enough to have her as a houseguest. And even if that never happens, she’s shared her recipe below, so you can be a great houseguest yourself.
—Andrew
What Makes a Challah a Challah?
Second to the bagel, challah is perhaps the most-known and most-enjoyed American Jewish food among non-Jews. It’s a “familiar other,” more recognizable if you’re from New York or another diasporic enclave—a familiar other, like a lot of American Jews—like me.
Challah is my portal food to bring to cross-cultural dinners or overnight visits. To those, I bring two challahs, the usual yield of one recipe: one loaf to enjoy at the dinner table and another loaf for the promise of breakfast, whether toasted as-is or soaked in eggs for French toast.
Challah is the centerpiece ceremonial bread for Ashkenazi Jews—those of us who draw their cultural origins spanning from Eastern Europe to Germany or thereabouts, whose ancestors spoke Yiddish alongside whatever language needed to survive in their home country. Challah is usually made before sundown on Shabbat to commemorate the holiday’s start and is blessed before dinner. There are a couple key characteristics that distinguish challah from other enriched breads, beginning with its shape, which varies depending on the holiday: plaits for the Sabbath, or rounds for the High Holidays to commemorate the returning cycle of a new year.
Unlike other enriched breads, a truly kosher challah is made without dairy or meat derivatives, relying on vegetable oils for fat and a contested number of eggs—which are considered pareve, or neither dairy nor meat, in the kosher laws known as kashrut. This means challah can be served alongside a dairy brunch or a roast-brisket dinner with equal flexibility. Some challah bakers sweeten their loaves with honey—which, I learned while researching for this article, is kosher!—others with sugar (more on that below).
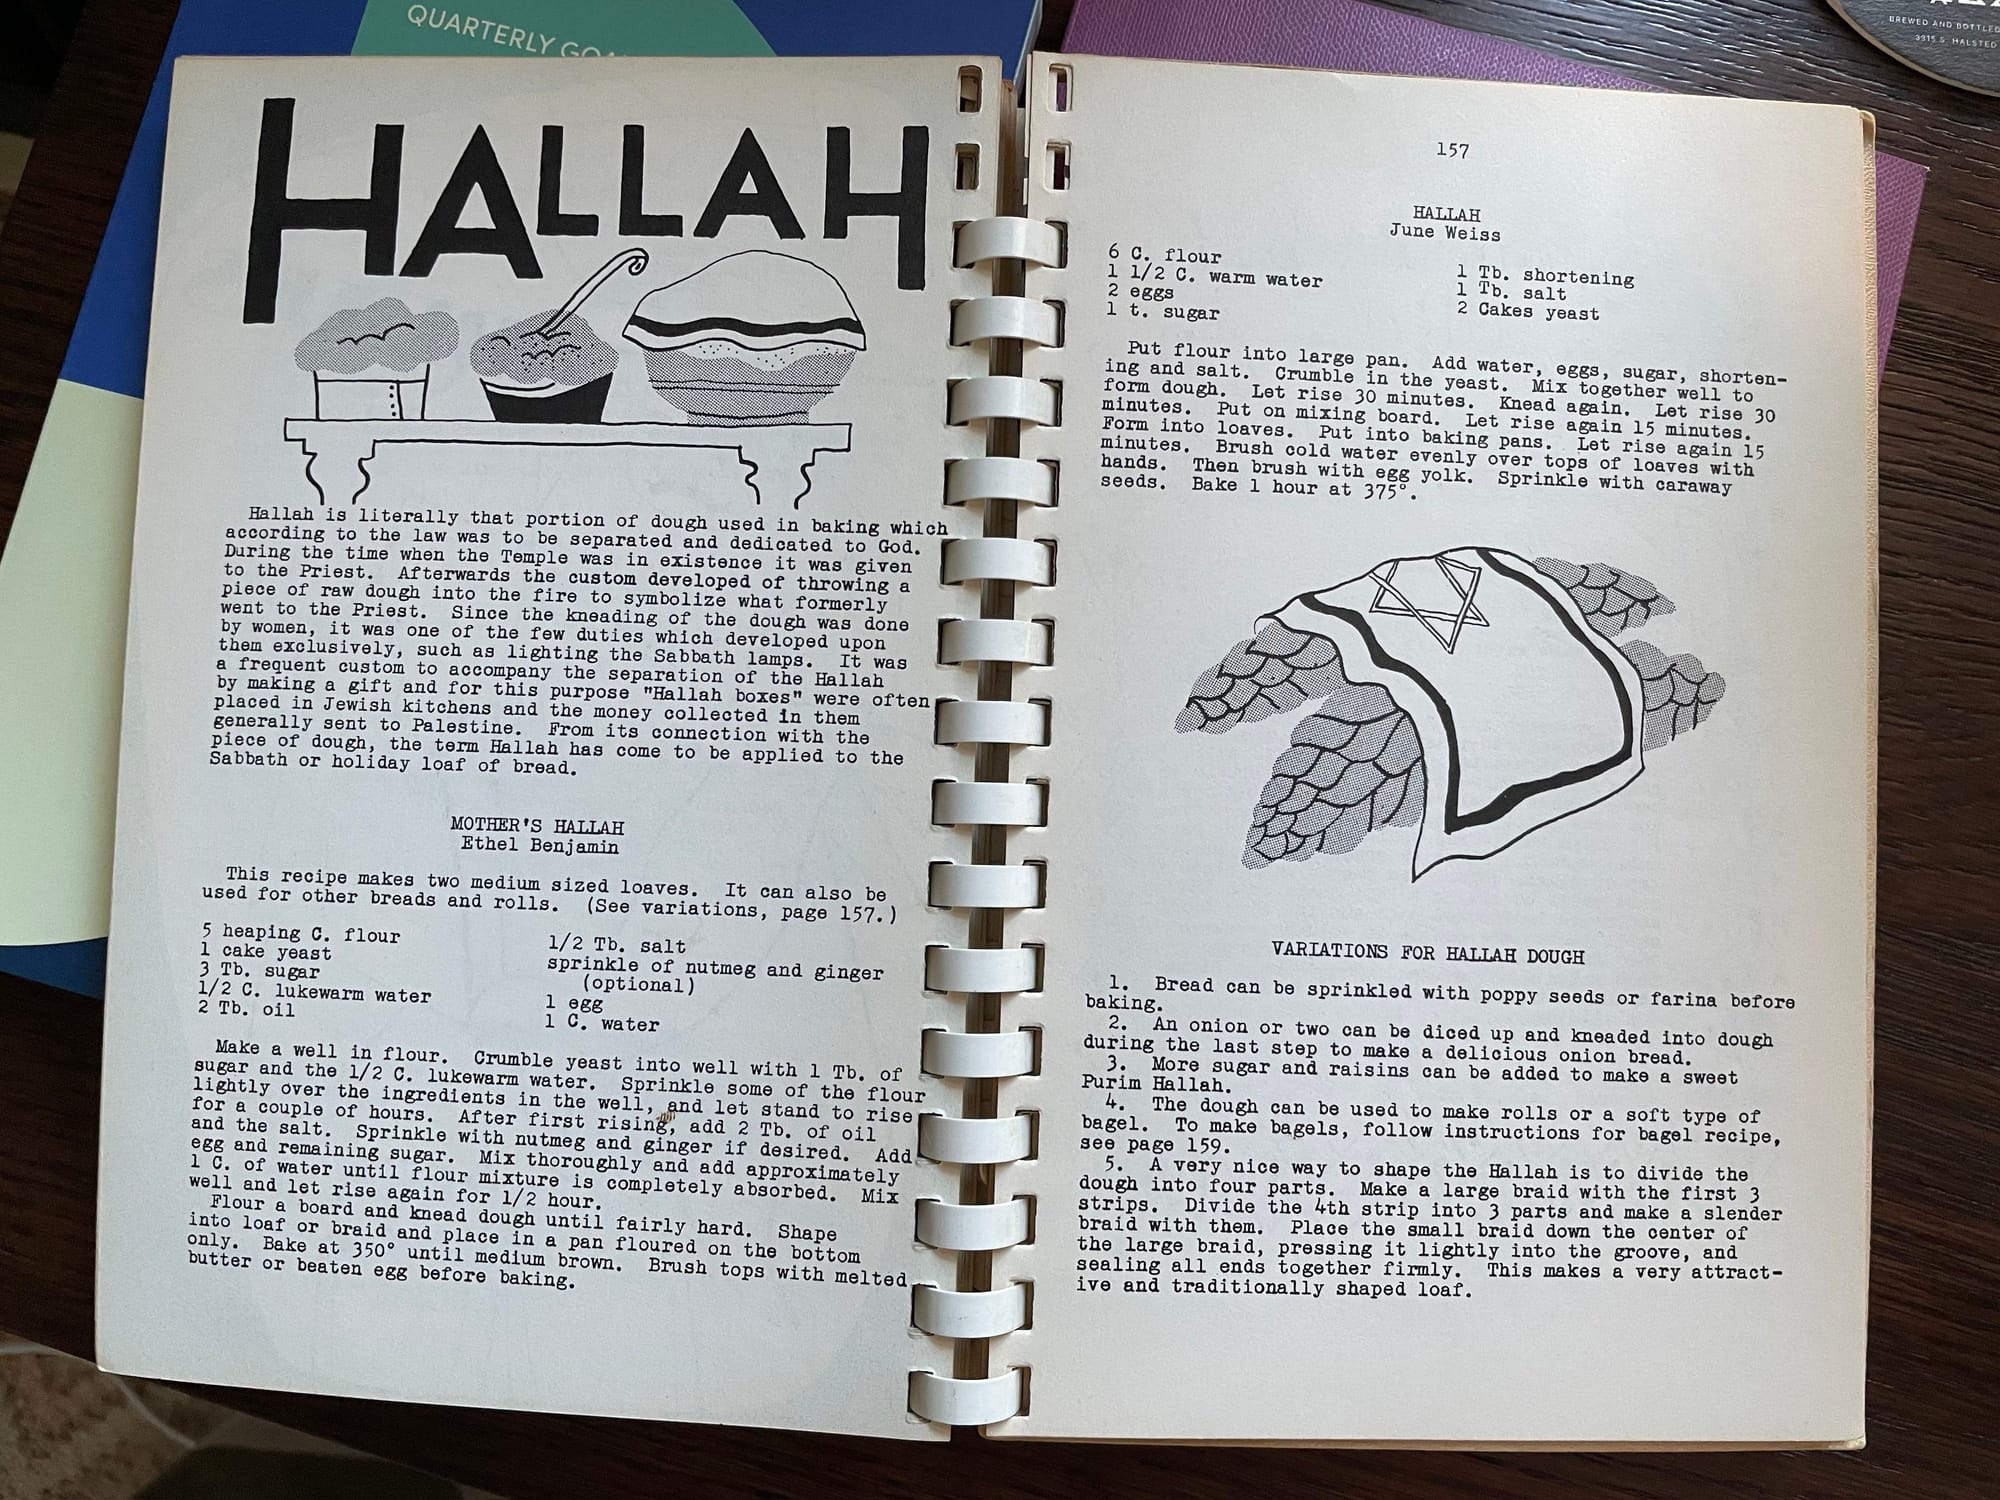
I cannot do justice to challah’s vast history and origination in this post, and for the curious, I direct you to Maggie Glezer’s A Blessing of Bread to learn more. What I can share is my history with the bread, which begins with my mother’s recipe—sourced from the Philadelphia Hadassah Cookbook, published in 1982—from which we braided and ate together often as a family. Her adaptation recipe, which I used for many years as the gold standard for all other challah recipes, is also comically loose in its measurements, and my mother has fiddled with it further over the years (less flour! more salt!), to the point where I often judged the “right” amount of flour entirely on feel. While this makes my mother’s a cherished recipe, it’s certainly not duplicable to others on vibes alone. And during lockdown, when I struggled, deeply lonely, to replicate family Shabbats in solitude, I found myself beginning to investigate the question that lives at the heart of this post.
What makes a foolproof challah?
Or—perhaps more existentially—what makes a challah a challah in the first place at the recipe level, its grams of sweetener and number of yolks?
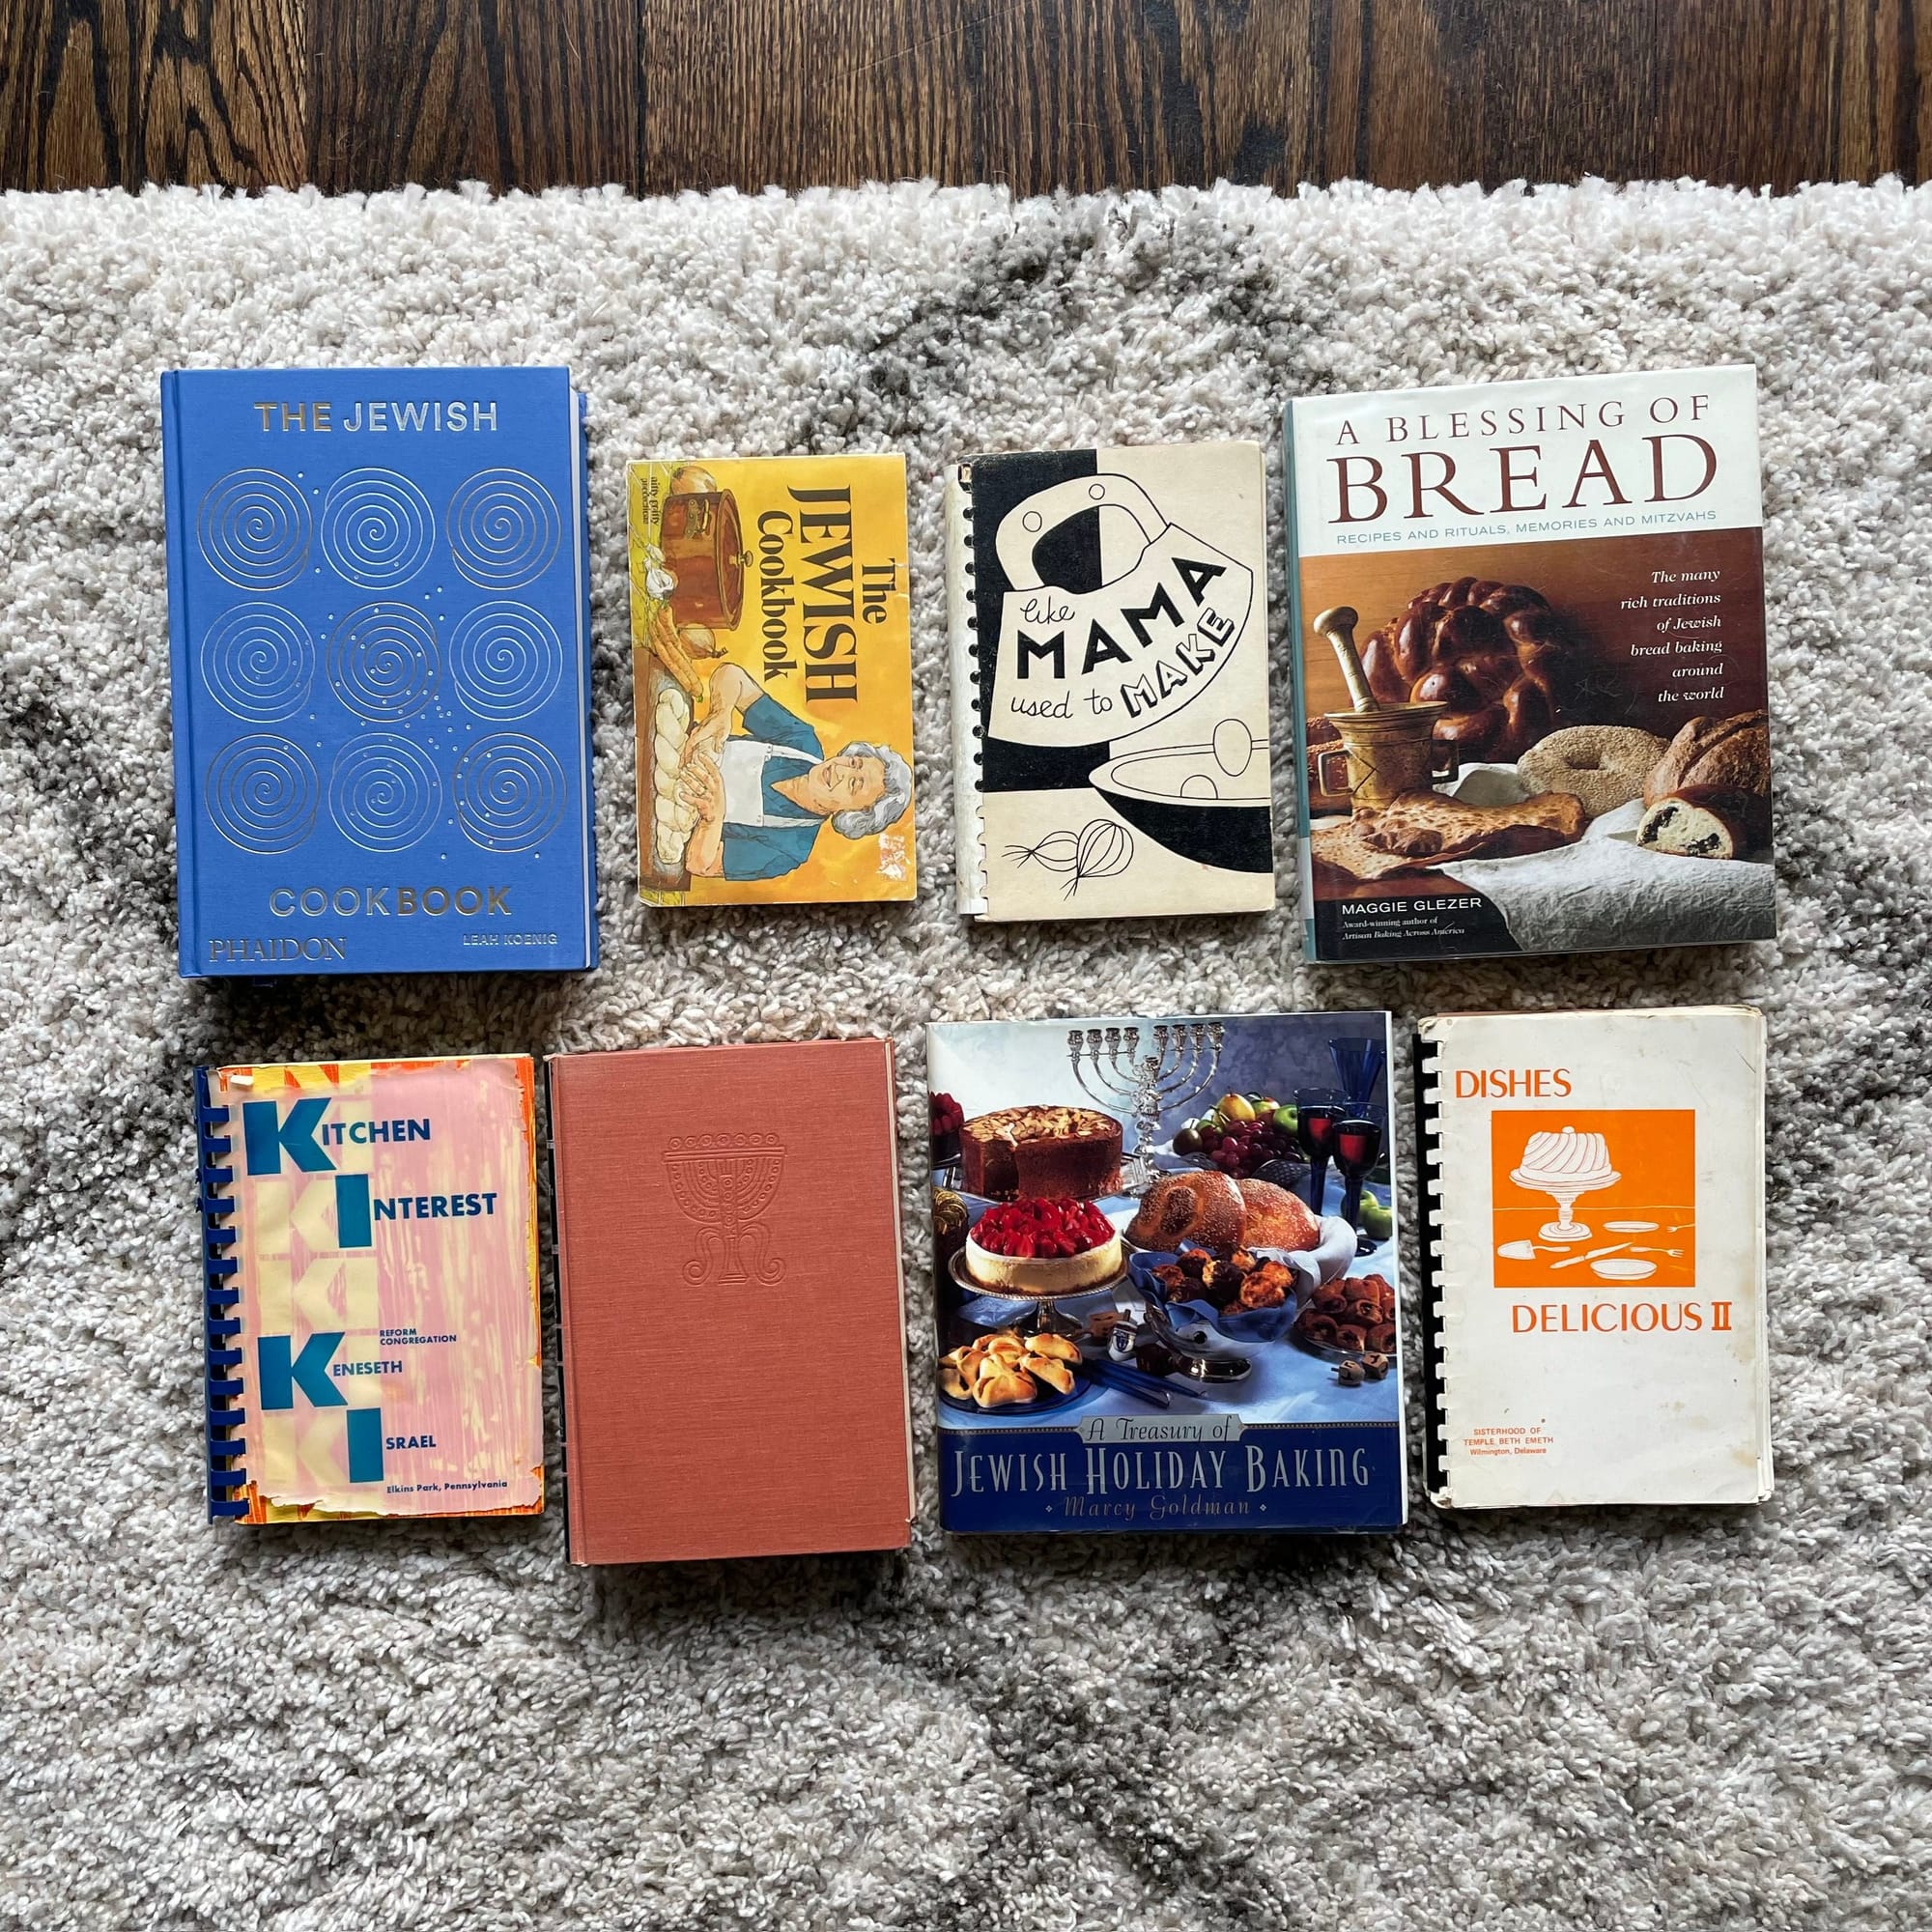
To answer this question, over the next couple of years, I bought or borrowed and read as many Hadassah cookbooks—which, as spiral-bound recipe books sourced from synagogue members, serve as fantastic time capsules for challah recipes over time and by region—as I could find on eBay and Etsy and, to those, added staple challah recipes from my own collection of baking and/or Jewish cookbooks, including Leah Koenig’s epic Phaidon The Jewish Cookbook, and recipes from popular, trusted online baking sites like New York Times Cooking (home of legendary Jewish cook Joan Nathan’s recipe) and King Arthur Baking.
Despite challah’s ubiquity in American Jewish baking, its recipes, it turns out, are far from uniform, with the most ingredient variation appearing around enrichment options and quantities:
- Fat: usually some form of oil, but vegetable shortening really had a moment in the Hadassah books, as did margarine here and there.
- Number of eggs and, specifically, egg yolks: I’ve seen recipes with as few as one whole egg plus one yolk (my mother’s recipe) all the way up to four whole eggs (Nathan’s) and even seven yolks (Michael Solomonov, from the Zahav cookbook), which—while a delicious loaf—feels like a luxury.
- Ashkenazi Jews represent only one of the many diverse Jewish ethnicities, each with their own approaches to challah ingredients that I can only begin to do justice to here. One example: in Sephardic tradition, the challah-cousin pan de calabaza is prepared during the High Holidays and includes squash or pumpkin as well as warming spices. Koenig writes in The Jewish Cookbook that some South American Jewish communities, like in Brazil, add mashed yuca to theirs instead.
- There are also what I like to call the “resilient challahs,” made with what was available out of necessity or economic constraint. This includes the berches, or wasser challah (water challah) of the Ashkenazi diaspora, which uses potato instead of eggs and happens to be vegan. I tested this over the summer; its crumb is incredibly tender and soft.
From within these exciting variations, I knew my recipe, as a blank-slate, basic-but-customizable challah recipe, must be kosher; I also wanted it to be makeable in nearly any kitchen, with ingredients that most folks keep on hand unless they do not bake at all (AP flour instead of bread flour; sugar instead of honey; a flavorless and affordable oil; no stand mixer required; adding fewer whole eggs in lieu of a pile of yolks). These choices were made for flexibility and ease—though I encourage more adept bakers to riff on this core. Olive oil tastes delicious in challah (and confers a stunning pale-yellow color); so does floral honey instead of sugar; so does a blend of flours, though veering into entirely whole grains will require attention to the liquid ratio—and I wouldn’t necessarily recommend the adventure, as a feathery, light crumb is part of challah’s signature.
My goal entering into the development of this recipe was, foremost, to honor the traditions and patterns I saw emerging from these myriad recipes—to make a true challah, not any other sort of braided loaf. However, as with anything else Jewish, a “true challah” is hardly of one mind.
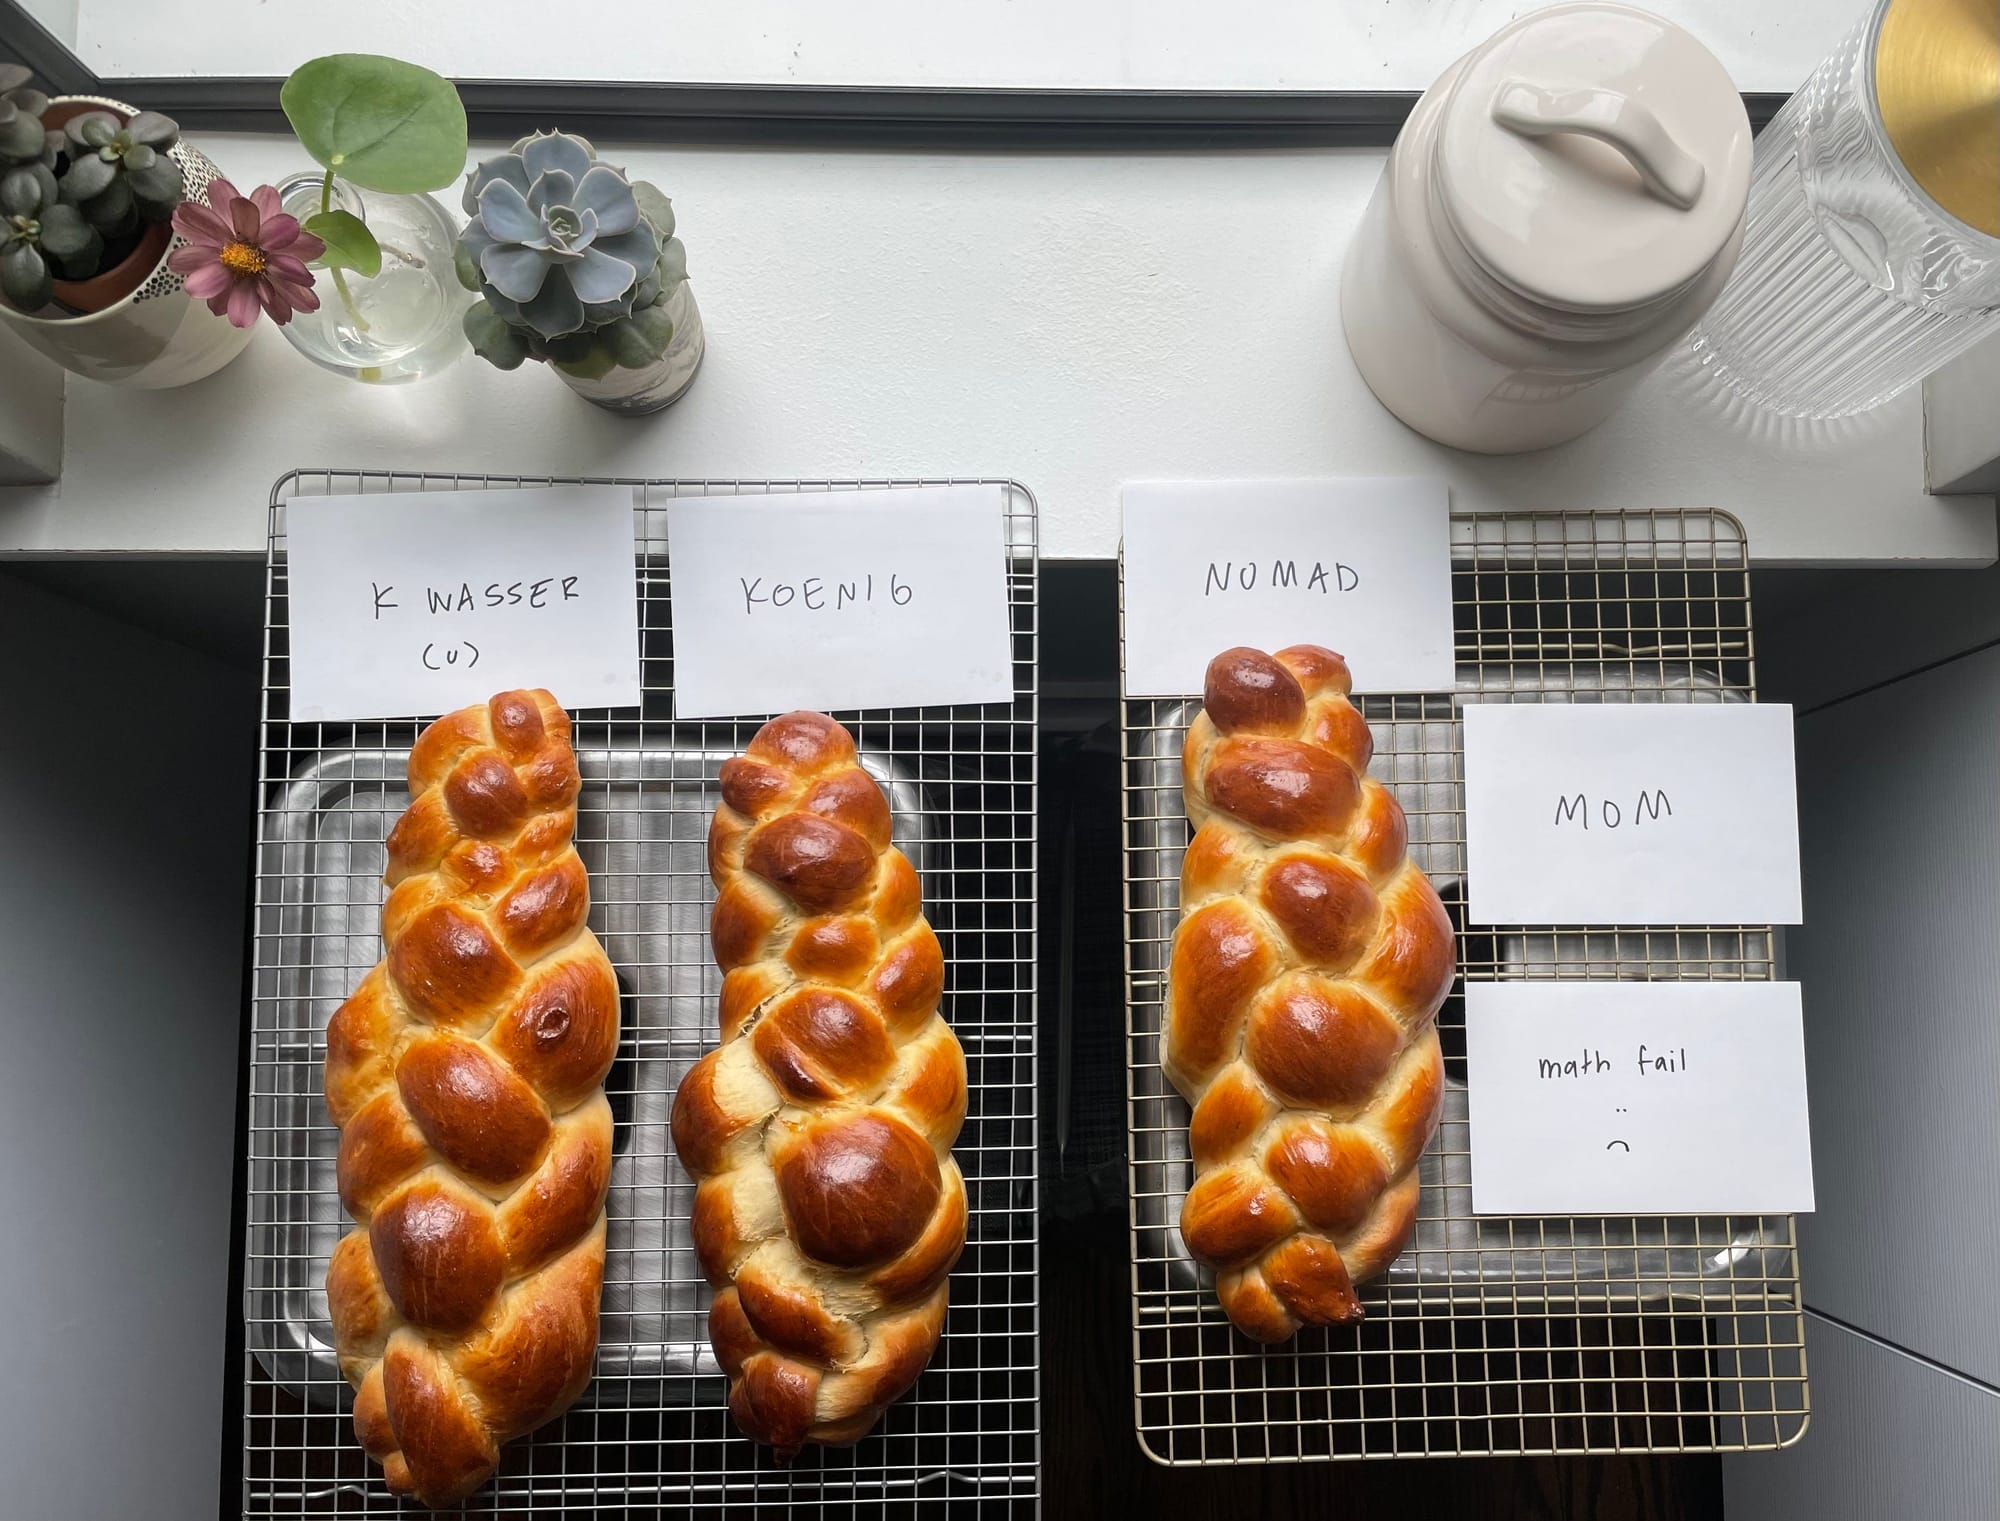
My goal entering into the development of this recipe was, foremost, to honor the traditions and patterns I saw emerging from these myriad recipes—to make a true challah, not any other sort of braided loaf. However, as with anything else Jewish, a “true challah” is hardly of one mind. After eliminating recipes that didn’t meet my above criteria, I narrowed down my trial list to three recipe-testing sources, with the wasser challah being a curiosity fourth-add:
- My mother’s recipe, as the representative of the Hadassah home-baker set;
- Leah Koenig’s recipe from The Jewish Cookbook; and
- Challah royalty Cheryl Holbert’s recipe, whose preferment step deeply intrigued me after taking an online class through her bakery, Nomad.

After the first and second round of testing, I discovered that the preferment made an important difference in shaping (see the note in the recipe); that some of the loaves, at 15–17% sweetener, were just a bit too sweet for my taste; that AP flour gave me the crumb of my childhood memories, especially for a day-after loaf; and that there is one ingredient I had to keep from my mother’s challah, her own addition to the Hadassah recipe: vanilla extract. At 1 tsp, you can’t taste the vanilla per se, just its warmth—which enhances all the tender work of the enriched ingredients and makes your kitchen smell even more amazing as the loaves bake (I might skip it if the loaves were headed for a toppings-shower of something unmistakably savory, like everything bagel seasoning, but otherwise it’s a must-add).
From there, I wrote a draft of my basic recipe, tried it out both with and without the preferment, and then finalized the (preferment encouraged!) version that appears below. Prefermenting helps to kickstart the dough and keeps the baked loaves fresher on the counter for longer. It also, for my more experienced bread-shaping aesthetes, addresses what I call the “braid pull” by aiding in a stronger second proving that fills in the gaps between strands. More on that below.
As I so often make challah for friends and loved ones by request and on a whim—while staying at a friend’s house, or spending the holidays with my in-laws—I thought about all of their kitchens when developing this recipe. You don’t need a stand mixer, just some patience with hand kneading. My one baker’s stickler move, though, was to write the recipe in grams (sorry to the Philly Hadassah ladies of yore), for reliably consistent results, and to use instant yeast for the same reason.
It’s the shape of the braid, if nothing else, that makes challah immediately recognizable. Social media has made certain eye-catching braids more popular of late, but my ancestors were not making this bread to photograph—they made it to pass around at the table and tear apart, so there’s no pressure if your initial braids are lopsided or mismatched. A simple three-plait braid is the perfect shape for this communal act, which is the braid I include in the recipe below, but you can explore any number of options via Instagram or YouTube, where amazing video tutorials abound. My favorite personal braid is the four-strand.
In the Pirkei Avot, a vital piece of didactic Jewish literature, the rabbi and scholar Elazar b. Azaryah says Im ein kemach, ein torah; im ein torah, ein kemach: in English, where there is no bread, there is no Torah; where there is no Torah, there is no bread. In this spirit—one that I interpret as recognizing the undeniable link between food, survival, and the endurance of community—I hope this recipe will fill the tables, and the hands, of your beloveds.
—Rachel Mennies
Houseguest Challah

Rachel Mennies’ Houseguest Challah780KB ∙ PDF fileDownloadDownload
Makes two 580g loaves
- I baked this recipe both with and without a preferment. I noticed no difference in the final flavor and the interior crumb also looked the same, but the preferment made the dough much livelier (more bubbles and a more visible bulk rise) and gave it a beautifully voluminous second proof. I am convinced that this is the path to avoiding an absolutely great, but slightly less aesthetically “perfect” challah braid with pulls between the strands.
- If you wish to skip the preferment for any reason, add the amounts of flour and water to their corresponding values in the dough, along with the yeast.
PREFERMENT
100g high-protein all-purpose (or bread) flour
1 ¾ teaspoons (7g) instant yeast
150g warm water, around 90 to 95˚F (32 to 35˚C)
DOUGH
all of the preferment
100g (2 large) eggs
75g warm water
75g neutral oil, like canola or vegetable
1 teaspoon real vanilla extract
75g granulated sugar
550g AP flour
10g kosher salt
BAKE
1 whole egg, beaten with a pinch of salt
- PREFERMENT: Combine the flour, yeast, and water in a large bowl (considerably larger than the preferment ingredients, as this will be where you mix the entire dough). Cover with plastic wrap and let the mixture rest for 20-30 minutes, until visibly bubbly and puffy.
- DOUGH: Whisk the eggs, remaining 75g water, oil, vanilla, and sugar into the preferment. Add the remaining 550g flour and salt and, using a dough whisk, wooden spoon, or a stand mixer (fitted with a dough hook), mix until the dough forms a shaggy, mostly cohesive mass. Turn the dough out onto a clean surface, using any stray flour in the bowl for help with kneading, and knead by hand for about 8-10 minutes (or mix in your stand mixer for 4-5 minutes), until all flour is absorbed and the dough is smooth and stretchy/extensible. Try not to add more flour at this point, if you can help it: the goal here is a tacky dough, but it should not leave dough stuck to your hands as you knead. In that case, a sprinkle as you go works wonders.
- Place in a greased bowl (I love cooking spray for this) and cover with a lid or the same plastic wrap as for the preferment. Let rise at room temperature until doubled in size (for me, this is usually 90-120 minutes), then punch down dough and transfer to a clean surface.
- Weigh the dough and divide to the desired size and number of pieces for strands for two loaves: for a three-strand braid, that is six pieces. I like to weigh mine out, but it is not vital—eyeballing your portions will be fine, if you like.
- I’m going to borrow Cheryl Holbert’s shaping suggestion here, as it has made a huge difference in my braids: “Pre-shape [six] strands by pressing each piece into a rectangle and rolling up on itself to create a cylinder shape (kind of like a mini-baguette), then let rest for a few minutes under plastic wrap. Roll strands under your palms to desired lengths.”
- Line a rimmed baking sheet (a standard half-sheet pan will fit both loaves) with parchment and set aside. Braid each challah in a traditional three-strand plait without pulling the strands too tightly, so the dough has room to expand during the final proof. Transfer to the prepared pan, spaced evenly both between one another and the rim of the pan, drape with plastic wrap (ideally) or a clean dish towel, and let the shaped loaves proof until they are noticeably puffier and a finger-poke leaves a slight indentation, about 45 minutes. At least 30 minutes before loaves are proofed, set an oven rack to the lower-middle position and heat the oven to 375˚F (190˚C).
- BAKE: Uncover, brush with egg wash, and sprinkle on any desired toppings (sesame seeds and/or poppy seeds are traditional options!) Bake, rotating the tray 180 degrees after about 15 minutes for even baking, until loaves are deep golden brown on the exterior and 195˚F (90˚C) on the inside, 28 to 30 minutes. (Optionally: For a darker, shinier “bakery challah” finish, give un-topping-ed loaves another coating of egg wash when you rotate it.)
- Transfer loaves to a wire rack and let cool to room temperature before slicing and enjoying. Leftovers can be stored wrapped in foil at room temperature; they will remain fresh for a day or so on the counter before becoming perfect for challah French toast. Alternately, the loaves freeze well wrapped in foil, then sealed in a plastic bag for many months.
wordloaf Newsletter
Join the newsletter to receive the latest updates in your inbox.
