Twenty grams of flour and a little jar
Sourdough micro-starter maintenance for everyone, the easy way
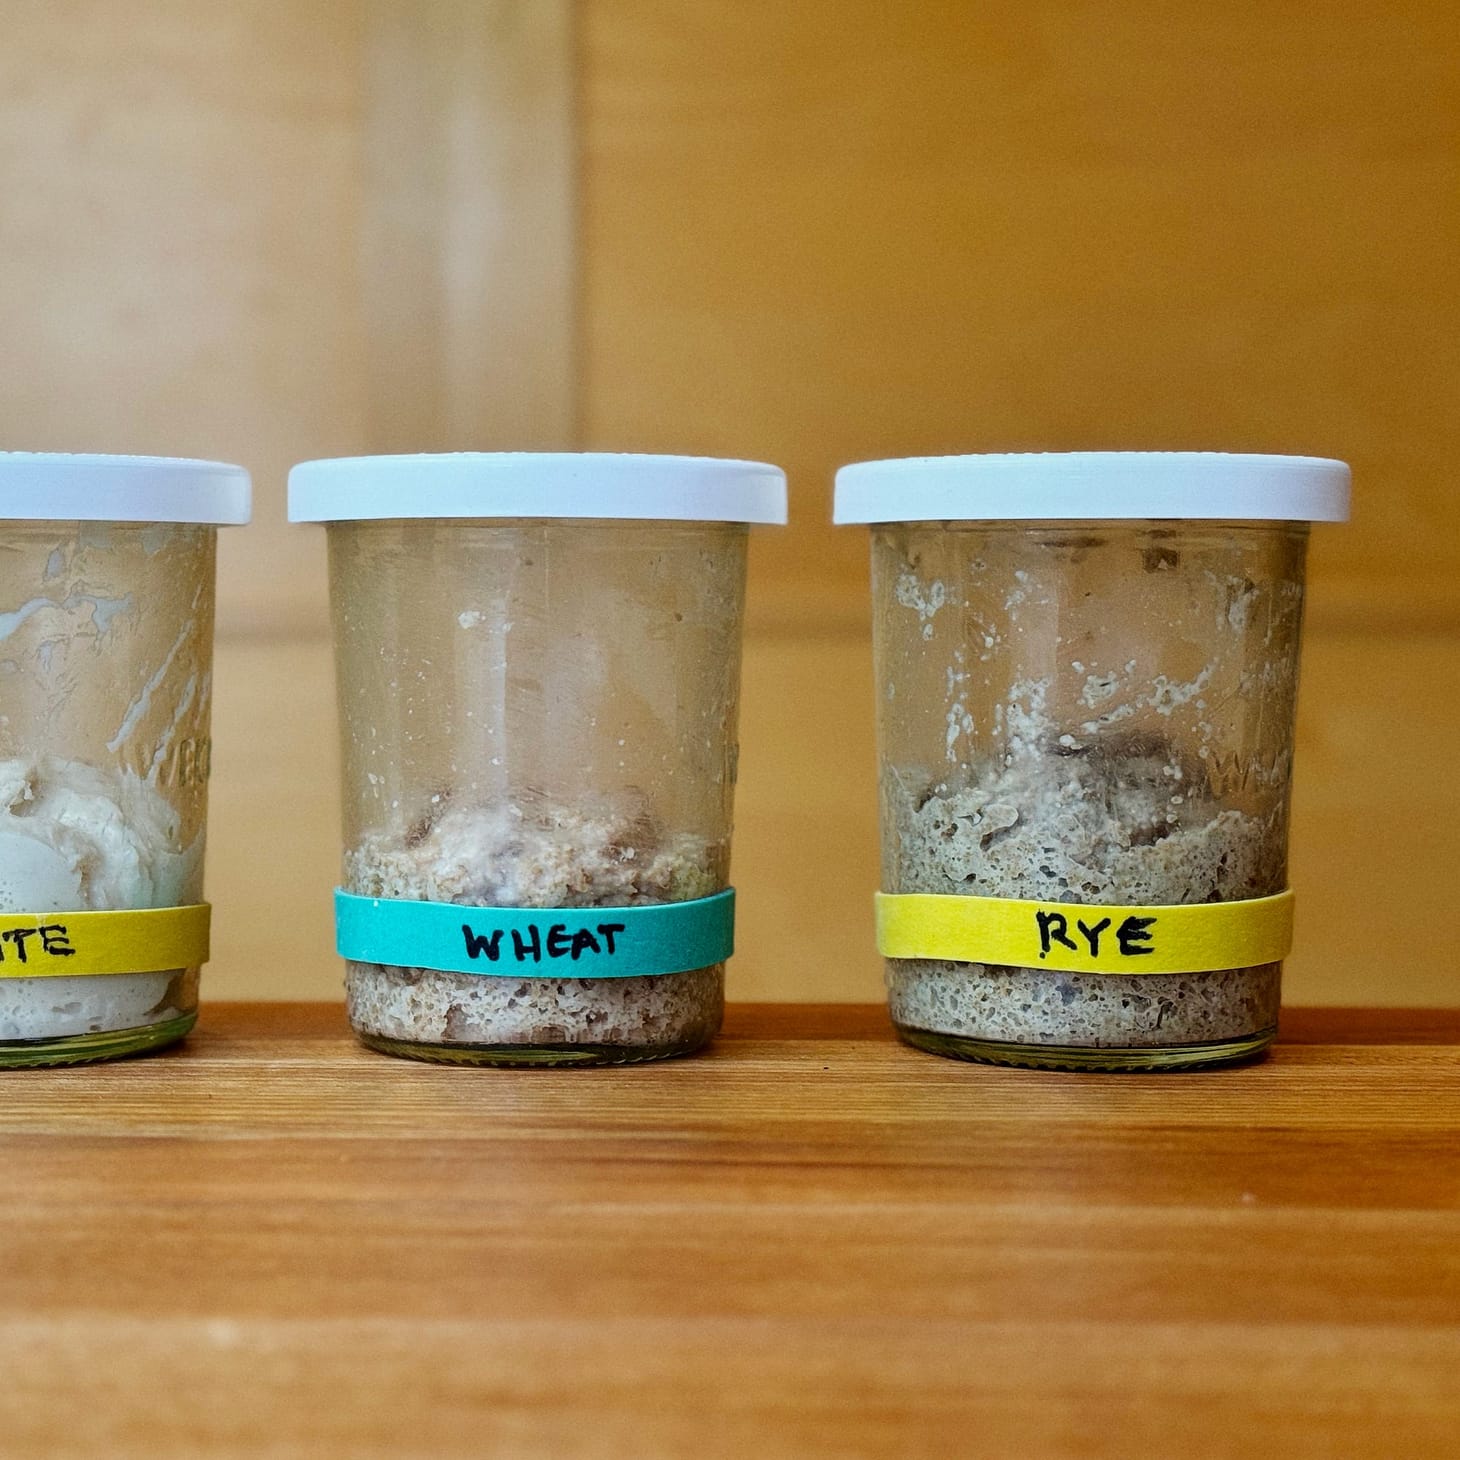
Table of Contents
Wordloaf, the newsletter, started out as a clearinghouse for information on sourdough baking during the early days of COVID, so it makes sense that I have talked about sourdough starter maintenance many times here. And despite the fact that I’ve been baking with sourdough for more than twenty years myself, I continue to learn new things about it regularly—especially now that I am attempting to codify everything I know about bread baking in a book—so my own approach to working with sourdough continues to evolve. Still, it’s a little embarrassing to see just how many times I have sent out some new approach to sourdough starter maintenance as if it was the definitive one, only to come back with another some time later that works just as well, if not better.
So I won’t preface this post with the notion that this method is definitive in any way. In truth, there are a near-infinite number of ways to care for a sourdough starter that can work well; what I am offering today is simply the one I am using right now. It’s entirely possible that it might change yet again down the line, though it’s challenging to see how or why, given how effective, efficient, and easy it is.
Easy, breezy sourdough starter maintenance
There are three things you want in a sourdough maintenance routine, in order of decreasing importance:
- It should keep the starter as happy as possible. This, obviously, is paramount: the goal is great sourdough bread, and without an active, robust starter, there’s little point to the endeavor. If you struggle to get consistent results with your sourdough baking, the first thing to consider is the health of your starter.
- It should be as low-lift as possible, both for the sake of the starter and for the starter’s caregiver. A happy starter requires regular, consistent care and attention. Meanwhile, we bakers have limited time and attention spans. These two truths are in opposition to one another, so it’s necessary to find the sweet spot between the two—good enough for the health of the starter, and easy enough for the sanity of the starter’s minder.
- It should use as little flour as possible. I have a few sourdough discard recipes I make regularly and love (mostly just this one), but I still kinda loathe sourdough discard. There’s almost nothing it can do that fresh, active starter can’t do better, so I cannot see a good reason to accumulate the stuff unnecessarily. When it comes to building levains for baking, it’s fairly easy to make only as much as you might need, but when it comes to sourdough starter maintenance, there is no getting around the need to discard the bulk of each batch (unless you are baking every day, in which case there need not be a difference between the two), so keeping flour to a minimum is key.
My current approach to sourdough starter maintenance satisfies all three of these requirements, and—best of all—it works whether you choose to maintain your starter at room temperature continuously (as I do), or you put it into the fridge part of the time.
I’ve already discussed the virtues of continuous starter maintenance extensively, so I’ll keep my thoughts on it here to a minimum, other than to say that whether you go all in on it as I have or you decide you don’t have the time or patience to, the more often you refresh your starter at room temperature, the happier it will be. If you bake once a week, then give it two or three (or four) refreshments first. If you bake once a month, give it four or five first. (If you bake less frequently than that, I’d still recommend taking it out at least once a month and refreshing it as many days in a row as possible before returning it to the fridge.)
Even if you stick with fridge storage, the goal should always be to maximize the number of days each week or month it spends living its best life, at room temperature. Maybe you’ll pick a particular cadence and stick with it forever, or maybe you’ll vary your approach depending upon how often you are baking, or because sometimes you have the time to give your starter a little more loving care. Consistency matters less than whether you do your best to let your starter stretch its legs at room temperature as often as possible over the course of any given week, month, or year.
Anyone who reads my continuous starter maintenance post might notice that my current approach looks quite similar to the one I presented there, since it is. The ratios have changed a little1, yes, improving things, but more importantly, after another six months of using it, I have discovered that it is far more flexible than I thought, in a few ways.
To begin with, it’s not simply a method for those like me who have the time and desire to keep their starters at room temperature; the same set of ratios work for fridge storage too, making it a “universal” sourdough starter maintenance routine.
Secondly, it works with whatever flour you choose, provided you adjust the hydration to the flour in question. Until recently, I’d been maintaining my starter on whole-rye flour, since I think it is the best choice for someone who is baking both rye- and wheat-based doughs and only wants to keep a single starter2. But about a month ago, I created two offshoots on white and whole-wheat flour, using the same maintenance routine for each. I’ve alternated among them for baking randomly, and have noticed no noticeable difference in their activity.
Finally, where before I said I tried to give my starter twice-daily refreshments when time allowed—in an effort to mimic “bakery” sourdough conditions, believing it would improve its activity further—I now think that entirely unnecessary. I haven’t refreshed my starters more than once a day in months, and they are still firing on all cylinders; anything more than once per day is excessive in my opinion.
Here’s what it looks like.
The micro-starter method
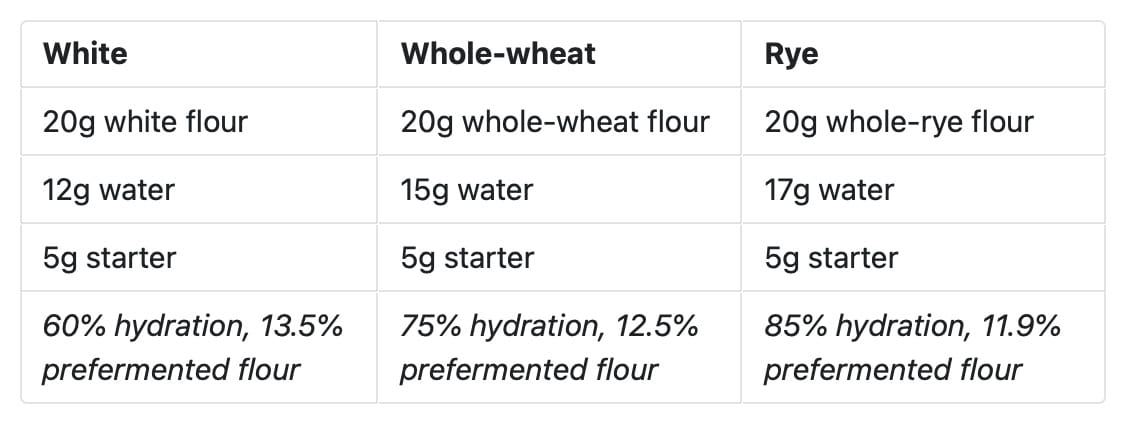
No matter the flour, the goal is a stiff paste that is neither dry nor wet, and one that expands fully after 8-10 hours at room temperature (65-75˚F/18-24˚C) and does not collapse significantly before the next refreshment. Depending upon the absorption rate of your flour, you may have to tweak the hydration up or down slightly; use my numbers, but make adjustments if things seem off.
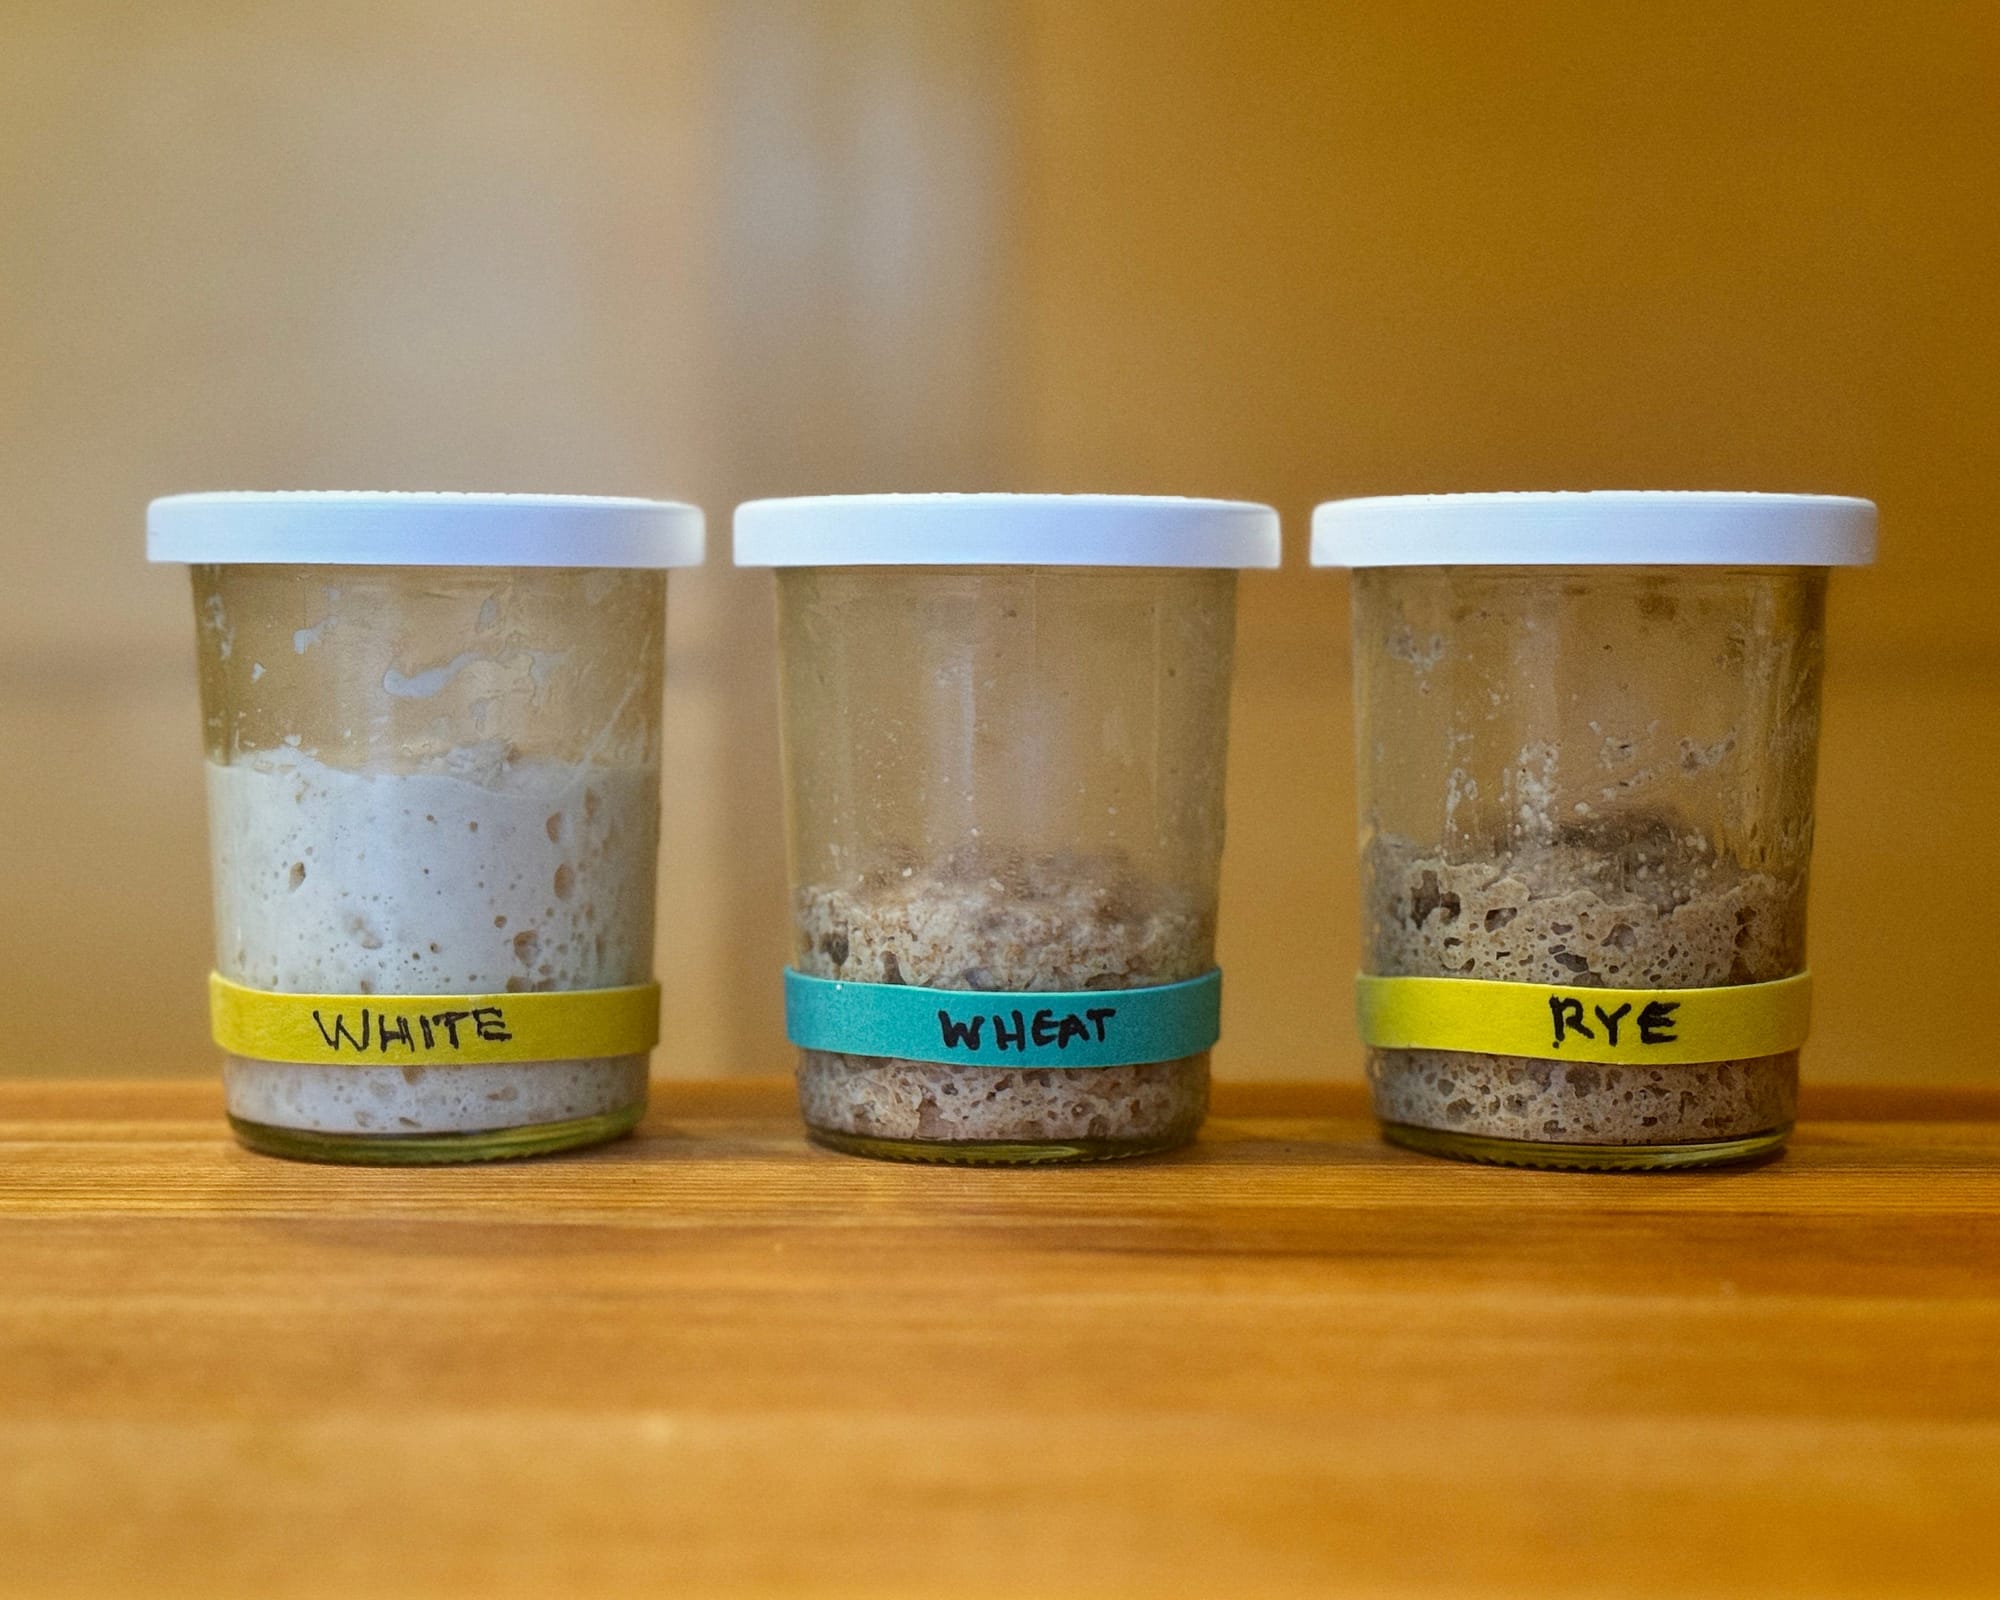
So long as you are keeping your starter at room temperature, repeat once per day.
If and when you want to refrigerate your starter, give it one last refreshment and let it proof at room temperature until visibly expanded (4-6 hours), then move it to the fridge. Remove it from the fridge and give it a series of room-temperature refreshments as often as possible.
When temperatures are significantly higher than 75˚F/24˚C, reduce the hydration a little and/or the amount of starter a little more, maybe 2g in summer rather than 5g. (Or move the starter to a Sourdough Home set to 70˚F/21˚C, if you have one.)
You might wonder if this is the smallest possible scale for a micro-starter, and no, you can definitely go down; I’ve done it on a ~20g scale (i.e., halving everything), and it works fine, but I find measuring out much less than 4-5g of starter annoying. Also, a ~40g batch leaves me more than enough to build a levain from, something I tend to do often. Also also, ~40g is the perfect amount for the 5.4 fl. oz Weck mini-mold jars I like.
One note: if you decide to convert your wheat-based starter to rye flour, it will take a few days of refreshments to adjust; it might flag a bit after the first refreshment, but it will recover eventually, so just keep going.
Building levains from your micro-starter
One nice discovery I made during all this testing is that there is a long window of time during which the starter is active enough to use to build a levain: it’s ready for use once it has expanded fully (after 8-10 hours), but stays there for the duration. I usually refresh my starters in the morning, which means I always have an active starter to use to build an overnight levain for use the following morning. (Building an overnight levain means I can seed it with a small amount of starter, which is all you have when you keep a micro-starter; if I need more than that for some reason, I’ll expand it to a larger scale first.) Or to use directly in a low-inoculation recipe like The Loaf.
And yes, using a starter that is of a lower hydration than most (60-85%) means you should adjust the final hydration of the levain to account for it, but in practice, the difference is negligible, especially when you use a small amount of seed, so I don’t usually sweat it.
Giving your starter a spa treatment
In my Bread Baker’s Pocket Companion, I included instructions for “reviving a flagging starter” that I borrowed from Kristen Dennis, aka @fullproofbaking. While I think hers is a totally sound approach, it’s pretty complicated, involving thrice-daily feedings with a mixture of flours and different water temperatures. Useful in an emergency, but sort of a pain in the ass.
Nowadays I don’t think one needs to go to all that trouble. If your starter seems to be less active than you’d like it to be, I think a week or so of room-temperature refreshments using this approach should do the trick just as well.
If you normally maintain your starter on white flour and want to give it a bit more nutrition during the treatment, maybe use a 50/50 mixture of whole wheat and white flour, splitting the difference on hydration—something like 13g of water to 10g of whole wheat and white flour.
Less water and more seed (~25%). Surprisingly, using more seed doesn’t make the starter prone to overproofing during the 24 hour cycle; in fact, I’ve done it at 50% seed and it still seems to work fine. ↩
For reasons I don’t yet understand, rye-based starters can be used to build levains on wheat or white flour directly, while wheat-based ones need at least a few refreshments on rye flour before they have the necessary activity to leaven a rye bread. This makes rye starters truly the “universal donor” of sourdough cultures.Since I wrote that, I heard from many people that their whole-wheat starters work just fine for baking rye breads, so I think the important thing here is that the flour be whole-grain, not rye specifically. Since I did the side-by-side tests, I have now consolidated to a 50-50 rye/whole-wheat starter: 10g whole-wheat, 10g whole-rye, 15-17g water, and 2-4g starter, refreshed once per day, and it works great in all sorts of breads. ↩
wordloaf Newsletter
Join the newsletter to receive the latest updates in your inbox.
