Recipe: The Loaf
one formula to rule them all
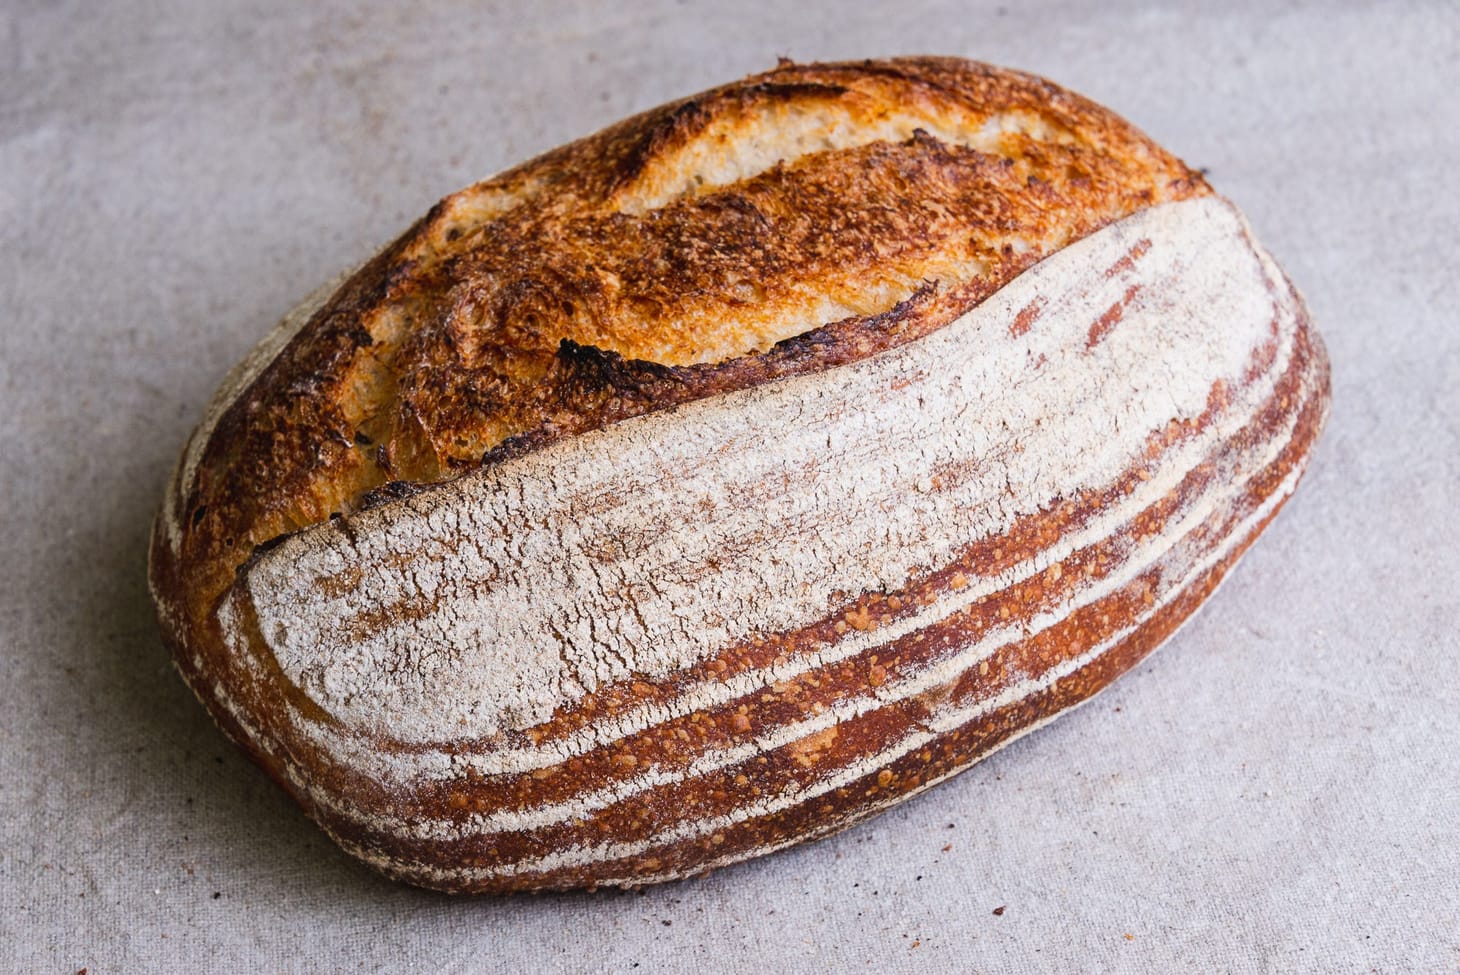
Table of Contents
I referred to this recipe when I wrote about the sourdough focaccia I shared a few weeks ago, since that recipe is a riff off of this one. The fact is that most of my recipes are riffs off of one basic formula or another. Once I find a method that works, I tend to just adapt it to as many styles of bread as I can—I find it much simpler to have a small set of templates that work in multiple ways rather than develop unique recipes for each style. (For example, I’ve used that same tangzong choreg template to also make brioche, pain de mie, challah, shokupan, and more.) So get used to the idea of seeing very similar recipes over and over again here. To my mind, there is no reason to reinvent the wheel every time, so long as there’s an approach that already works.
I’ve come to call this one “The Loaf”, because it is such a basic formula, one that is almost infinitely adaptable to any number of different breads. And because it is the template that I use most often nowadays, particularly when I want a lean sourdough bread (lean meaning from zero to at most 10% fat in the formula).
The other reason I use this template over and over again is that it is so freaking easy. Though it does take a day or two from start to finish, the amount of hands-on/need-to-be-nearby time is less than 3 hours. And if you don’t count all the just-waiting-around-for-something-to-happen phases, then it’s literally less than 30 minutes actual work. Despite that, it makes loaves as good as nearly any other recipe I know of. In other words, it’s simple, but doesn’t compromise anything in terms of results.
Here are some of its distinguishing features:
One: It uses a relatively small amount of levain (6%, when many recipes use somewhere between 15 and 30%). Six percent is what you use when ambient temps are in the “normal” range (between 70 and 80˚F or so). If it’s colder or warmer than that, you increase or decrease the amount of levain accordingly. (Because it has such a long bulk fermentation, you can’t adjust the water temperature the way you might in other recipes.)
Two: It can be done using either recently-refreshed levain or levain that has been in cold storage for up to 10 days. Meaning there’s no “levain build”, provided you have recently-refreshed levain in the fridge. (It’ll probably even work with levain that’s older than 10 days, though it might take longer to complete the bulk fermentation. And because it calls for such a small amount, it really doesn’t matter what hydration you keep it at, should you use something other than 100%.)
And three: Other than a single fold after 30 minutes (mostly there to even out the salt distribution), there is no kneading or additional folding involved; you simply leave the dough to ferment and develop gluten strength all on its own. (See the photo below of the halved loaves to see the type of oven spring and crumb structure you can achieve with this approach.) To those familiar with the Jim Lahey/Mark Bittman No Knead Bread recipe and its myriad descendants, this is exactly equivalent to that, except using a natural ferment in place of yeast.
While no-knead sourdough recipes have been around awhile (I even did one for Cook’s Illustrated a few years back), this particular approach using minimal levain was brought to my attention by my friend Martin Philip of King Arthur Flour. And Martin got the idea from Maura Brickman, a serious homebaker friend who told him she was successfully making sourdough without feeding her levain and without kneading her dough. He was skeptical that it would work as well as she said it did, given how little effort it involved. As was I when he told me how well it worked. (The idea that such a casual approach to bread baking could make beautiful, delicious loaves is a hard pill for a professional baker to swallow.) If you’d like to read more about Maura and Martin’s take on this approach, Martin wrote a detailed post all about it on the King Arthur blog, including his own version of a recipe.
This recipe is written to take advantage of common kitchen tools, but it does call for one specialized item, namely a 5-quart or larger cast iron Dutch oven, enameled or not. (Cook’s Illustrated’s “Best Buy” choice for a 7-quart enameled Dutch oven is this one. And loads of people like Lodge’s 5-quart Combo Cooker, in which you bake with the “lid” on the bottom. ) Cooking breads in a heavy, lidded pot for the first half of the bake is the best way for beginners to produce the jacket of steam necessary to achieve bakery-caliber crusts and good oven spring. It’s not the only way to do it (and not the only way I do it), but it’s pretty much foolproof and it cannot be beat, at least if you are making one round loaf at a time. Hopefully you have one and can jump right in.
If not, this method using a pan of lava rocks and boiling water works nearly as well, especially if your oven is well sealed. If you lack both a Dutch oven and lava rocks, there are many other possible ways to create steam, hopefully you can find one that you can make work. (Even a stainless Dutch oven or pot will work in a pinch, provided the lid fits reasonably tight.)
A little something about scheduling: This takes anywhere from 22 to 38 hours, which sounds complicated to fit into a schedule, but it really isn’t. You can either start the bulk proof early in the morning, shape the loaf in the evening, and bake the loaf the following morning or evening. Or you can start the bulk proof in the evening, shape the loaf the following morning, and bake at the end of the day or the next morning.
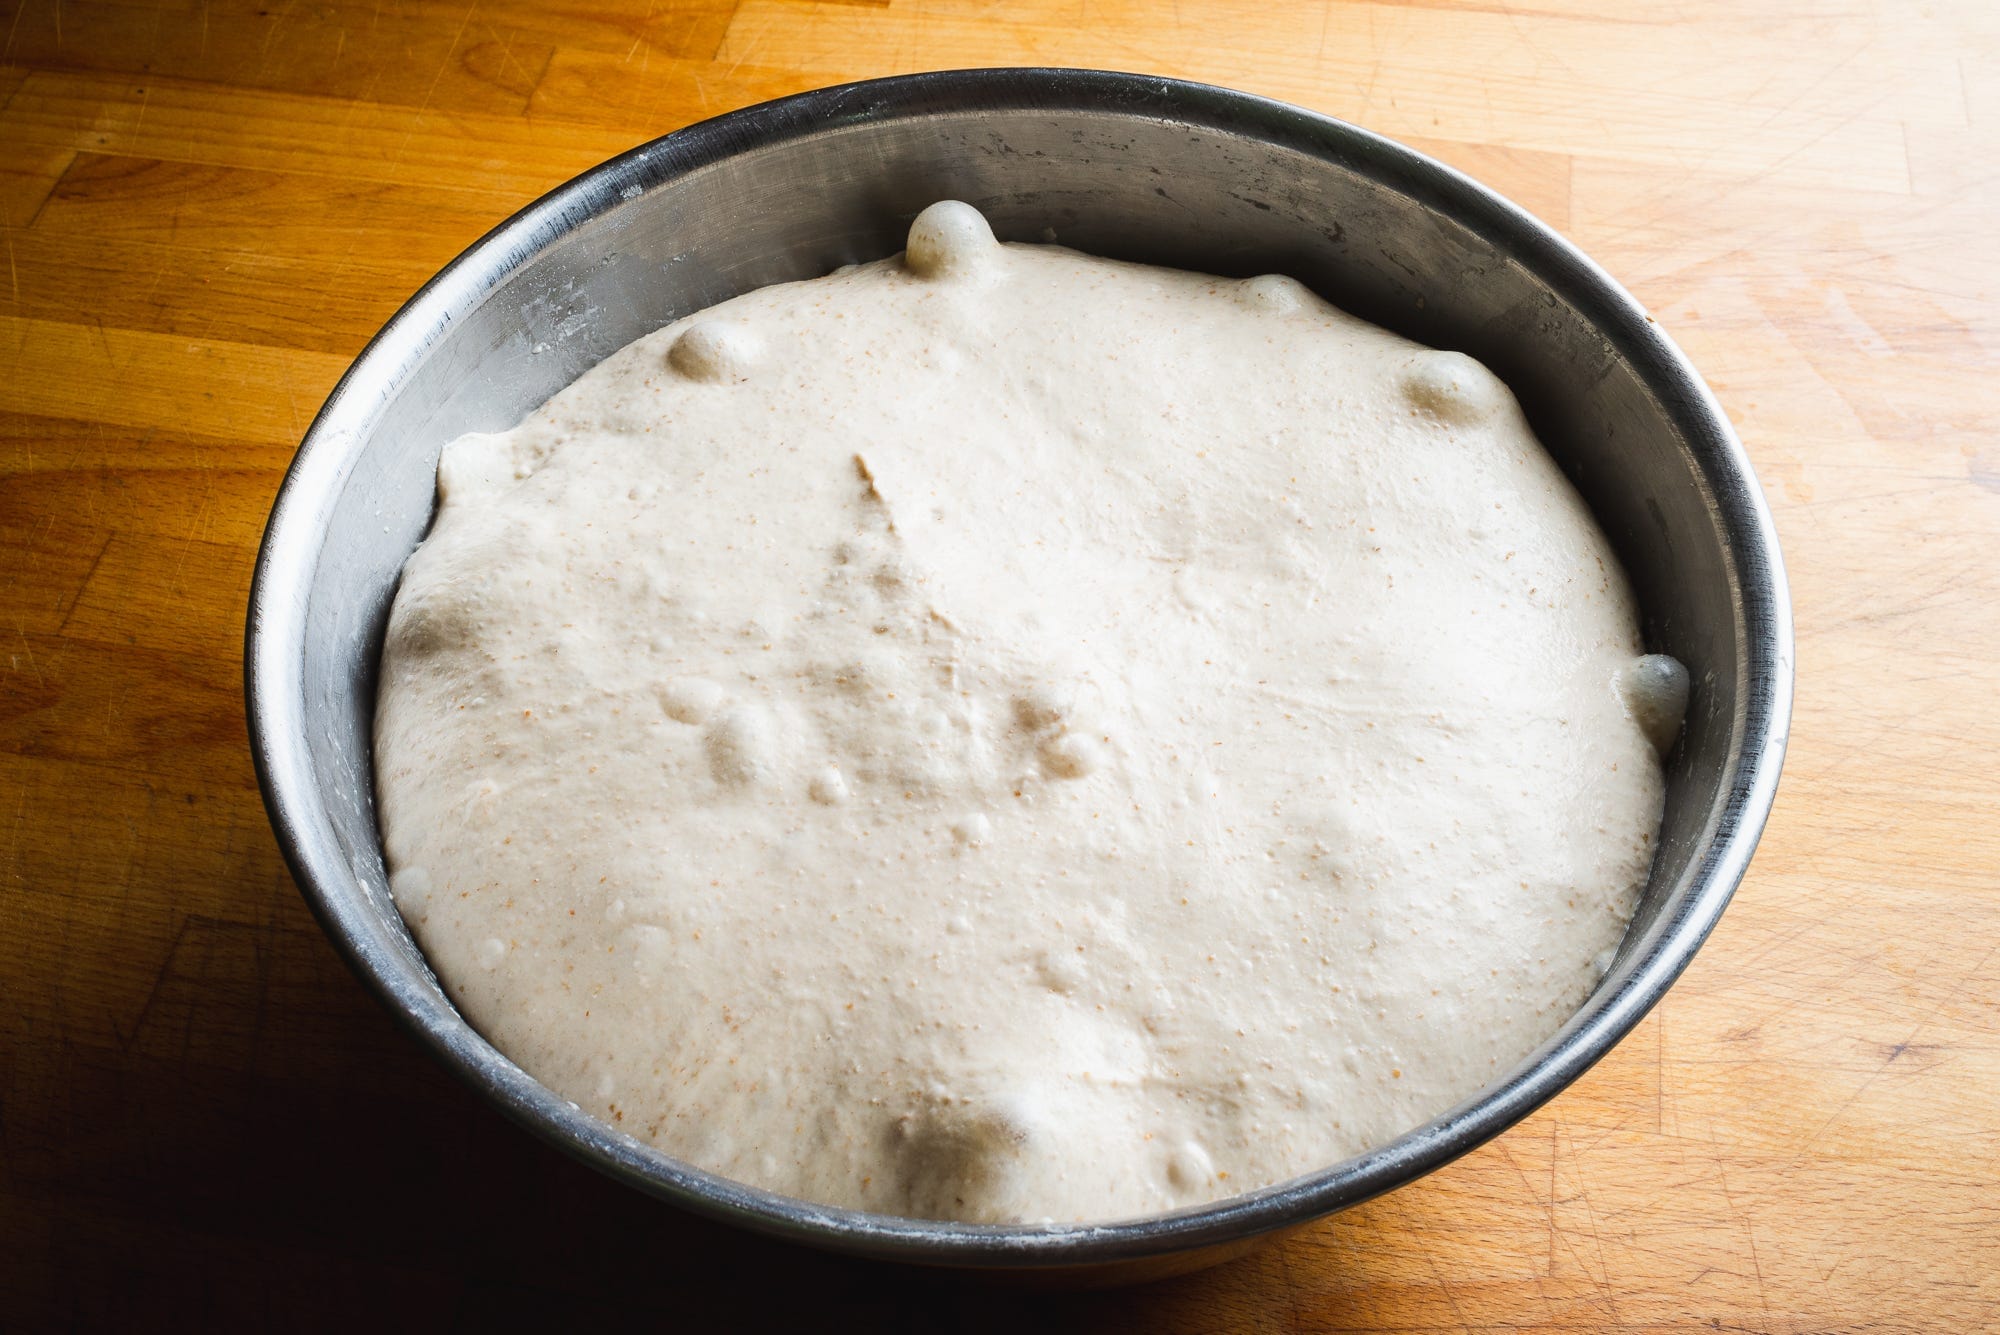
The moment to pay closest attention to is the end of step 5, the bulk proof. This phase should take around 12 hours, and it’s important to know exactly what to look for when it is complete—i.e., the dough should be domed, puffy, and lightly bubbly on top, like the one in the photo above, and with a webby, finely-bubbled interior (which you’ll only see when you peek under the sides or turn it out onto the countertop)—and to be there when it has been achieved. Unlike many other no-knead bread recipes, the window of readiness is a narrower here (though you probably have a 1 to 2 hour grace period as long as the air temperature isn’t much above 75˚F). If it’s not ready at 12 hours, keep checking every 30 minutes or so until it is.
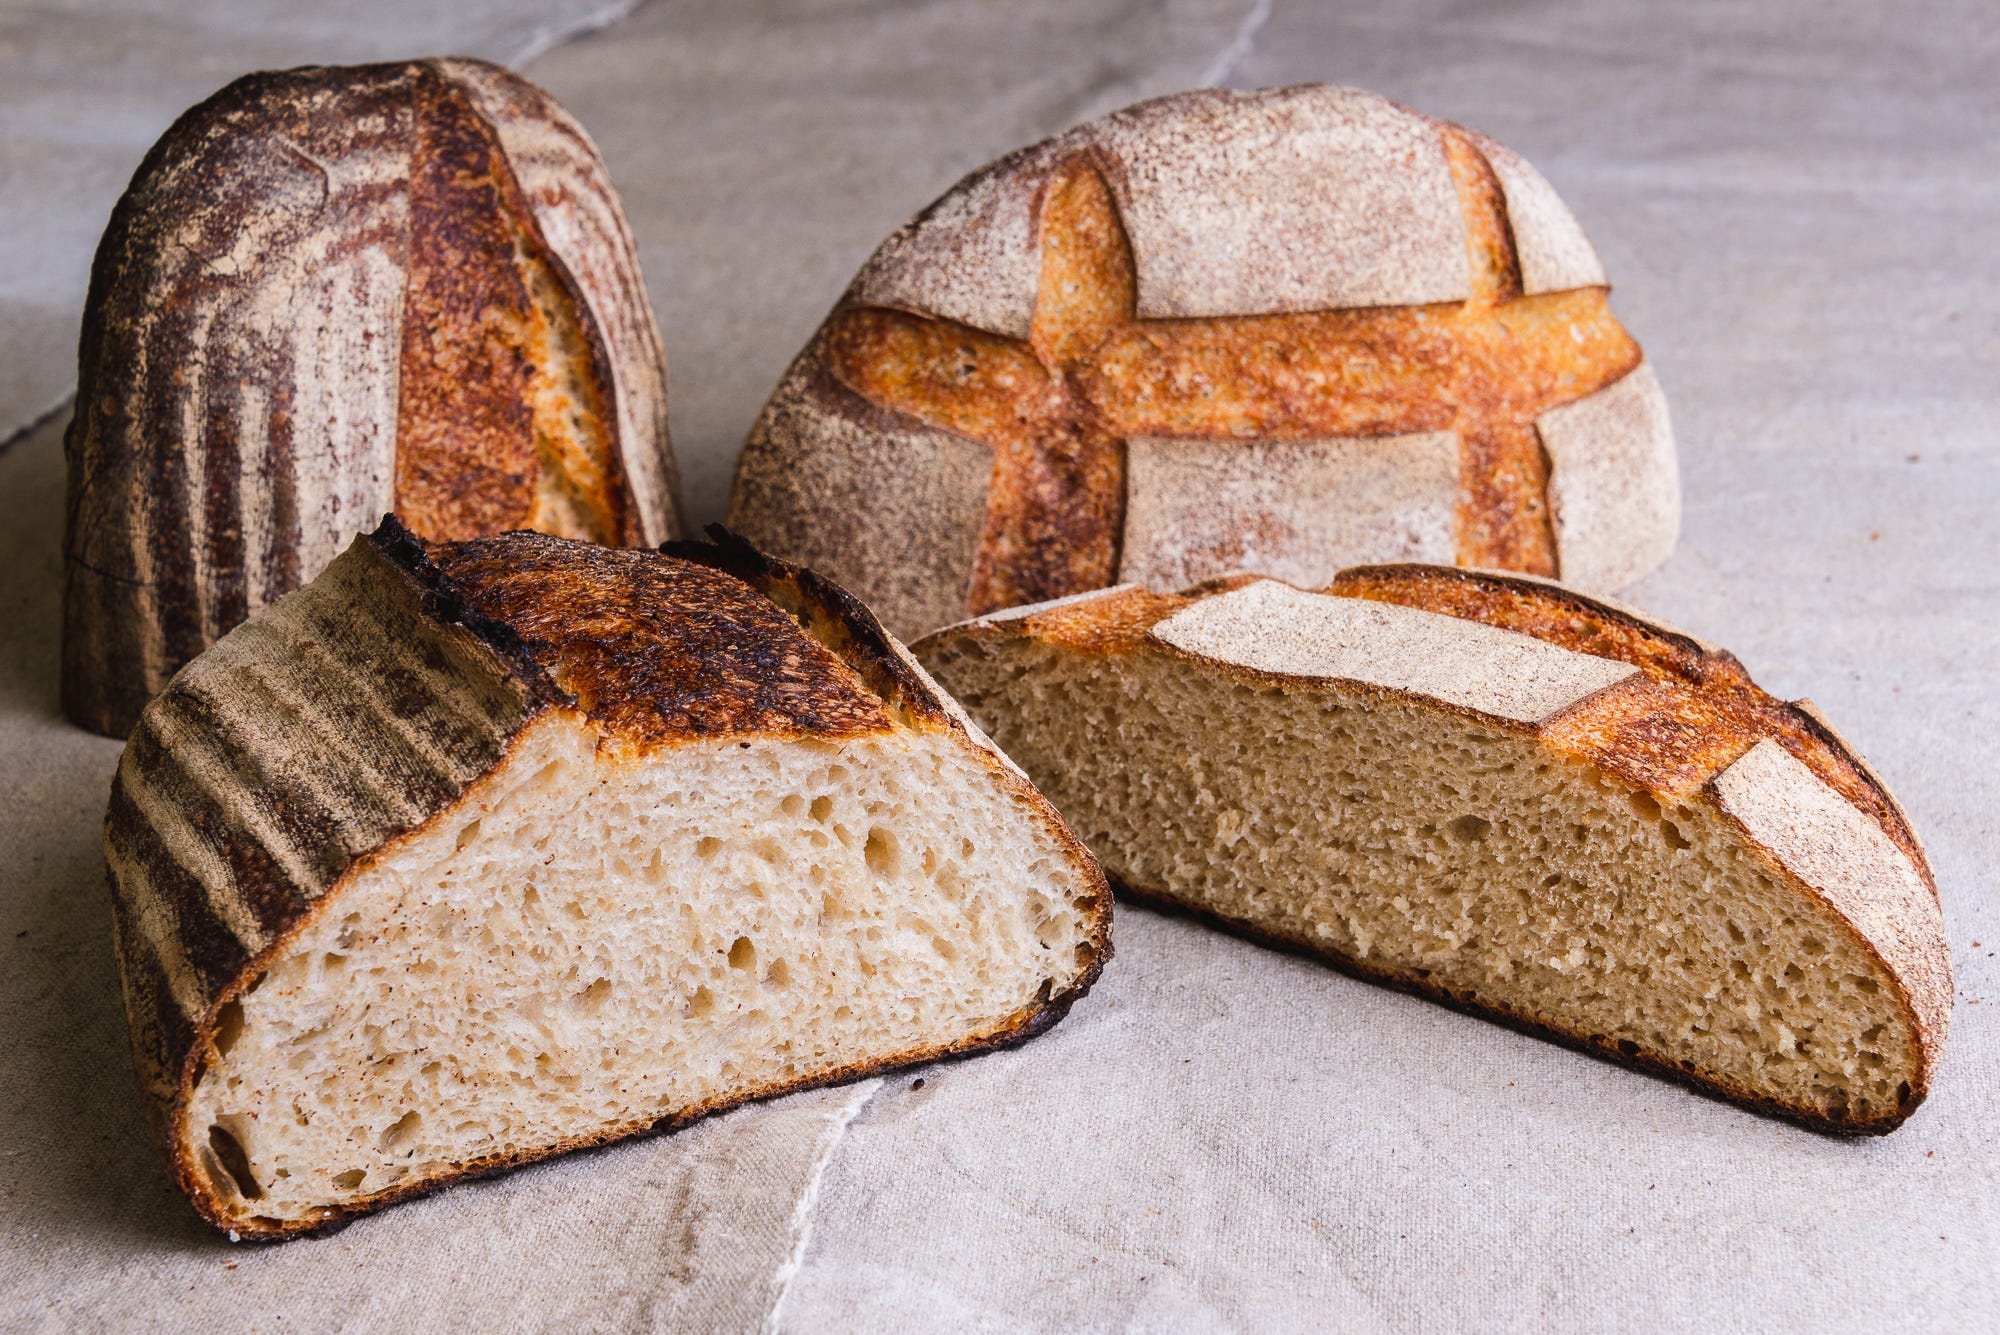
[20% whole wheat on the left, 50% on the right]
About the formula: Many of you weighed in last Friday with requests for loaves containing more whole grain flour, and this formula is 20% whole wheat. But it works equally well with different mixes and ratios of flours, without needing to alter the hydration at all. Doing so will definitely change the texture of the dough and the resulting crumb, but it will still be workable whether you use 100% white flour or 50% whole wheat flour (see above for two examples). You can also use spelt or any other gluten-forming, wheat-adjacent flour. Beyond 50% whole wheat, however, and it will start to need more water—I’ll have recipes for 100% whole grain loaves eventually. As for non-gluten forming rye, I wouldn’t use more than 10% in total here. (I do use 95% all-purpose/5% rye in this recipe all the time, in fact that is my baseline “white” flour loaf.)
Aside from the 15g of flour in the levain, it contains 500g flour total, so feel free to play around the mix and proportion of flours, provided the total amount you use adds up to 500g. Of course, I’d recommend starting with the formula as written before you start experimenting, so you have a sense of how it is supposed to behave under “normal” conditions.
That’s it for now. Have at it, and good luck!
No-Knead Pain au Levain, 20% whole wheat
Yield 1x 900g loaf
NOTE: In step 1, you can use levain that has been recently refreshed and refrigerated as described in this post. If your kitchen is very cold (like mine December through April or so), you can increase the amount of levain in step 1 to 10% (50g); in the heat of summer, you should dial it down to as little as 1% (5g). The mix and ratio of flours here is just a baseline example, feel free to experiment, while keeping the hydration the same and the amount of whole grain flour 50% or less. The loaf can be retarded (refrigerated) in step 7 for 8 to 24 hours, depending upon whatever timing is most convenient for your schedule (it will get more slightly more sour in flavor the longer it proofs). My usual approach is to start the dough in the evening, shape the bread in the morning, and bake late in the day or the following morning. I usually cover the top of the banneton loosely with a clear plastic shower cap (or plastic wrap), but not the remainder of the banneton, to let it breathe.
Overall Formula
High Protein All-Purpose Flour 80.0%
Whole Wheat Flour 20%
Water 74.0%
Salt 2.0%
100% hydration levain 6.0%
Final Formula
High Protein All-Purpose Flour 400g
Whole Wheat Flour 100g
100% hydration levain (see note) 30g
Cool (70F) Water 360 g
Salt 10.0 g
1. Place about 10 grams (~2 teaspoons) water in small bowl and set aside. Combine remaining water and levain in large bowl and stir with wooden spoon until levain is mostly dissolved. Add flours and stir until no dry flour remains. Cover and let rest at room temperature for 20 minutes.
2. Sprinkle salt over dough, add reserved water, and knead gently in bowl until incorporated. Cover and let rest at room temperature for 30 minutes.
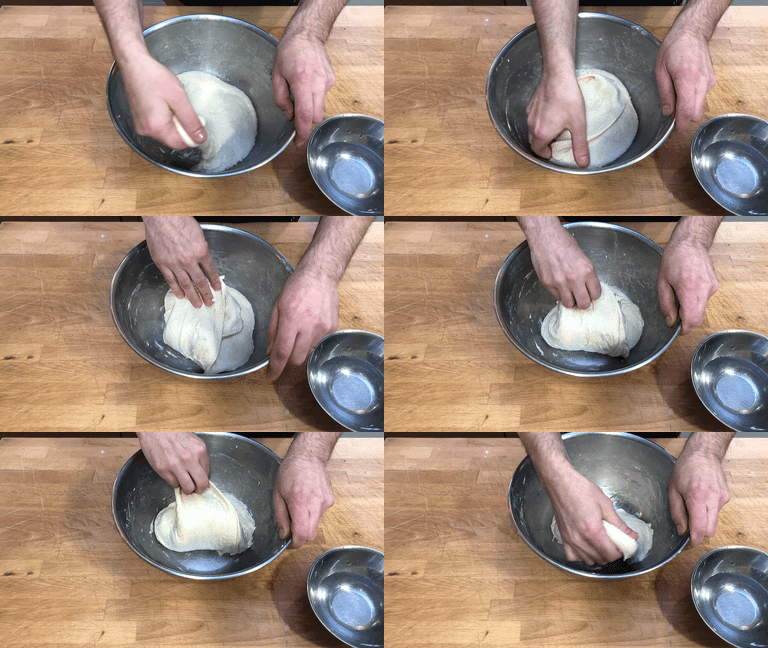
3. Using lightly wet hands, fold dough until tight and uniform, 6 to 8 folds.
4. Desired dough temperature: 70-75˚F
5. Bulk Fermentation: 12 hours at 75˚F, until dough is domed, lightly bubbly, and just doubled in volume. A peek at the underside of the dough along the edges of the bowl should also show a web of fine bubbles. (Do not overproof here—it’s important to shape the loaf as soon as this stage has arrived. That said, there is probably a 1-2 hour window before it’s too late, at least when ambient temps are below 77˚F.)

6. Dust top of dough lightly with flour and invert onto lightly-floured countertop. Preshape into round and let rest at room temperature for 30 minutes.
7. Round (or shape however you like, provided you have the banneton and baking vessel to accommodate anything other than a boule) and transfer to floured banneton or lined basket. Cover and let sit for 30 minutes, then transfer to refrigerator for 8 to 24 hours.
8. One hour before baking bread, adjust oven rack to middle position, set covered heavy-bottomed Dutch oven on rack, and heat oven to 475 degrees.
9. Lay 12- by 12-inch sheet of parchment paper on counter. Remove loaf from fridge, dust bottom of loaf with flour, and invert onto center of parchment paper.

10. Carefully remove Dutch oven from oven, place on stovetop, and set lid aside. Using lame or sharp knife held at 30-degree angle to loaf, make series of four 4-inch long, 1/2-inch deep slashes to form square around perimeter of loaf, about 2 inches in from edge of loaf. (Or score however you prefer.) Pick up dough by lifting parchment edges and lower into Dutch oven. Carefully cover pot and transfer to oven. Bake for 20 minutes.
12. Remove lid, reduce oven temperature to 425 degrees, and continue to bake until loaf is golden brown, 15 to 20 minutes longer.
13. Carefully remove pot from oven. Return loaf to bare oven rack and continue to bake until deep golden brown, 5 to 10 minutes longer. Transfer loaf to cooling rack and allow to cool for at least two hours before serving.
wordloaf Newsletter
Join the newsletter to receive the latest updates in your inbox.
