Plant-powered pan パン (vegan bread, briefly, and a recipe)

This email is part two of March’s guest posts from from Gan Chin Lin, aka @tumblinbumblincrumblincookie, on the subject of Asian breads. If you missed it, read part one here.
—Andrew

I’m hesitant to write a “guide” to making vegan enriched breads per se, because I am far from an expert and still have so much to learn, myself. One principle I try to operate by (for bread and beyond) is moving away from the notion of binary transfers for ingredients: everything is, instead, about rediscovering a new equilibrium. As such, I hope you will accept my suggestions: what I’ve learnt from good loaves and bad alike, from my personal experience only.
And as with all vegan baking, it is less about what is taken away, but what all these new tools (soy milk! coconut products! methods like the sweet stiff starter) can do, especially because each attempt is basically a complete restructuring of any original recipe: rethinking the traits of the non-vegan loaf as various permutations of plant ingredients according to their properties, pushed even further by bread making techniques, and how bakers evolve and discover exciting fresh methods year after year by giving “what ifs” a go.

Eggs
This can be one of the most complicated ingredients to replace, as there are no straightforward substitutions, only clear restrictions (do not use vegan egg replacer, do not use flax egg or God forbid chia egg, I hope it goes without saying that the odd alchemic solutions using apple cider vinegar and baking soda definitely will not work here). The usual rules for vegan egg substitutes in baking do not apply!
To me, the egg in bread is less about properties of binding, more about building a resilient structure that is maximally enriched, such that in its eggless state it still resists staling and holds its air through the oven spring and baking process without compromising on taste.
I cannot give a guide or a foolproof chart for you to veganise every recipe: it is very particular to the composition of the dough and it is impossible to give umbrella advice. What I can advise, in general for recipes using 1 egg, is:
- a) use a dough improver method: tangzhong or sweet stiff starter in particular - to fully reinforce the structure, and perform the bulk proof in the fridge overnight
- b) use all soy milk in the dough instead of water: you will need all the protein you can get.
- c) substitute an amount of coconut cream/soy milk for the egg: for instance, for recipes with 1 egg (55g average weight), I will sub in 30-35g coconut cream and adjust the soy milk amount accordingly - that is to say, observe the hydration of the dough and add a tablespoon of milk at a time to reach the ideal state. I will not substitute any more than 35g of coconut cream per 350g flour, minimum 270g flour: I learnt this the hard way when the fat started to separate, as it can be tricky to emulsify.
Again, this is as much as I’ve personally learned; recipes beyond 1 egg as well as whole yolks are a completely different wheelhouse, and I have to go through many rounds of trial and error to re-balance the recipe.
Can I use aquafaba? The short answer is yes, but I do not like it as it doesn’t do anything special to bind the dough or build structure.
Can I use applesauce or fruit purées? I have seen recipes try this, but personally I really dislike the gummy crumb it produces.
Milk
Milk is generally more straightforward to replace—as a general rule of thumb, whole soy milk (including good supermarket brands, basically as rich and full as possible) is the best as it holds the most ideal ratio of protein and fat that helps enrich and fortify the crumb. Whole oat milk will also work. Other carton nut milks will suffice, but if they’re on the anaemic, watery side they will definitely be unable to do as much heavy lifting in terms of richness. On the other end of the spectrum, do not wholly substitute with canned coconut milk—the high amount of fat will cause your dough to split.
Butter
Several options here: dairy free spread or vegan butter if you can afford it is what I use, as it is a general 1:1 substitution and works perfectly fine for flavour. Coconut oil (softened or liquid) will also work, and is especially good with brown sugar or pandan doughs, but be careful about the virgin stuff if you don’t want a strong coconut taste. I find that it browns more rapidly when baking, too, so watch out! Otherwise, people have used olive oil and grapeseed oil, but I feel like the latter creates a drier, staticky crumb especially as the loaf ages.

So let me tell you my own story: a recipe that uses the sweet stiff starter method for just about the entire dough—you only add sugar, salt and fat afterwards. I wanted to push the radical effectiveness of the sweet stiff starter as demonstrated through the 5k dough even further, and hence came up with my own version. I adjusted the sponge dough to accommodate the bulk of the ingredients, utilising vegan ingredients to enrich. This is my current favourite recipe for soft, vegan Asian bread because it is so effective—the bread reaches a quicker and stronger windowpane than if you used tangzhong or yudane, due to the tenacity of the developed gluten structure in the sweet stiff starter after it rests.
You can adjust the rest time to your taste: the bloggers who celebrate this method are housewives who appreciate a shortcut stored in the fridge for a few days to allow them flexibility in whipping up a loaf over that period of time; if you’re afraid of too much sourness, you can do so for the bare minimum of 5-6 hours at room temperature. I would reassure you, though, that by using soy milk instead of water and with a higher than usual sugar content in the recipe there won’t be a sharp, lactic twang; I love the flavour imparted which is subtly winey but milk rich, as if you had used amazake or rice wine.
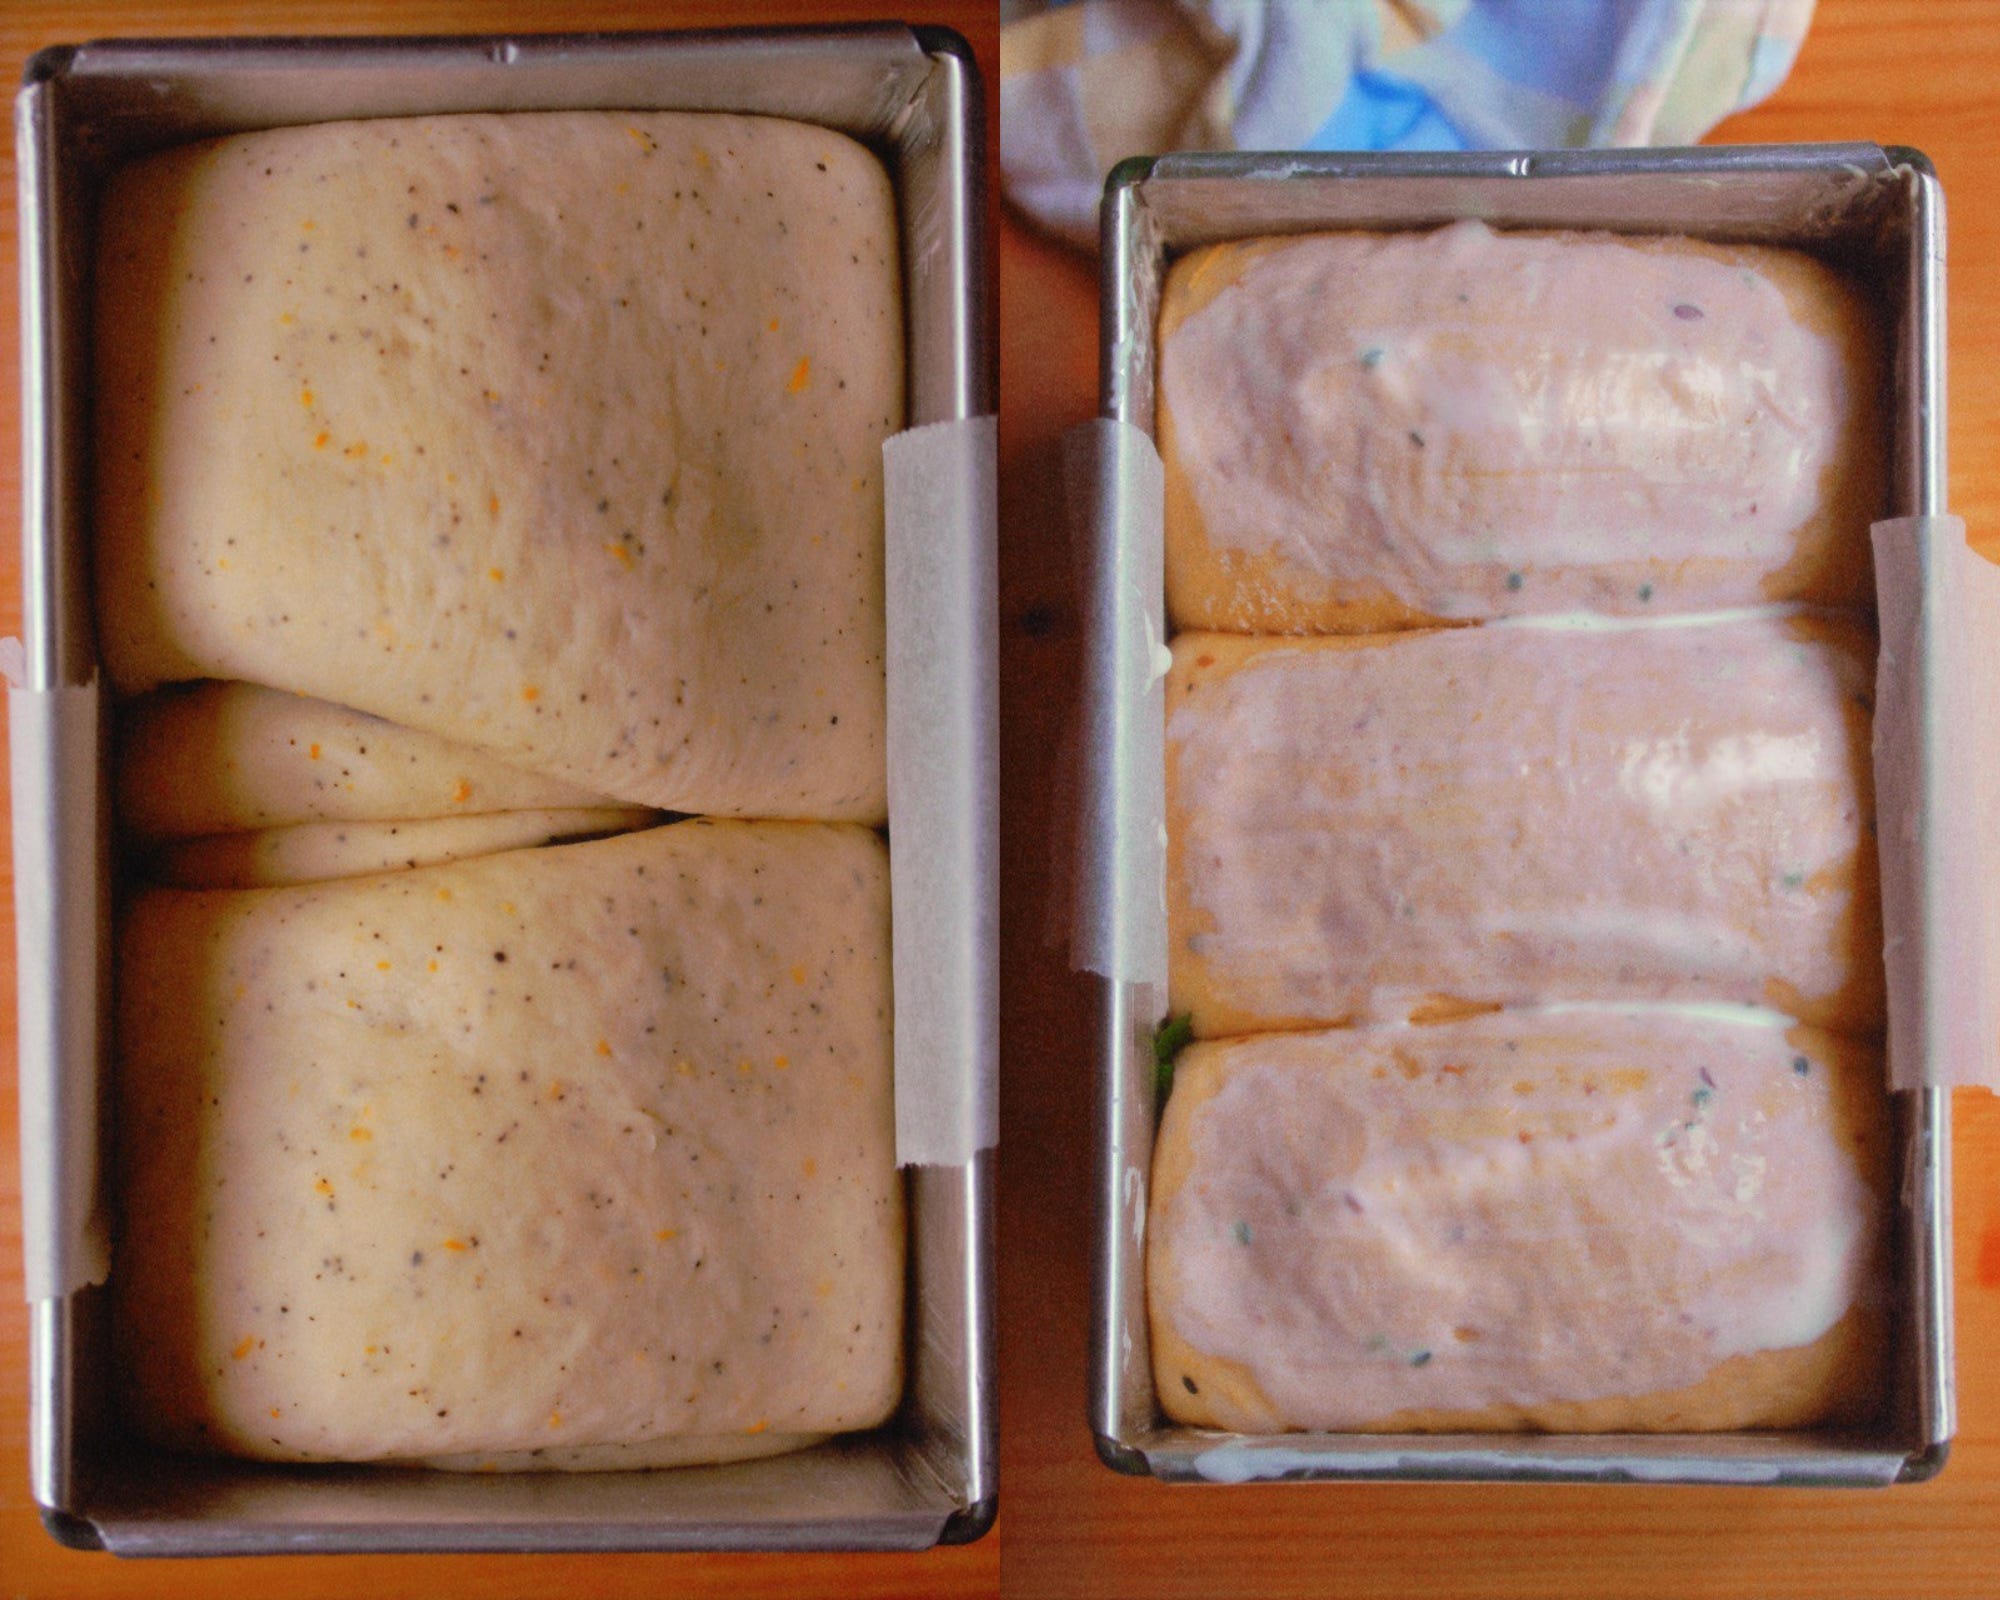
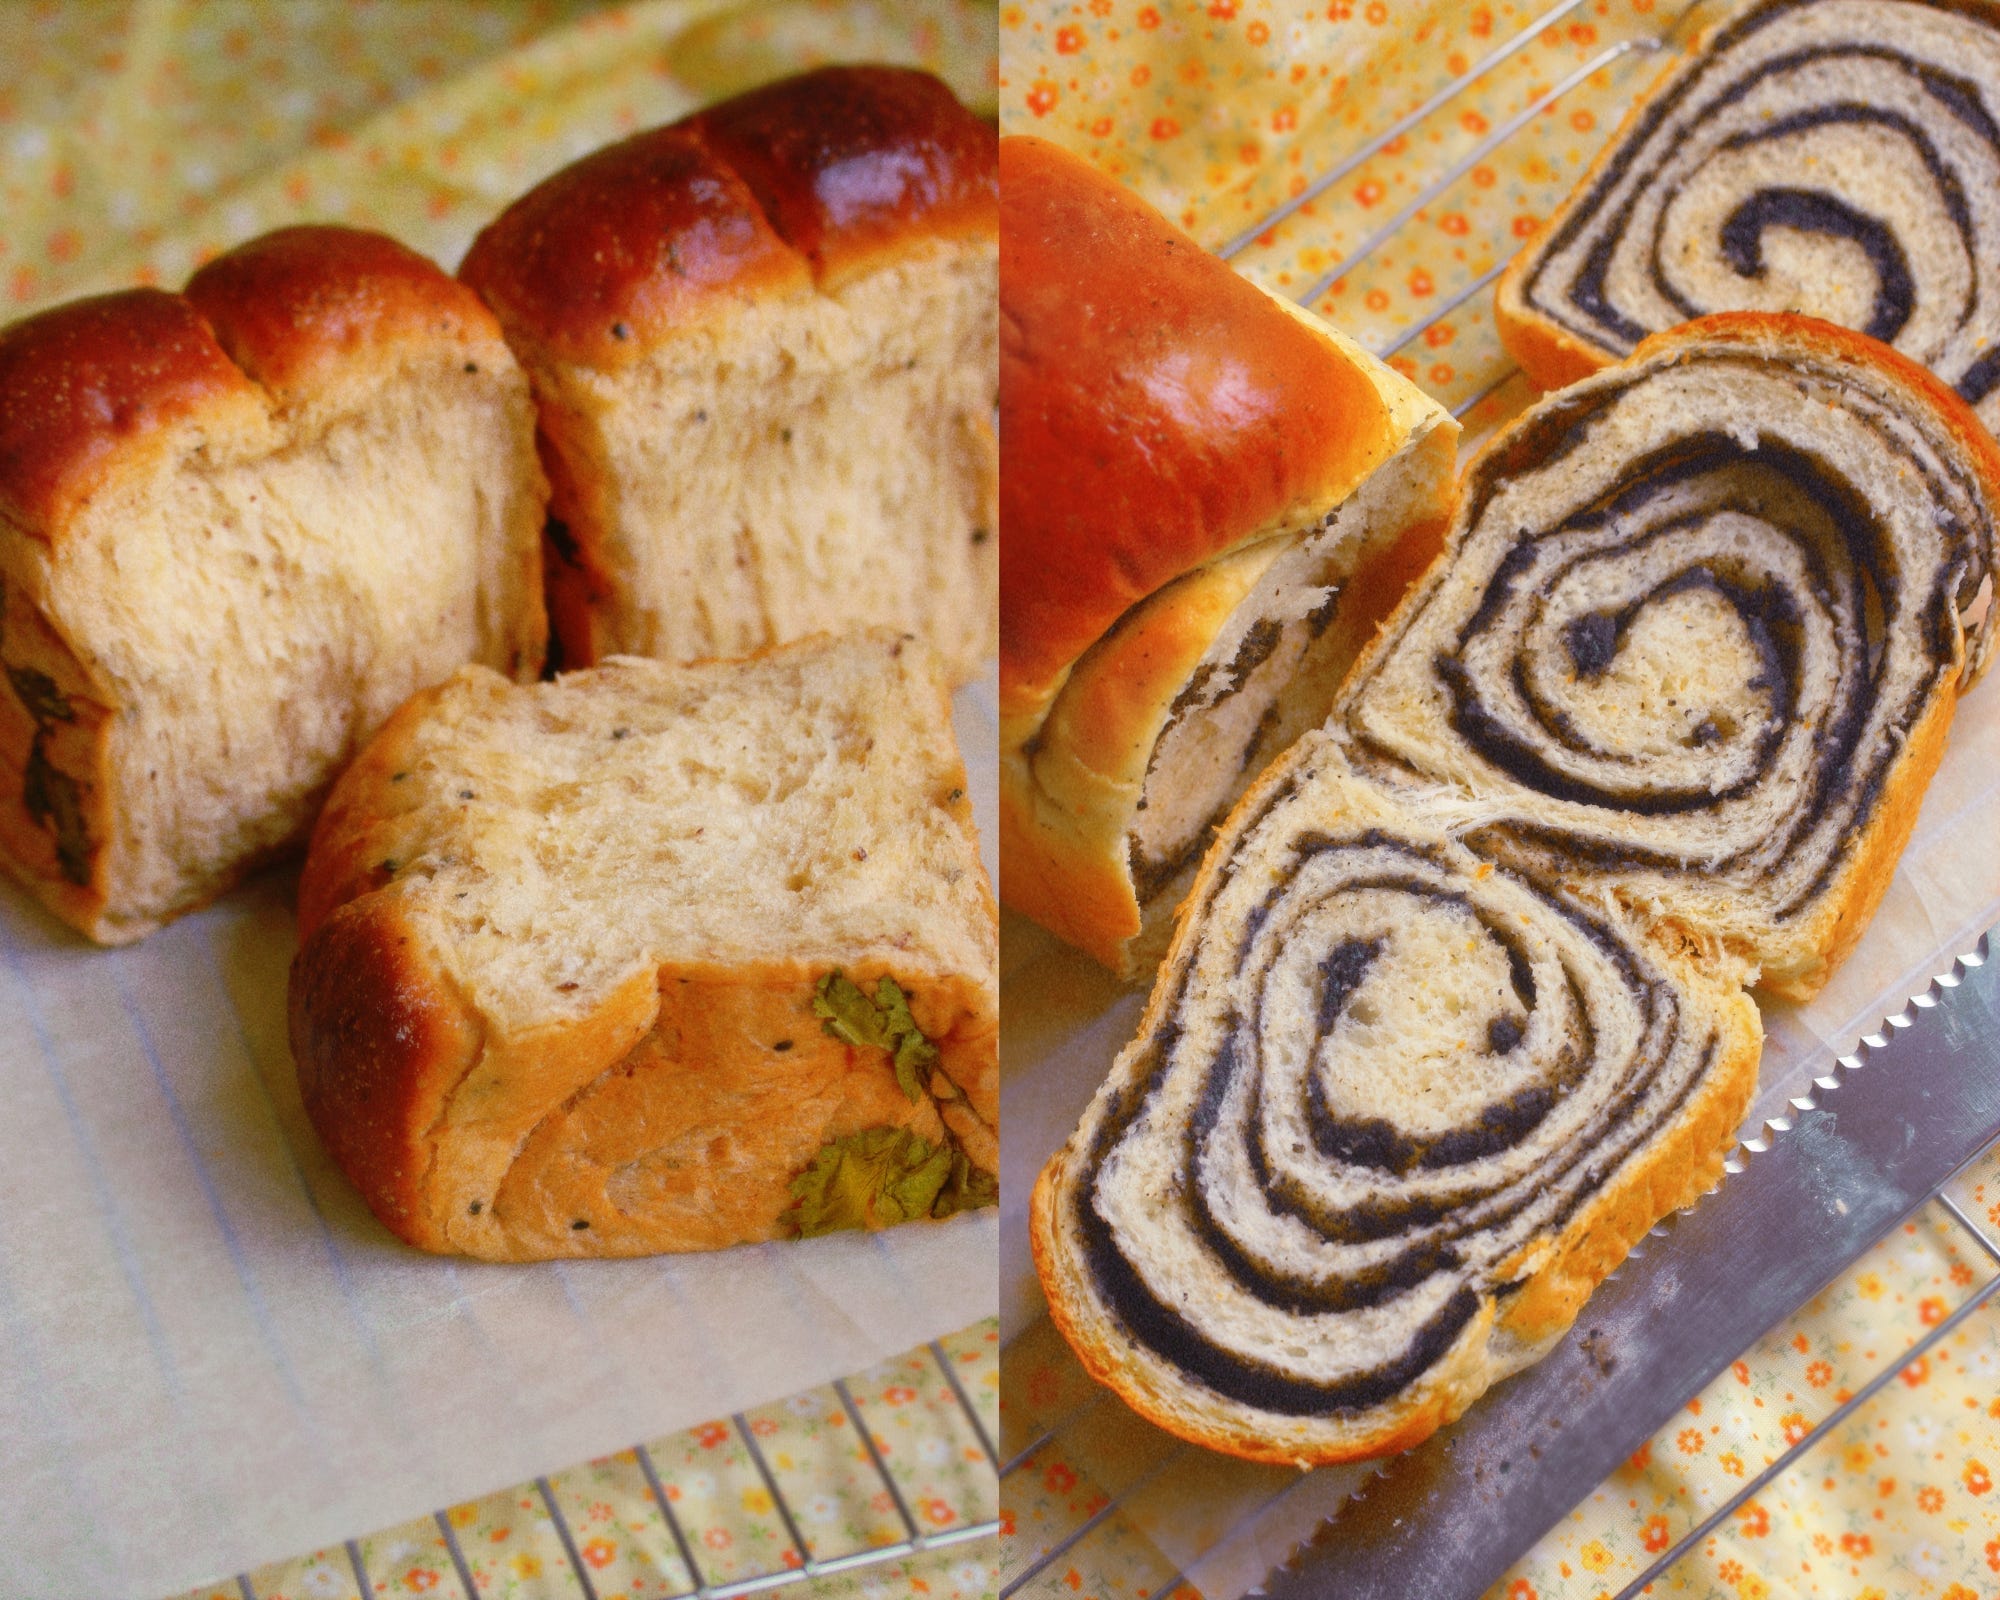
On the pictured loaves: the swirled version had orange + kumquat zest and was swirled with homemade black sesame sweet bean paste in a method adapted from Maida Heatter. The other, with coriander fronds adhered to the sides of the greased tin; a plain dough with ~15g of oat bran, ground flax, and black sesame added in.
Vegan Milk Sponge Loaf (aka the sweet starter bread)
Yield: 1 loaf in a 450g tin
Sweet Stiff Starter
350g bread flour
4g instant dried yeast
20g light brown sugar/liquid sweetener of choice
32g coconut cream/plant cream (a thick coconut yogurt or soy equivalent will work)
190-200g pure soy milk or oat milk (by this I mean full-fat and as unadulterated as possible — nothing thin and watery like Alpro or Almond Breeze)
Main body dough
All of the sweet stiff starter
25g light brown sugar
20g coconut cream powder, also labelled as coconut milk powder/dairy-free multigrain or cereal drink powder (I use the brand Kara)
5g salt
30g softened vegan butter or softened/liquid coconut oil (you can up this to 35g for maximum richness)
coconut cream to brush (optional)
For the sweet stiff starter: Mix all ingredients for the sweet stiff starter together with a spatula or wooden spoon, using only 190g of the milk first. Gradually add more milk, a tbsp at a time, if your flour requires more hydration. It should be shaggy and tacky, beyond comfortable handling, like a very thick muffin batter or hefty focaccia dough.
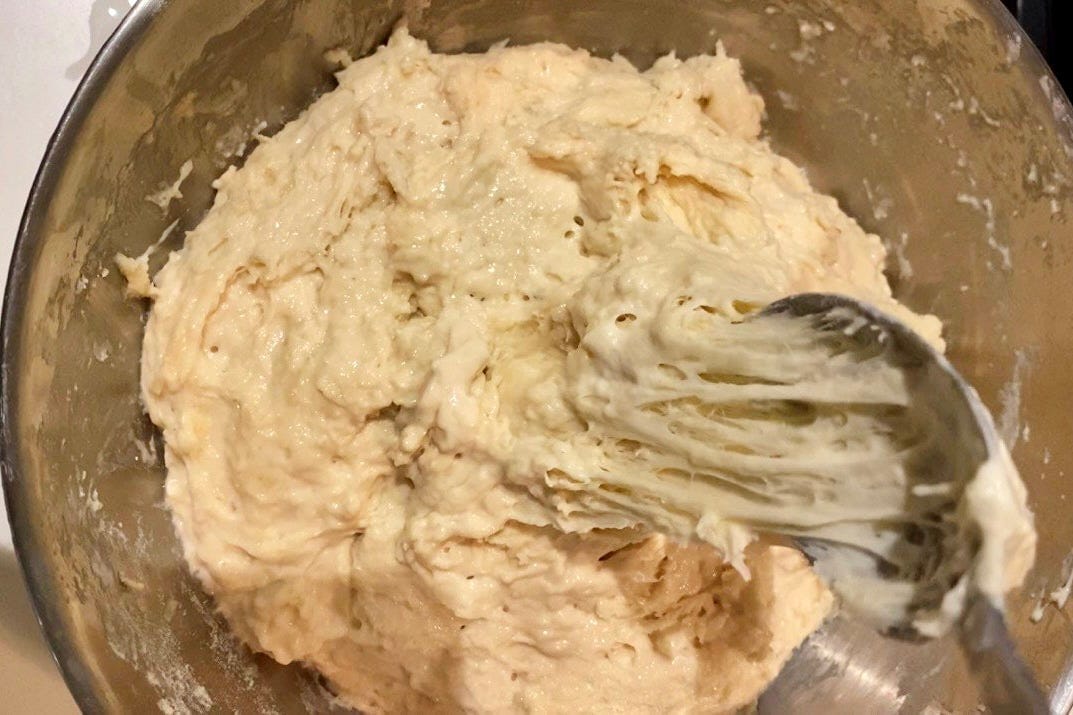
Let this rise at room temperature for 1-2 hours, covered in clingwrap, or until a long honeycomb structure of gluten is formed (you can pull a little at the side with your spatula or merely tilt the bowl to check). It should be 3-4x the initial size and smell sweet and alcoholic; there should be little air holes all over the top, spongelike.

The sweet starter after proofing. After this, I like to chill it in the fridge overnight for use the next day; you can keep it for up to 2 days this way. If you are operating in a non-humid climate, you might have to let your dough come to room temperature (and rise additionally if needed) before using, if it is too stiff from the fridge chill. Alternatively, you can let it rise for 5-6 hours at room temperature and use on the same day.
For the dough: Scoop out the sweet stiff starter into the basin of your stand mixer (if using); to make the mixing easier, snip it into small chunks with scissors or dice with a dough scraper before using. Add all other ingredients except for the butter/oil.
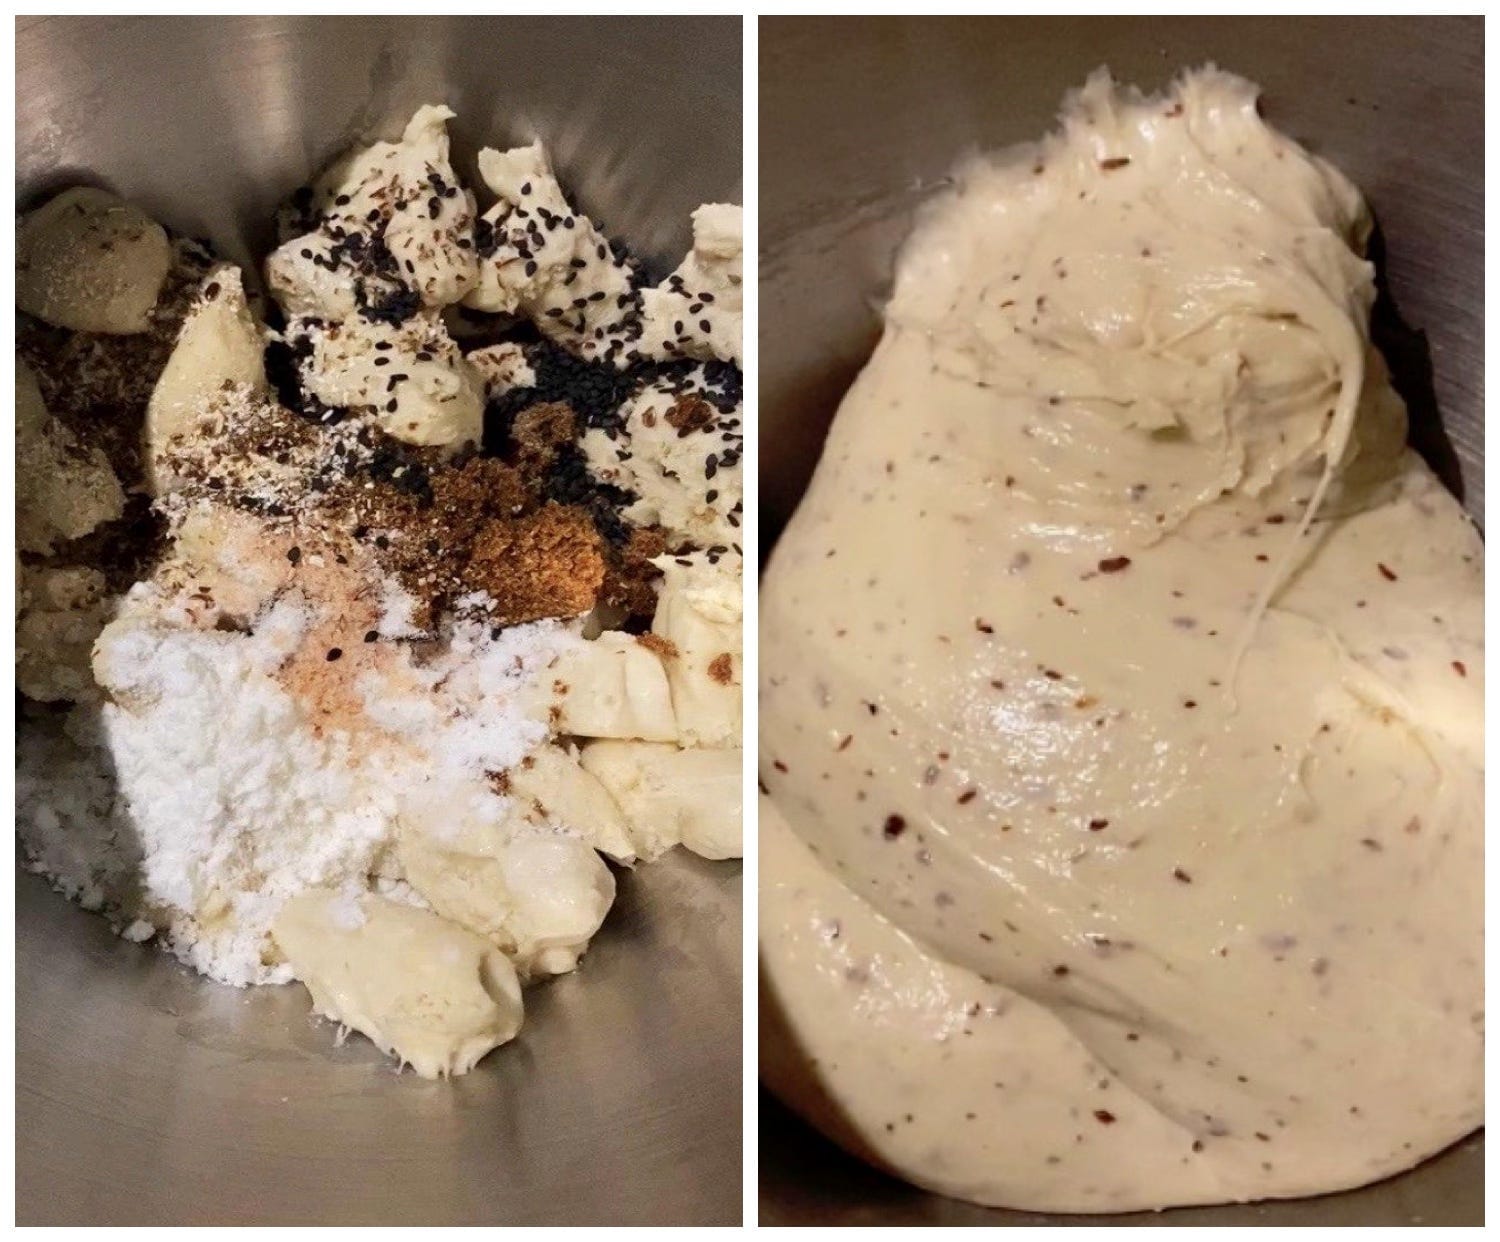
Knead until a thin windowpane is achieved, and then add the butter/oil and knead again until the dough comes back together and a strong, elastic windowpane is formed that can stretch over your knuckles. I like to cover the mouth of the bowl with a damp towel a little bit after the fat has been incorporated and just let it rest for 10-15 minutes—it will come to windowpane quicker and stronger.

Final dough, before and after mixing. Form the dough into a ball as best as you can with wet/oiled hands (it should be glutinous and ‘pouring’ from the dough hook). Place in a large, oiled bowl. Cover and let it rise in the fridge overnight (8 hours minimum, 13 hours maximum) or at room temperature for about an hour, until doubled in size. I always let it rise overnight, as I prefer working with cold dough especially due to its high hydration. Tip it out onto a lightly floured surface and divide the dough into 2 or 3 portions, form each into a ball and let this relax for 10 minutes covered with a damp teatowel or plastic wrap.
Flatten each ball with your palm into an oval. Roll this up, swiss-roll style, and pinch to seal. Turn the swiss roll 90 degrees such that the swirled end faces you, and gently flatten with your rolling pin. Roll this out into a long strip the width of the loaf pan, and roll it from top to bottom again like a swiss roll. Repeat and place the rolls side by side into a greased 450g loaf pan. Cover with a damp teatowel or clingwrap and let rise until doubled in a warm place, about an hour and a little more (I put mine in a closed, cold oven with a dish of hot water; in Singapore this took me 1 hour and 10 minutes). It should fill 80-90% of the tin.
Preheat your oven to 190˚C/375˚F. Brush your dough lightly with coconut cream if desired (not necessary if you use a lid). Turn down the heat to 180˚C/356˚F and bake for 25-40 minutes depending on the size and material of your tin; cover with foil no earlier than 10 minutes in if it starts browning too quickly.
Transfer to a wire rack to cool and brush with liquid sweetener of choice or 15g sugar dissolved in 10g warm water, if you want a glossy finish.

Vegan Milk Sponge Loaf (aka The Sweet Starter Bread)1000KB ∙ PDF fileDownloadDownload


Member discussion