I’ve made yogurt at home on and off over the years, but the inconsistent results I’d gotten discouraged me from keeping up the practice. One of the side-benefits of working from home full-time is that it’s easier to find the time for low-lift but long-taking projects like yogurt (and bread, duh), and I’ve since taken it up again. (We also eat a lot of yogurt, and I started to dread the amount of single-use plastic it involved.)
This time around I have perfected my approach, and it is now consistently as good as, if not better than, the good supermarket stuff. And while it isn’t necessarily cheap, it’s still significantly more economical than buying yogurt premade. A quart of good Greek yogurt from the supermarket costs around $6. Meanwhile, a half gallon of good milk costs about the same. Even once you add the cost of the milk powder (more on which below), the total cost for nearly 3 quarts of yogurt comes to less than $10.
And best of all, my current method gives strained/Greek-style yogurt without all the mess and fuss of straining it. (I loved thinking up interesting ways to use up all the whey that straining yogurt created, but honestly I don’t miss all the extra dishes, dirty hands, and whey-soaked cheesecloth the method required.)
Here are the things I’ve learned along the way:
It’s a good idea to develop a regular cadence, especially one that keeps the culture happy between uses. Yogurt cultures are similar to sourdoughs: the more often you “feed” them, the happier they will be. I make one half-gallon of milk’s worth every other week or so, which seems to work fine.
Supermarket yogurts are mostly made with purified cultures that aren’t robust enough to be reused for more than one or two generations before petering out and leaving the yogurt thinner and thinner with each batch. Using them is fine, but can lead one to think there is something wrong with their technique when really the culture is to blame.
Meanwhile, “heirloom” cultures can be re-cultured indefinitely. I got my current one from a jar of White Moustache, but you can also get dried ones from places like Cultures for Health or Cheesemaking.com. (Be sure the culture is labeled as heirloom.)
While it might be tempting to add more starter culture to the milk to speed up fermentation and/or create a thicker yogurt (I speak from experience here), for somewhat mysterious reasons, I’ve found that less is definitely more when it comes to yogurt making, especially if you like one with a mild-mannered flavor. I like 1-2 tablespoons culture per quart of milk, which takes 6-8 hours to ferment to my desired consistency and flavor.
If you start with supermarket milk, there is zero reason to scald the milk. Nearly all supermarket milks are ultra-pasteurized, so they are essentially “pre-scalded”;
you only need to heat the milk to 115˚F (46˚C) so that it will begin to ferment once the culture is added.UPDATE: I don’t even warm the milk up first anymore, I just use cold milk and let it warm up in the water bath. And don’t let anyone tell you you cannot make great yogurt with ultra-pasteurized milk, I do it all the time. (I think UHT milk, the kind that doesn't need refrigeration, doesn’t work well, but I haven’t tried it.)If you use raw milk, you should scald it, which means holding it at 185˚F (85˚C) for at least 10 minutes. (You can safely make yogurt from raw milk without scalding it, but your culture will likely be happier if you first kill off any competitors by doing so.)
Holding raw milk at 185˚F (85˚C) for 30 minutes or more will likely give you a thicker yogurt, since it denatures the proteins (in a good way).
Either way, bring the milk to temperature gently, and stir it regularly (and constantly once it gets close to the maximum temperature) to prevent scorching.
Adding nonfat dry milk powder to the milk ups the milk solids to “pre-thicken” it. (This is something I learned from my pal Lan, who developed a yogurt recipe for Cook’s Illustrated recently, though she didn’t end up using the method in hers.) Many recipes call for ~1/2 cup (60g) per half-gallon of milk. I mistakenly added more than twice this amount one time and found it made something that didn’t need straining at all, and it’s been my go-to method ever since.
Adding dry milk powder also increases the volume of yogurt you get out of one batch. My recipe yields just shy of 3 quarts of yogurt from a single half-gallon of milk.
Dry milk powder is resistant to hydrating. You can’t just dump it into the milk, or you will end up with a clumpy mess. Instead, whisk some of the milk into the powder a little bit at a time until it forms an even slurry, then add it back to the remainder.
All the whisking involved in adding dry milk powder and scalding can cause the milk to foam up, which will carry over to the yogurt. You can pass the milk through a strainer to break the foam and also remove any stray solids that might have formed during heating. (Press on the solids with a spat to retain as much of them as possible.)
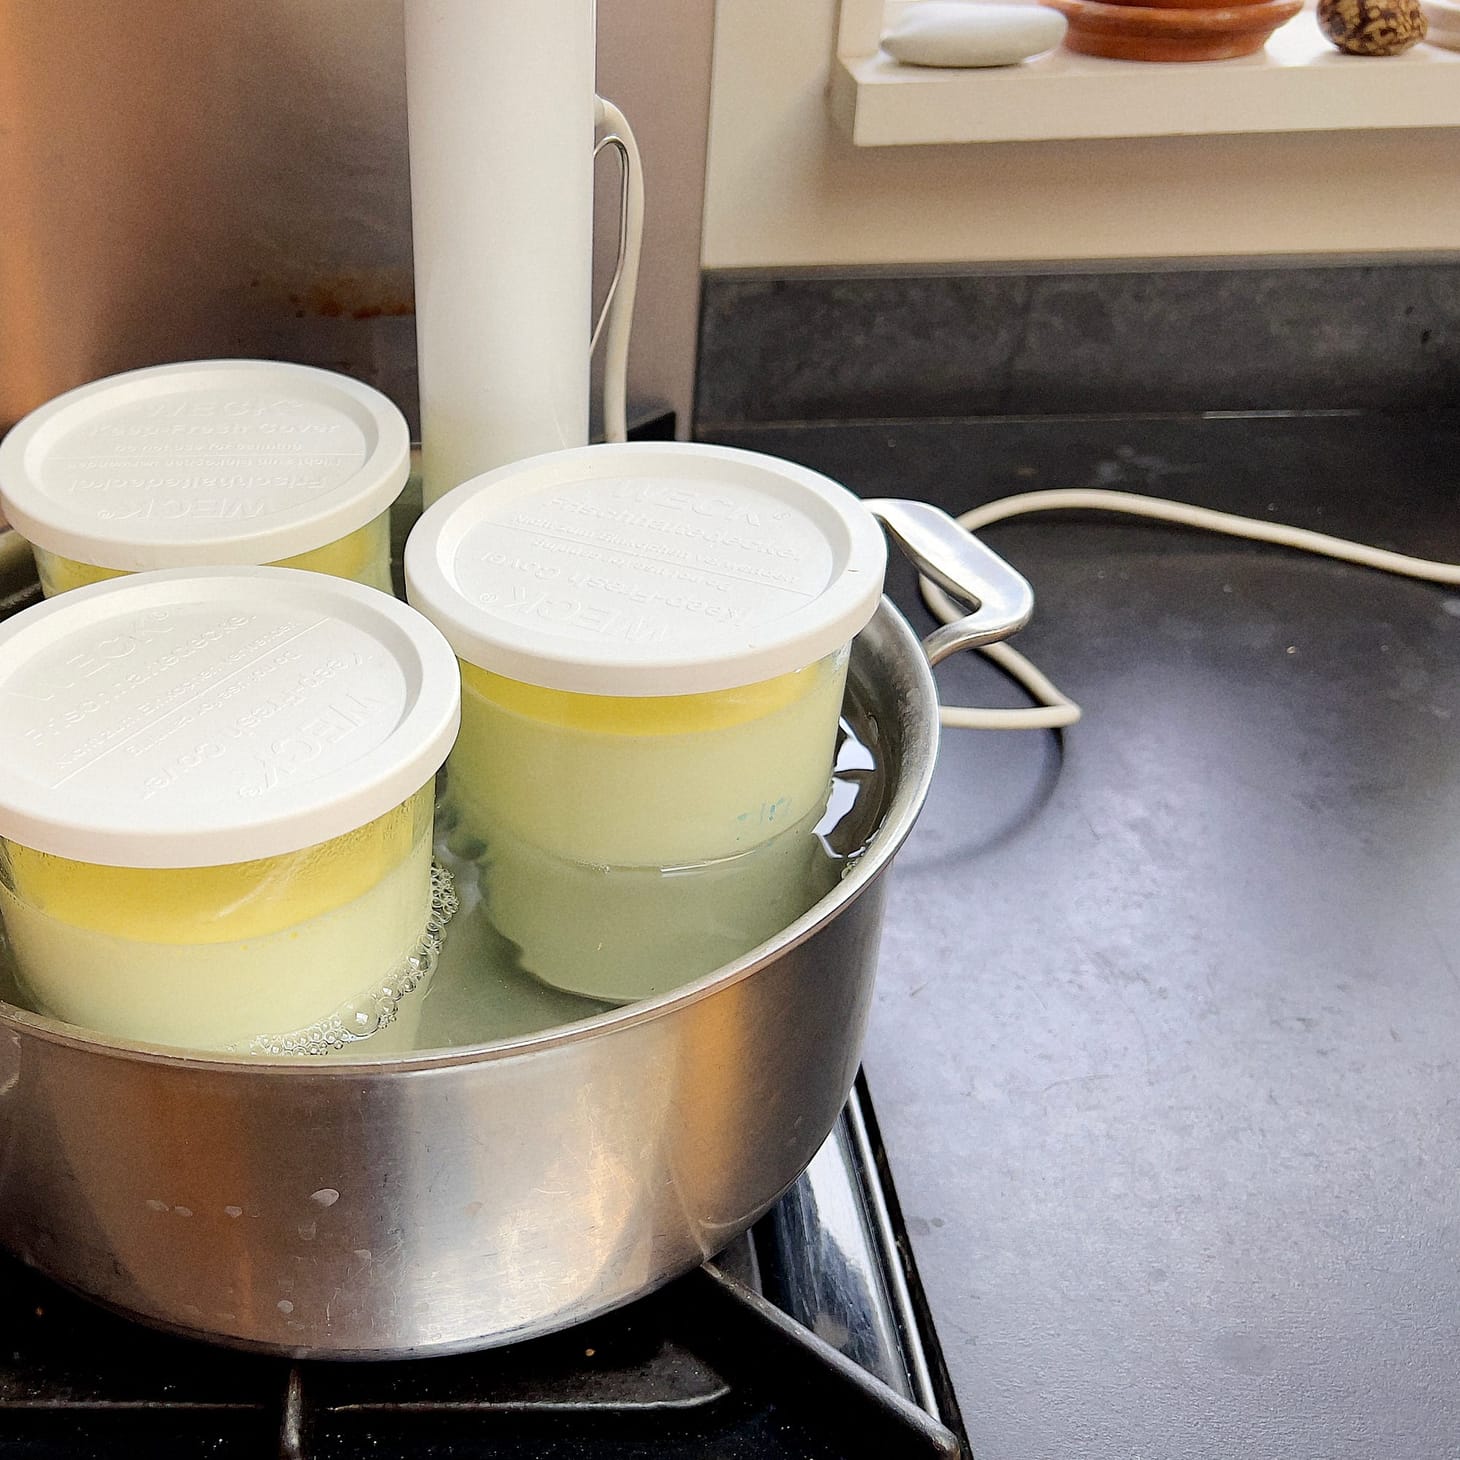
I like to culture my yogurt directly in its final containers, so there’s no need to divide it up later, which can break the gel in the process. Keeping the yogurt in smaller containers also means less chance of contaminating the culture before it comes time to make more.
Less is more when it comes to culturing yogurt too. You can incubate it at temperatures as high as 115˚F (46˚C), but I found it got too sour too quickly that way. My preferred temperature is 105˚F (41˚C). As I said, mine is usually ready in 6 hours or so at that temperature.
Yogurt sets up significantly once it cools down, but it takes awhile to do so. Don’t be tempted to incubate yours longer because it is thinner than you’d like. I usually let mine go until it’s just solid, with no wiggle left in it. Overnight in the fridge is usually long enough to firm it up completely.
Because the recipe makes 3 containers worth, you might want to pull each one out of the incubator at a different endpoint and compare the results to sort out the level of set and sourness you prefer.
That’s everything I know, and it should be more than enough for you to divine my actual recipe. Paid Wordloaf subscribers get access to the actual actual recipe below, including a bunch of different methods for incubating them, along with the ability to comment on how great it is.
—Andrew