Class time: Thin Crust Pizza 101: The Dough
Pizzember is here, people
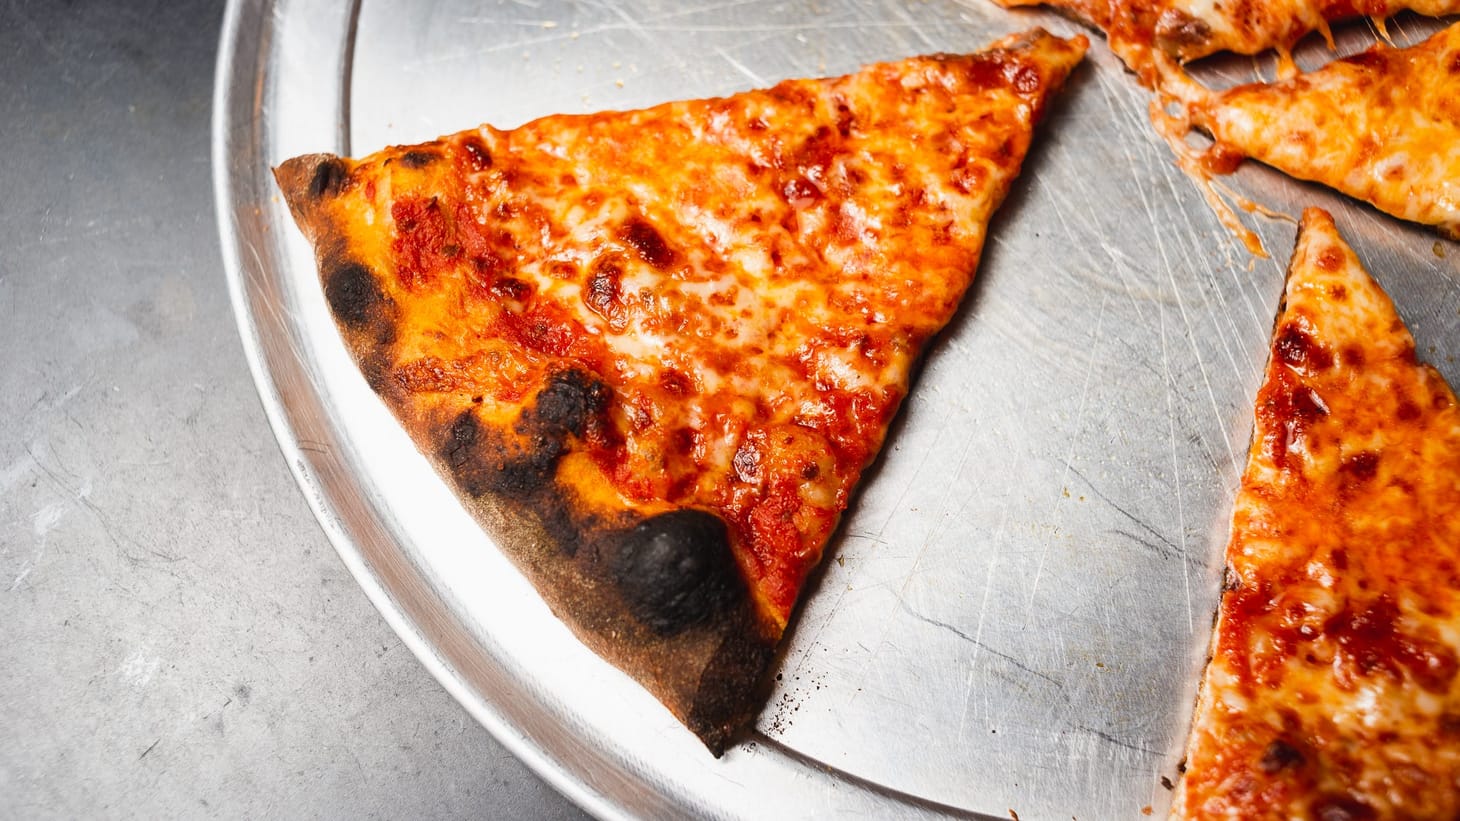
Table of Contents
As I said, all of my content in November is going to be devoted to pizza, a huge topic I haven’t covered here at all yet. It’s such a big subject that it’s hard to know exactly where to begin. I have recipes ready to roll, but—even with detailed instructions included—I really believe that success with pizza first requires a thorough understanding of some of the underlying principles. And while there are lots of aspects of the recipe to consider, none of them are particularly complicated, thankfully.
I’m going to focus initially only on thin-crust pizza. While I love pan pies as much as thin ones, they are different beasts entirely, deserving of their own separate focus. I think we will get to at least one pan recipe before the month is out, but we shall see. And though I typically try to send out a recipe once a week, I am going change things up this time around and hold off on sharing recipes until next week, so I can get a solid base of information in place first. My pizza recipes—even more so than bread ones—are typically variations on just a few themes, built upon simple, basic frameworks that can be applied to a wide variety of styles, and it’s worth understanding things before you begin.
The good news is that I have loads of recipes to share with you eventually, since I have been at this pizza thing for ages now. While my obsession with bread only began about 10 years ago, pizza was the first thing I ever wanted to learn to cook, as a teenager. At last count, that was a long time ago, and I’ve been tinkering with and refining my pizza recipes ever since. Moreover, one of the very first recipes I developed for Cook’s Illustrated was for a New York-style thin-crust pizza, one that has served as the template for numerous recipes since, both in the magazine and on my own.
I promise it will be worth the wait, because next week I’ll be sending out two recipes to you: a NYC thin-crust recipe that includes 10 years of refinements upon the Cook’s Illustrated one, and a brand-new sourdough one that was recently abuse-tested by my crack team of peer-reviewers (if you want to join the team, it’s just a click away!)
Before getting to the tricks and techniques involved in making great pizza at home, it’s important to determine what we’re trying to achieve. What exactly is great pizza, after all?
To me, a perfect thin-crust pie—regardless of the style, and leaving aside questions of toppings altogether (we will get there, eventually)—should be a study in contrasts between inside and outside. Meaning I want a flavorful, well-browned, and crisp—but not tough—crust, with a tender, moist interior crumb.
Some of these goals are achieved before baking, through dough formulation, fermentation, and handling. Others are achieved during baking, by creating the oven conditions most favorable to them. (There’s even one that is achieved after baking: Eating the pie as soon as possible once it is done. Like many wonderful things, pizza perfection is ephemeral, and that inside/outside contrast, if achieved, only lasts but a few minutes once the pie is out of the oven.) Today, however, I want to focus only on what needs to happen before baking—we’ll cover oven setup and baking in my next post.
Flavor
Flavor in pizza crust comes from flour, fermentation, and browning.
Flour
The vast majority of my pizza recipes call for white flour, since I think the best texture in a pizza is achieved with refined flours—the bran that is removed in the flour-refining process is anathema to a tender, crisp crust. (That said, I will eventually share recipes for making very nice crusts with less-refined flours, so not to worry if that’s more your thing.) So the contribution toward flavor in the crust from the flour is generally pretty subtle. I do, however, sometimes add small amounts of whole-grain flours to amp up the underlying “grain” flavor in the crust—usually no more than 5%, and usually sifted to remove the pesky bran. As for what types of flour I recommend, it depends on the exact texture of the crust I’m aiming for. So I’ll leave that discussion for the individual recipes.
Cold-Fermentation
Fermentation creates flavor in a crust through the production of the secondary products of yeast—and, in the case of sourdough, bacterial—activity in the dough, compounds such as alcohols, carbonyls, and acids. Fast dough fermentations tend to favor only the production of carbon dioxide, leaving a dough somewhat flat in flavor. In order to shift the balance away from the production of CO2 and toward flavorful fermentation side-products, you need to stretch fermentation out somehow. One way to do this is by using a preferment, meaning a portion of the overall flour and water in the dough that has been fermented ahead of time, as in a levain or a yeasted sponge like a biga.
But my preferred approach to developing pizza flavor through gradual fermentation is to reduce the temperature of the dough by simply moving it to the fridge. Cold-fermentation (also known generally as retarding) is similar to what many of us already do with our loaf breads; at temperatures lower than the “ideal” 75-78˚F I mentioned in my DDT discussion last week, CO2 production slows down drastically, while that of flavorful compounds increases.
The difference here is that the pizza dough stays in the fridge for nearly the entire duration of fermentation, often for many days at a time. Though making pizza this way does require planning ahead, it is at least flexible, since you can bake the pies anywhere from 24 hours to as many as 5 days after mixing the dough (the total range depends on the specific style of dough in question). And convenient, since you make the dough on one day and bake it on another. And though the dough flavor does continue to improve over time—day 3 is usually when the dough is at its peak—it’s still very good after just 24 hours. (There are key textural benefits to cold fermentation of pizza doughs as well, something I’ll explain below.)
Browning
While achieving good browning in a pizza crust is mainly a function of oven setup and technique, there is one place where dough formula and fermentation are a factor: sugars. Though some dough formulas contain actual sugar, most of the sugars present derive from the enzymatic breakdown of carbohydrates (i.e., starches) into sugars (carbohydrates are simply long chains of various sugars linked together end-to-end).
Sugars are the fuel for caramelization—without enough sugar present during baking, a crust will end up dull in both color and flavor. But sugars are also the fuel that drives fermentation, and they can end up thoroughly depleted by the time it comes to baking, particularly after long fermentations.
That’s where diastatic malt comes in. Not to be confused with malt syrup or malt sugar, both of which are actual sugars, diastatic malt is a powdered mixture of amylases, the enzymes responsible for converting starches into sugars. These enzymes are naturally present in sprouted grains, since the conversion of starch into sugars is essential for the growth of the young, pre-photosynthetic seedling.
Diastatic malt is added to most commercial white flours to a consistent, standardized amount (it’s the “malt”, “malted barley”, or “barley flour” you’ll find in the ingredients listed on the side of the bag). But there isn’t usually enough of it in flour to keep the sugars flowing during very long fermentations, which is why I add more of it in those cases. A little bit goes a long way here—overdo it and fermentation can go crazy and the texture of the dough can turn soft. I recommend using no more than 2%, relative to flour weight, and I typically call for just 0.5% myself.
Diastatic malt is a specialty item that you’ll probably need to order online. Stored in a sealed container, it will keep for up to a year, longer if stored in the freezer.
Incidentally, there is no benefit to adding actual sugar to long-fermented doughs as a way to improve browning, since it will be long gone by the time it comes to bake the dough.
Texture
The texture in a pizza crust—both good and bad—comes from flour, hydration, and fat content in the dough formula, and from how the dough is mixed, handled, and baked.
Dough formula
The protein content of the flour determines how strong a pizza dough’s gluten structure will be, along with how chewy the interior crust and how chewy-crisp the exterior crust will be. For more tender crusts, I opt for high protein all-purpose flours like King Arthur; for more chew and crunch, bread or even high-gluten flour.
The hydration level (water content) of a dough influences how tender the crust will be as well, since the more water a dough contains, the softer it will be. But it’s a little more complicated than that, since that water has to cook off before the exterior crust can crisp up. Which means that the ideal dough hydration is also determined by how hot the pie will be baked. We’ll come back to this subject when we talk about oven setups in the next post.
Fat also helps tenderize dough, which is why most of my pizza doughs contain some oil. But too much fat and a crust can eat inappropriately rich or even greasy; for that reason, I tend to use no more than 2% overall in my thin-crust pies. (Other styles of pizza often contain more.)
Mixing and fermentation
Gluten development during mixing obviously has an effect on the final texture of the crust, but with long fermentations the impact is less pronounced than you’d expect. That’s because—as in the case with “no-knead” bread recipes—some amount of gluten development takes place while the dough sits. I’ve made cold-fermented doughs that were mixed to full strength and those that were mixed minimally, and both were similar in texture once I went to bake them. (You’ll notice this effect once you’ve worked with these doughs awhile—they’ll commonly go into the fridge somewhat rough-textured, but emerge a few days later smooth and even.) This means that protein content has a greater influence on the final dough texture than initial gluten development.
But more importantly, there’s actually an opposite effect that we are looking to achieve via cold-fermentation: increased extensibility. A recently-mixed, well-developed dough is elastic, meaning that it snaps back like a rubber band when you go to stretch it out. Cold fermentation increases the extensibility of doughs by giving slow-working, protein-degrading enzymes known as proteases the time needed to partially break down the gluten present. And a relaxed, extensible dough stretches easily and evenly.
(Minimal) Handling
The increased extensibility provided by long, cold fermentations actually has a doubly-useful effect on pizza texture: A relaxed dough yields a more tender crust, but so does one that doesn’t fight back when you try to stretch it. In other words: The more you wrangle with a dough to get it to its final dimensions, the more the gluten tightens up, and the tougher the resulting crust. Conversely, the less you (need to) handle a dough, the more tender the crust.
There are additional ways to avoid over-handling pizza doughs. Many pizza dough recipes have you bulk ferment the dough in a single portion and then divide and shape it into balls an hour or so before baking. But that only serves to tighten up the dough right when you need it to be the most relaxed. My approach is to shape it into individual balls at the start of fermentation instead.
Secondly, I store the balls of dough in separate, wide plastic takeout containers, rather than on trays. That way I can move each one around without touching the dough directly. And when it comes time to stretch the dough, I just gently invert the container over a bowl of flour, flip the dough over to coat the second side, and then transfer it to a lightly-floured counter.
TL;DR
You’re probably entirely overwhelmed by this point, or more likely your eyes just glazed over eleven paragraphs ago. Let me summarize it all briefly for you in a way that hopefully makes sense. To reiterate: The platonic ideal pizza has a flavorful, well-browned, and crisp—but not tough—crust with a tender, moist interior crumb. We achieve this by:
- Choosing a flour with the appropriate amount of protein for the style of pizza in question
- Using a long, cold fermentation for complex flavor development, minimal CO2 production, and a relaxed, easy-to-handle dough
- Adding diastatic malt to maintain adequate sugar levels in the dough throughout the long fermentation, for maximum browning during baking
- Minimally handling the dough before baking by shaping it into balls early on and storing them in individual containers, to keep the dough relaxed and supple
Achieving the contrast of a crisp crust alongside a moist interior crumb requires cooking the pizza as quickly and evenly as possible, something I’ll cover in my next post.
Until then: VOTEEEEEEEEEEE!
—Andrew
wordloaf Newsletter
Join the newsletter to receive the latest updates in your inbox.
