Before we jump into this week’s recipe, the Wordloaf Pie January straggler, I wanted to let you know that my friends over at Cairnspring Mills are doing a pizza giveaway for National Pizza Day, which is on 2/9. Prizes include:
A Tom Gozney Signature Edition Roccbox ($599 value)
Bianco DiNapoli Pizza Sauce ($20 value)
A copy of Bianco cookbook ($39.99 value)
Ferndale Farmstead cheese ($24 value)
An assortment of Cairnspring Mills flour ($35 value)
A Cairnspring t-shirt ($25 value)
It’s free to enter, just add your contact information here!
I have never been to Detroit (though it has long been high on my list of American cities to visit ) and have never had Detroit-style pizza in its home territory. Which means I am no expert on the style. But I have had my fair share of Detroit-style pies outside of Detroit, and I love it very much. And I have been studying how to make it for a long time now and have a recipe I am pretty happy with.
Would a Detroiter consider it authentic? I have no idea. But that doesn’t matter to me so much, since it hits all of the hallmarks of what I expect from a Detroit pie, and it is delicious. My ideals for this style of pie might change once I’ve finally had the real deal, but for now this will do quite nicely.
If you aren’t yet familiar with Detroit pizza, here’s how it is described by Buddy’s, the pizzeria where it was originally invented in 1946:
Detroit is what it builds. 75 years ago a new style of pizza was born in the Motor City and it was different. What makes a pizza Detroit-Style? The same things that made Detroit – a little bit of ingenuity, some stubborn spirit and a whole lot of heart. It’s what sparked an original idea back in 1946 to take a steel auto pan, create something new and make Buddy’s the birthplace of Detroit-Style Pizza…
The Detroit-Style Pizza legacy began at Buddy’s Rendezvous Pizzeria on Six Mile and Conant street on Detroit’s eastside when in 1946 Gus Guerra and Concetta “Connie” Piccinato made their first square-shaped pizza. Baked in forged-steel pans borrowed from local automotive plants, they were able to produce a very light and crispy crust which is now known as Detroit-Style Pizza. This was the first known square pizza in the U.S. and now, more than 75 years later, the pizza style has become a national favorite.
And here’s a short video that describes the history of Buddy’s and a few of its descendants:
Detroit Techno
These are what I consider the hallmarks of a great Detroit-style pie:
It’s baked in a deep, rectangular, and dark-colored steel pan. The pans first used at Buddy’s were steel pans originally meant for use as drip trays to catch motor oil or to hold small parts or scrap metal in automobile factories, and some have apparently been in use there since the beginning. But black steel pans from places like Lloyd’s are what most home bakers use to recreate this style nowadays. The dark color of the pan and its ability to retain a solid coating of seasoning help guarantee a crisp, brown crust, and the high, angled sides help create the signature cheesy rim.
It has a cross-section about 3/4 inch high, with a light and airy internal texture.
It has a fricco-like rim of crisp, lacy cheese where the pizza and the pan meet. (Detroit pizza is a corner-slice-lover’s dream style.) It is made by making sure to cram a lot of cheese around the edges of the pan. (Detroit pizza is not a lactose-intolerant person’s dream style.)
The cheese used at Buddy’s and elsewhere is Wisconsin brick cheese, a medium-soft cheese with a buttery, mildly sharp flavor. It’s hard to come by outside of the Midwest, so many home cooks approximate it with Monterey Jack, or a 50/50 blend of low-moisture mozzarella and white cheddar.
Best I can tell, the original Detroit pies did not really have a distinct raised “crown” of cheese—this frill was something that was added by pizzerias outside of the Motor City, and is perhaps best represented by Los Angeles’ Apollonia’s Pizzeria. It is achieved by pressing the shredded cheese up the sides of the pan before baking and then very carefully separating the fragile crown from the pan after it is baked.
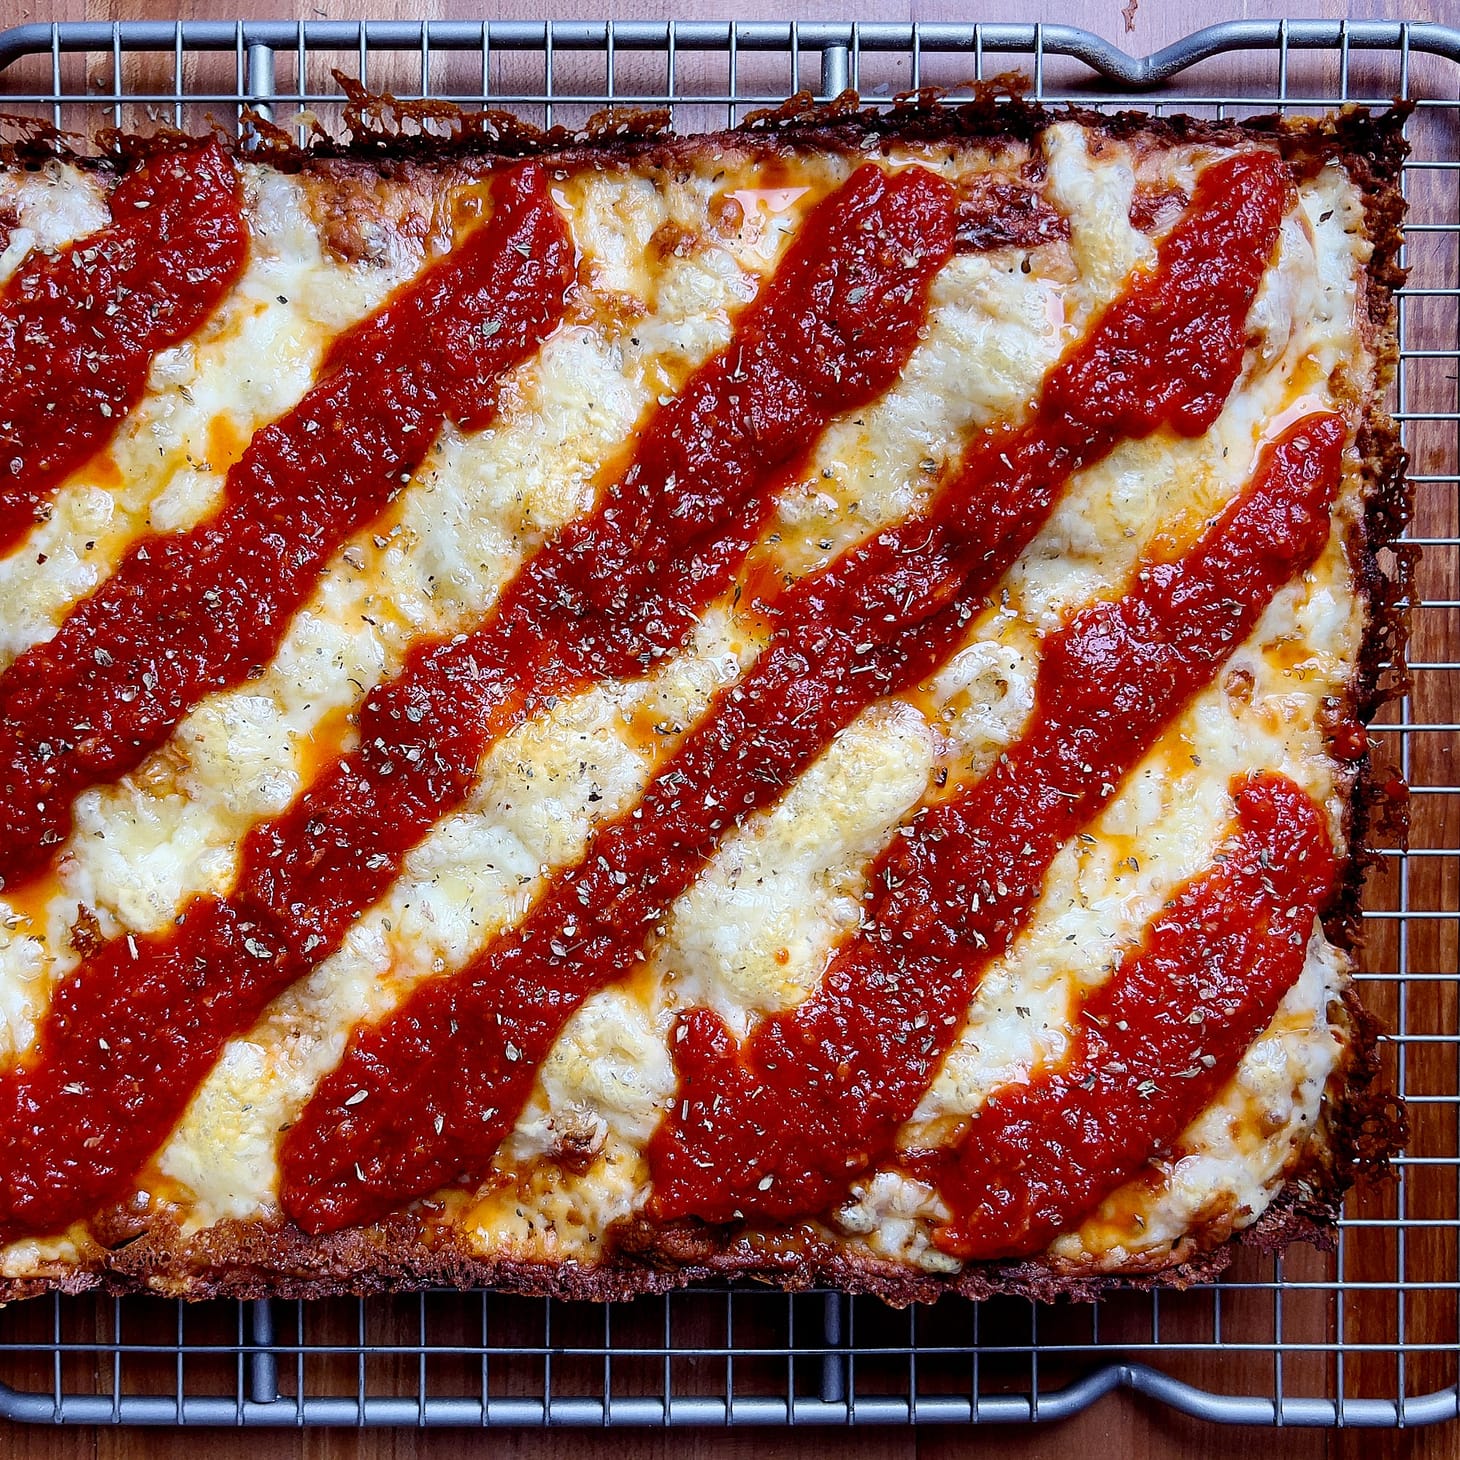
The sauce on a Detroit pie is applied above the cheese, either in stripes or scattered over the pie, with only about half of the total surface area covered. While many places bake the sauce onto the pie, some top it after the fact, which helps to keep the crust from sinking beneath it.
If pepperoni is added, it is traditionally placed in a single layer under the cheese.
My Way
Some of the approaches I take to my own Detroit pies are traditional, while others are ones I’ve gleaned by reading up on how other people make theirs, or by experimentation to find what worked best for me. Here’s where I landed:
I have two formulas, one with yeast and a hybrid using both sourdough and yeast. The sourdough has a slightly more wild crumb and a bit more tang, but both are excellent. The base hydration in both is 70%.
It’s a hand-mixed dough with a short autolyse and a ~2 hour, room-temperature bulk fermentation, followed by a 16 to 48h cold fermentation. (How long I stash it in the fridge is mostly a question of convenience.)
It’s not essential, but I like to cold-proof in a rectangular or square pan, so that the dough is already close to the shape of the final pie when it comes time to stretch it out. That said, if you leave it in a bowl, it will be fine, you’ll just have to do a bit more stretching later on.
This recipe is scaled for a 14- by 10-inch Detroit pan, which, conveniently enough has close to the same internal dimensions as a 13- by 9-inch cake pan, should you have the latter but not the former. Your crust might need an extra 5-10 minutes to brown properly in a lighter-colored pan. Unfortunately, it’s harder to get the crown cheese to stick to a cake pan since it has straight rather than angled side walls.
As with the other Sicilian pies I shared earlier this month, I like to coat the pan with a solid fat like coconut oil or vegetable shortening, which helps the dough adhere to the pan while also promoting crisping.
I proof the dough in the pan for about 3 hours, stretching it gently toward the corners every 30 minutes or so until it fills the pan. (I think this pan proof could be extended further, and plan to try 4 hours next time.)
When the pie is ready to bake, I gently push it up the sides of the pan to create a slightly raised rim.
I par-bake the crust for 8 minutes at 500˚F/260˚C, with a light band of cheese around the rim. This is something I learned from Pizzamaking Forum expert HansB, who discovered that the combination helped minimize shrinking of the dough away from the sides of the pan. Avoiding shrinkage is important if you want to get a tall crown, since if there is a gap, the crown cheese sinks below the rim of the pie. (Note: in the photo above, I used up some sliced provolone, but I call for Monterey Jack in the recipe.)
After the par-bake, I let the pan cool slightly before topping the pie with the remainder of the cheese, making sure to press a good amount of cheese up the sides of the pan to form the crown.
I then bake it for another 15 to 20 minutes on a baking steel, until the crown is browned and the top cheese is spotty brown. If everything works as it should, the bottom should also be nice and brown by this point, but you have to go by faith or end up ruining the fragile crown by peeking.
While the pizza cooks, I reheat the sauce on the stove so that it is ready to apply to the pie. (I’m currently adding my sauce post-bake, though I am not 100% sure that’s necessary given the par-bake.)
To separate the crown from the edges of the pan, I’ve recently been using a small palette knife that I found at a local art supply shop. It’s thin, lightweight, and flexible, which makes it easy to slide into the narrow space between the cheese and the pan without busting it.
It also helps to have a pan gripper to hold the pan steady while you work.
Anyway, I think that covers my current recipe in enough detail. You can find the recipe below the fold.
Thanks kindly to Wordloaf pal Rhianna Morris, aka One Hollow Leg, who did some excellent testing of this recipe for me awhile back, and who had this to say about the recipe she got to play with:
I was excited to try Andrew's Detroit crust not to make a traditional Detroit pie, but for a puffy alternative to the thinner, more neo-Neopolitan round pies I had been making. The height I achieved always amazed me, and despite its looks as a thick pan crust, it was incredibly light and airy. In my oven, I found it helpful to start the pan on a baking steel and to blast the heat at 500 F for about 5 minutes before reducing it and then topping at around the 10 minute mark. In addition, the dough was much more relaxed and easier to stretch after at least a 48-hour rest in the fridge. Despite the needed touch time when you're first making the dough, I always enjoyed the coil folds because I loved watching and feeling how the dough became a magical jiggly puff of airy dough.
—Andrew