Class Time: Thin-Crust Pizza 101 - The Dough, Part 2
From the Fridge to the Oven
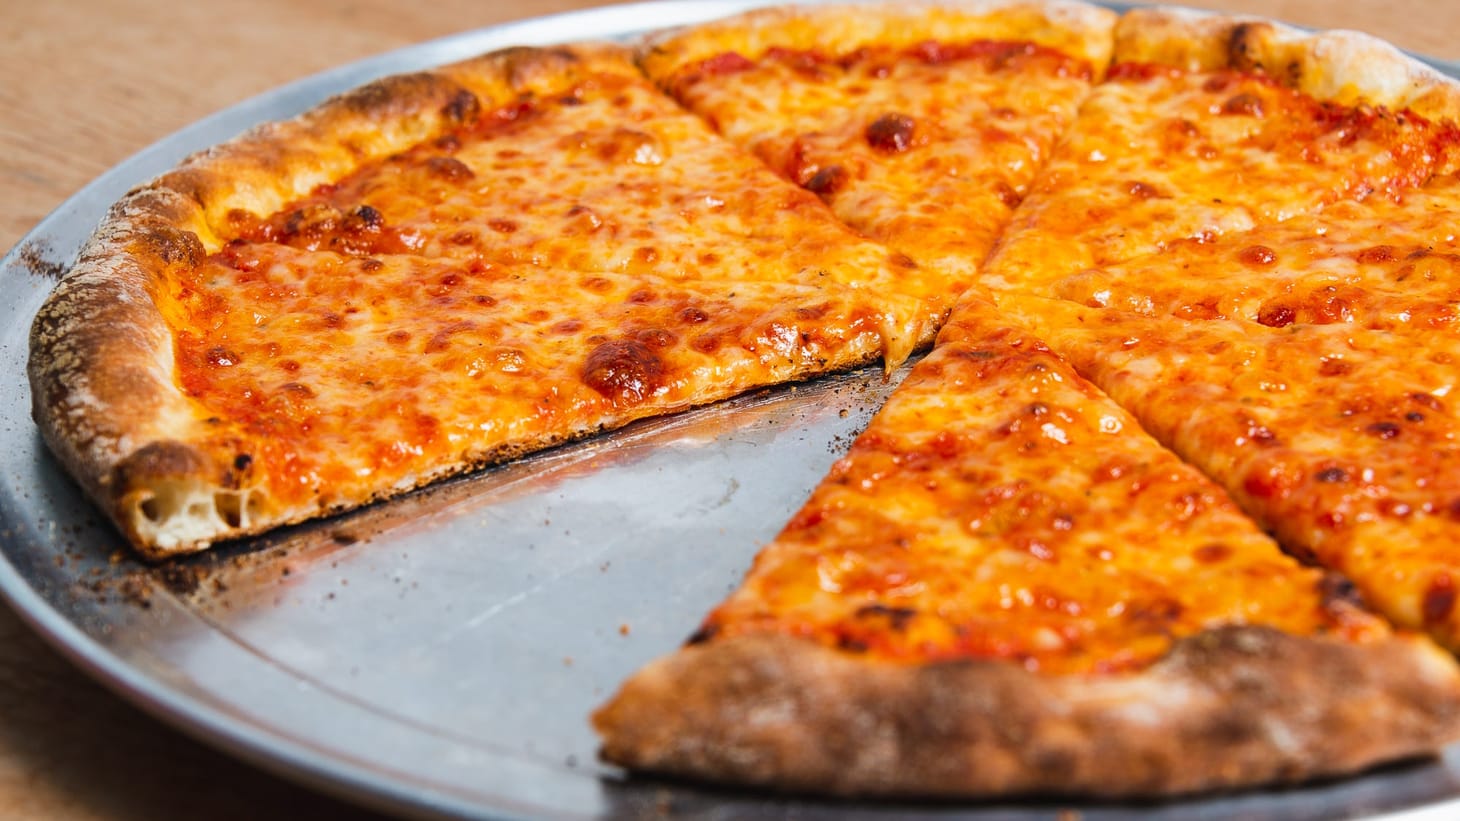
Table of Contents
Turns out all this thin-crust pizza stuff is going to require not two but three posts, since I realized that what happens after the dough has cold-fermented, but before baking it deserves its own post. So part three, the bake itself, will drop next Tuesday instead.
From the Fridge to the Oven
To reiterate our goals here: a flavorful, well-browned, and crisp—but not tough—crust, with a tender, moist interior crumb. There’s one more element I want to add to this description: What I mean when I say thin-crust. For me, the type specimen for a thin-crust pizza is a New York slice like this one:

Notice how that pie is—other than the nice puffy rim—evenly flat from edge to edge. To achieve that, there can’t be any large alveoli in the dough, which is why I use cold fermentation to inhibit CO2 production. That means that you shouldn’t expect to see much rise or activity in the dough, beyond a few stray large bubbles here and there. (Those bubbles are totally acceptable, since they produce those wonderful, charred blisters that pop up randomly in the finished pie. My wife usually gets first dibs on those slices.) There will be a fine network of bubbles inside the dough that will only be revealed once you turn the dough out of the container and expose its underside.
Temper, Temper
Before you can bake the dough, you’ll need to let it come to room temperature, or it will be more elastic than extensible, which means it will fight back and probably end up tougher than it needs to be. If your kitchen is around 75˚F, this should take an hour or so—less if ambient temps are high and more if they are low. (Now that it is chilly here, I’ve been using my 77˚F seedling mat/proofing cabinet to bring my dough balls to room temperature.)
Most of the time you won’t want the dough to start puffing up before stretching since that will make keeping it evenly thin more difficult. But if you do happen to like a puffier pie, you can certainly let it sit a bit longer before shaping, until it just starts to rise a little. Just be careful not to let it go too long, or the dough could turn slack and fragile.
Coat it
Before you can stretch the dough, you’ll want to coat the sticky ball of dough with flour. I tend to try to minimize the amount of bench flour I use with pizza, since I don’t like a pie that has a noticeable amount of raw, uncooked flour on its edges and underside. (We’ll come back to this again below when we talk about peels.) But these doughs are wet enough that they can stand to be thoroughly coated with flour before stretching, since much of that flour gets absorbed into the dough in the process.
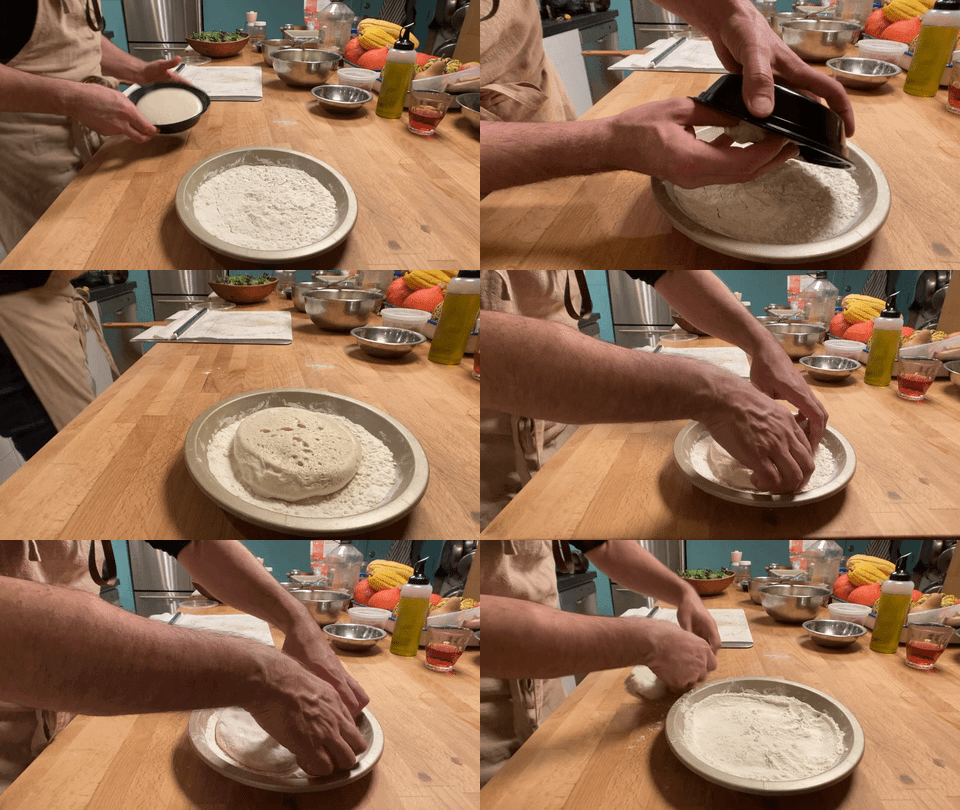
To do so, I invert the container of dough over a pie plate filled with flour, and then gently guide the dough out, letting gravity do most of the work. I then (gently) flip it over to coat the second side, and then (gently) transfer it to the counter. Normally I don’t need to flour the counter itself, because there’s enough remaining on the outside of the dough to prevent sticking. And I usually tend to flip the dough over a second time, so that the dough ends up “smooth” side down, since that side is slightly drier than the one that was in contact with the container the whole time, which makes it less likely to stick to the peel.
From the Stretch
If everything goes according to plan up to this point, the dough should stretch to its final dimensions and shape easily. In fact, it might happen a little too easily when you first work with these formulas, especially if you are used to handling doughs that fight back when you try to stretch them out. Doughs that have proofed and relaxed for long periods like this are very extensible, and it takes some practice to get used to just how gentle you need to be with them to avoid disaster.
I wish there were a secret I could share with you for successful bread and pizza shaping beyond practice makes perfect, but that is really all it comes down to. The only real trick is this: To get good at shaping pizza and bread, you need to make lots of pizza and bread.
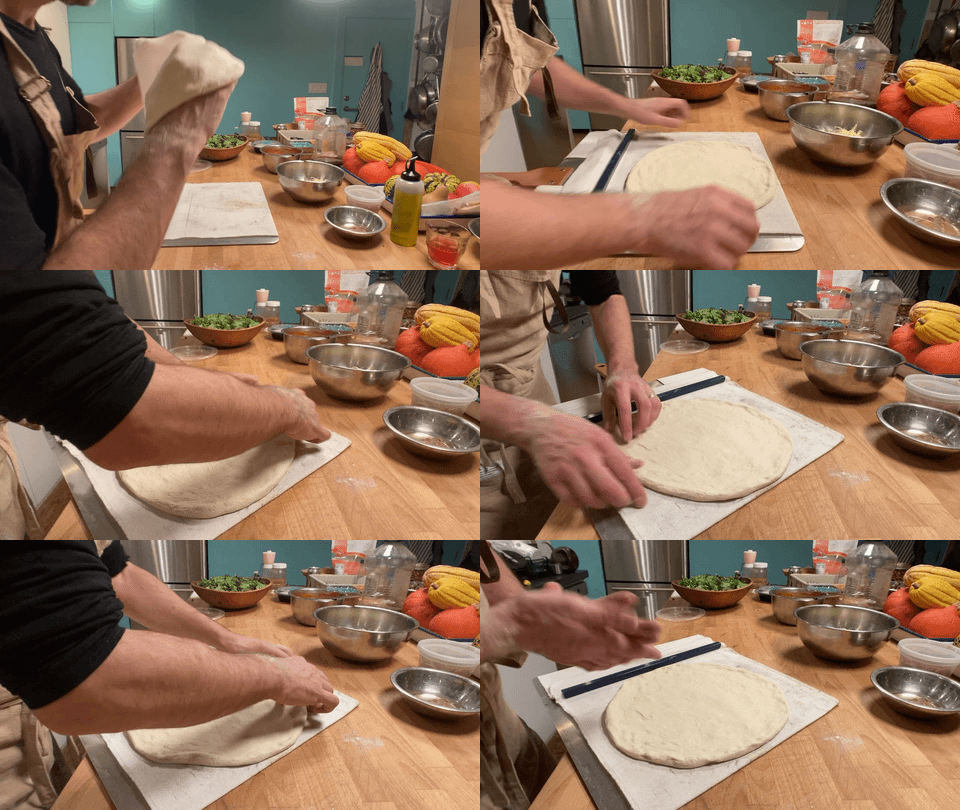
I tend to stretch pizza dough in three phases:
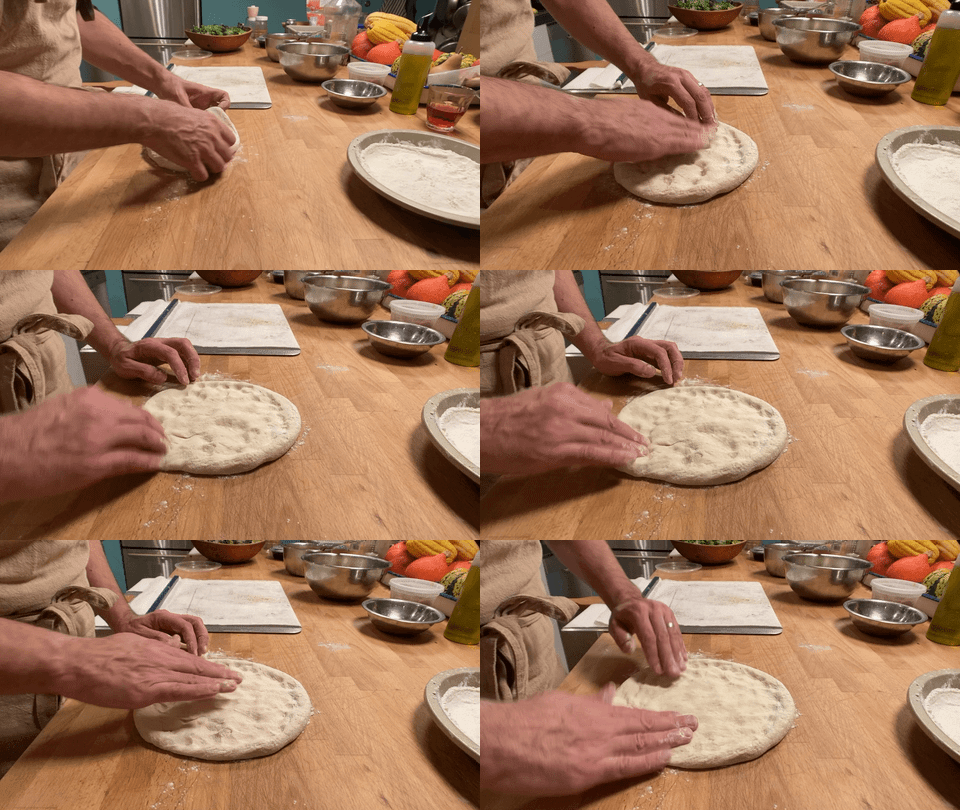
First I press the dough out on the counter with my fingertips to about half its final dimensions, leaving a half-inch wide rim around the outer edge.
I then lift the dough in my hands and stretch it most of the rest of the way on the backs of my knuckles. This motion in particular requires the most practice, because it doesn’t involve much effort at all, and it tends to happen fast, so you have to be swift in getting it onto the peel to avoid it over-stretching or tearing. Once again, gravity does most of the work—you aren’t so much “stretching” the dough as you are letting just it droop gently over your closed fists.
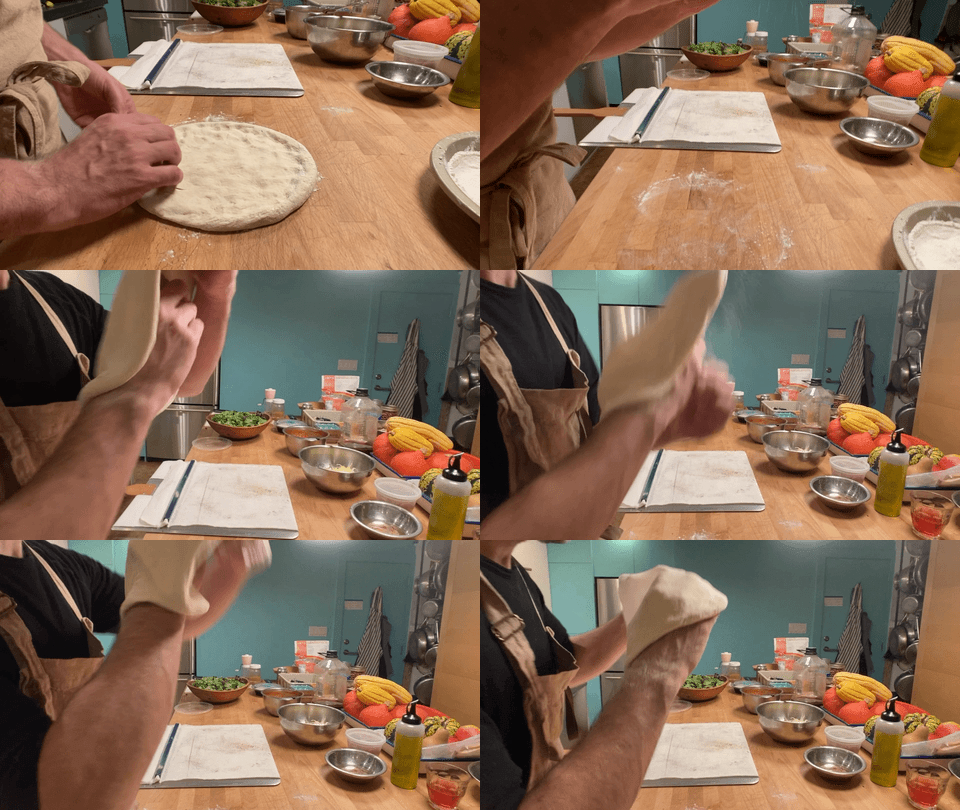
Finally, I transfer the dough to the peel, stretch it the remainder of the way, and even out its shape.
Peel Sessions
I have lots of thoughts about pizza peels. First off, I am convinced that any dedicated pizza maker will want to have two different peels: One for loading the pie into the oven, and another to remove it.
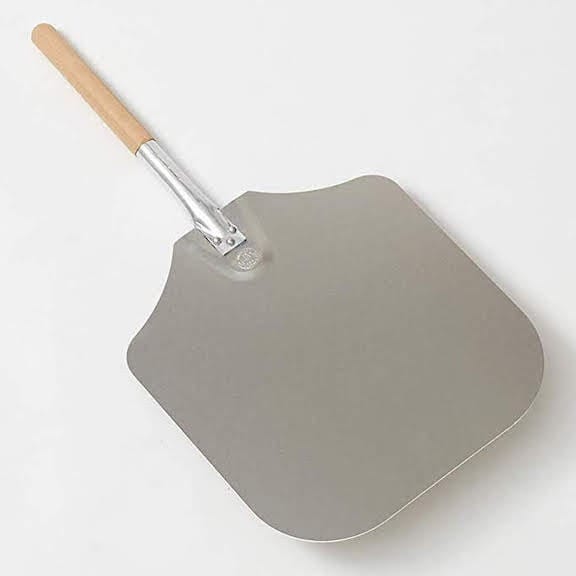
The best tool for rotating and removing the pizza from the oven is an aluminum peel like the one pictured above, because it is flexible and thin enough to slide beneath the pie without pushing it around on the baking stone. But the problem with a metal peel for loading the pie is that its slick, non-porous surface traps moisture and makes the dough likely to stick without overloading it with bench flour.
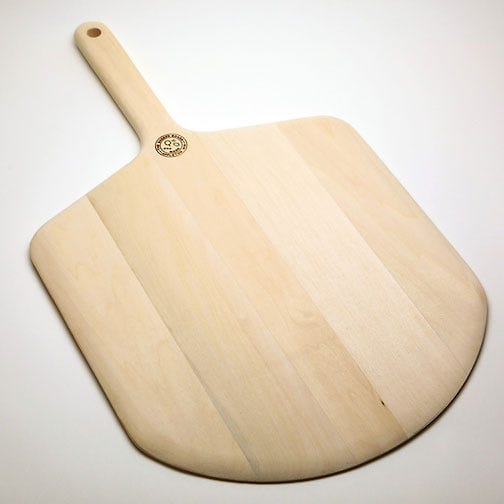
An uncoated wooden peel, on the other hand, such as the one pictured above, is able to wick moisture away from the dough, which buys you a little more time to get the pie topped and into the oven before it starts to stick. But wooden peels are generally too thick to slide easily under the pie, so they are less useful than metal ones once the pie is in the oven.
That said, a pizza that has stuck to a peel is way more disastrous than one that is a little difficult to remove from the oven, so if you can only afford to have one type of basic peel, I suggest you get a wooden one.
A Job for SuperPeel
But my recommendation, provided you have the space and resources to afford two peels, is to get an aluminum one, plus one of these:
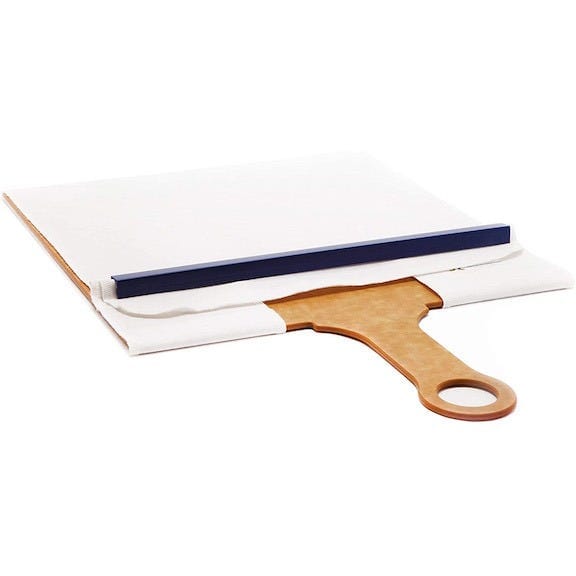
This is the Super Peel, a conveyor belt for pizza (and bread, too). It’s identical in function to the loaders that professional bakers use to get bread into a deck oven, except scaled way down in size. What makes it such an effective tool is that you can load a dough onto it without adding any bench flour at all. More importantly, you can take your sweet time getting the pie into the oven, since there is virtually no risk of the dough sticking. That’s because instead of sliding the pie off of the peel, you pull the belt out from underneath it, and it simply drops straight down onto the baking surface, not unlike a magician’s “tablecloth” trick. And if you use the Super Peel for loading and a metal peel for unloading, you can save time by shaping and topping the next pie while the first one bakes.
Using a Super Peel definitely takes practice, but it’s something you can work on outside of the oven, using some other flat, wide item as a stand-in for the pie. Here’s how it works: You grip the plastic bar in one hand and the handle in the other. You then place the peel directly over the baking stone, hold the bar in place, and pull the handle backwards. (Your natural inclination will be to instead slide the bar forward and hold the handle in place, which will just push the pizza toward the back of the oven. Don’t do that.)
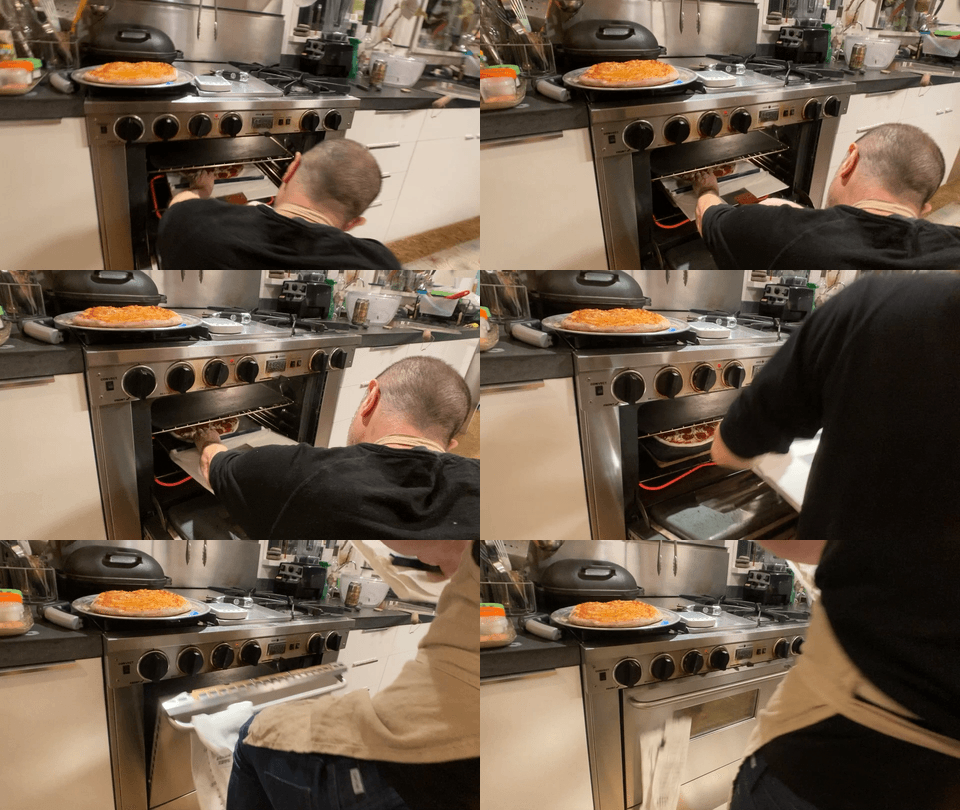
It really is a magical tool and will make pizza night 500% less stressful, I guarantee it.
Topping
I’m not going to say a lot about topping pizzas here, since this post is long-winded enough already, and I think topping is a place where personal preference can and should prevail. But I do have some general thoughts.
One: You should sauce and top the pie closer to the edge than you’d think. That’s because the un-topped rim expands both up and out, not unlike an inflating inner tube. Which means that it will end up about twice as wide as its starts out. I typically leave no more than 1/4 inch of the rim bare, because while I like pizza crusts, I want them to be modest.
And two: I generally recommend saucing and topping conservatively, quantity-wise. (Usually that means no more than 1/2 cup sauce, 1 cup cheese, and just a smattering of other toppings.) You are of course welcome to pile on as much as you like, but there is a practical reason to use a lighter touch: An overloaded pie will take longer to bake, which means that the crust is likely to overcook.
I’ll talk more about why baking a pizza rapidly is crucial to getting that ideal inside/outside crust contrast in my next post.
—Andrew
wordloaf Newsletter
Join the newsletter to receive the latest updates in your inbox.
